Tabla de contenido
Publicidad
Idiomas disponibles
Idiomas disponibles
Enlaces rápidos
Air-Conditioners For Building Application
OUTDOOR UNIT
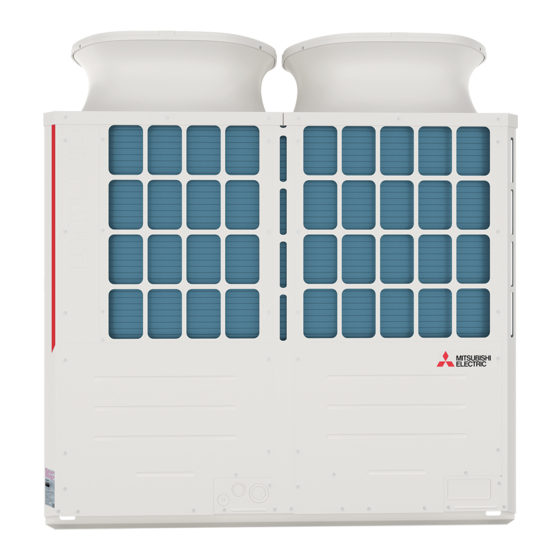
TURYP-AN40AN/AB
TURYE-AN40AN/AB
INSTALLATION MANUAL
For safe and correct use, please read this installation manual thoroughly before installing the air-conditioner unit.
MANUAL DE INSTALACIÓN
Para un uso seguro y correcto, lea detalladamente este manual de instalación antes de montar la unidad de aire acondicionado.
For use with R410A
Publicidad
Capítulos
Tabla de contenido

Manuales relacionados para Mitsubishi Electric TRANE TURYP0723AN40AN

Resumen de contenidos para Mitsubishi Electric TRANE TURYP0723AN40AN
- Página 1 Air-Conditioners For Building Application OUTDOOR UNIT TURYP-AN40AN/AB For use with R410A TURYE-AN40AN/AB INSTALLATION MANUAL For safe and correct use, please read this installation manual thoroughly before installing the air-conditioner unit. MANUAL DE INSTALACIÓN Para un uso seguro y correcto, lea detalladamente este manual de instalación antes de montar la unidad de aire acondicionado.
-
Página 3: Tabla De Contenido
CONTENTS 1. Safety precautions ········································································································2 1-1. General precautions....................... 2 1-2. Precautions for transporting the unit ..................3 1-3. Precautions for unit installation ....................3 1-4. Precautions for piping work....................4 1-5. Precautions for electrical wiring ..................... 4 1-6. Precautions for relocating or repairing the unit ..............5 1-7. -
Página 4: Safety Precautions
- Operating the unit with a safety device whose settings have been changed may result in bursting, fire, or explosion. - Using safety devices other than those specified by Mitsubishi Electric may result in bursting, fire, or explosion. Do not alter or modify the unit. -
Página 5: Precautions For Transporting The Unit
If you notice any abnormality (e.g., a burning smell), stop the operation, turn off the power switch, and consult your dealer. - Continuing the operation may result in electric shock, malfunction, or fire. Properly install all required covers and panels on the terminal box and the control box. - If dust or water enters the unit, this may result in electric shock or fire. -
Página 6: Precautions For Piping Work
If the air conditioner is installed in a small room, take measures to prevent the refrigerant concentration from exceeding the safety limit in the event of refrigerant leakage. - Consult your dealer regarding the appropriate measures to prevent the allowable concentration from being exceeded. -
Página 7: Precautions For Relocating Or Repairing The Unit
Only use standard power cables of sufficient capacity. - Failure to do so may result in current leakage, overheating, smoke, or fire. Proper grounding must be provided by qualified personnel. - Improper grounding may result in electric shock, fire, explosion, or malfunction due to electrical noise. Do not connect the ground wire to gas or water pipes, lightning rods, or telephone ground wires. - Página 8 Place a wet towel on the service valves before brazing the pipes to keep the temperature of the valves from rising above 120ºC (248ºF). - Failure to do so may result in equipment damage. Keep the flame out of contact with the cables and metal sheet when brazing the pipes. - Failure to do so may result in burnout or malfunction.
-
Página 9: About The Product
2. About the product ・The outdoor unit described in this manual is air-conditioning equipment that is designed only for human comfort. ・The numeric values in the unit model name (e.g., TURYP-AN40AN/AB, TURYE-AN40AN/AB) indicate the capacity index of the unit. ・This unit uses R410A refrigerant. 3. -
Página 10: Specifications
4. Specifications (1) 208 230 V – Model TURYP0723AN40AN TURYP0963AN40AN Sound level* 56.5 dB <A> 58.5 dB <A> External static pressure 0 Pa* Total capacity 50% to 150%* Indoor unit Model 05 to 96 Quantity R2 system 1 to 18 1 to 24 Indoor W.B. - Página 11 Model TURYE2883BN40AN TURYE3123BN40AN TURYE3363BN40AN TURYE3843BN40AN TURYE4323BN40AN Sound level* 65.0 dB <A> 62.5 dB <A> 62.5 dB <A> 67.5 dB <A> 69.5 dB <A> External static pressure 0 Pa* Total capacity 50% to 150%* Indoor unit Model 05 to 96 Quantity 2 to 50 2 to 50 2 to 50...
- Página 12 Model TURYE2164AN40AN TURYE2164BN40AN TURYE2404AN40AN TURYE2404BN40AN TURYE2644BN40AN Sound level* 66.5 dB <A> 60.0 dB <A> 67.5 dB <A> 60.0 dB <A> 65.0 dB <A> External static pressure 0 Pa* Total capacity 50% to 150%* Indoor unit Model 05 to 96 Quantity 2 to 50 2 to 50 2 to 50...
-
Página 13: Package Contents
5. Package contents The table below lists all the parts and their quantities included in the package. (1) P models Tie band P072 P096 P120 P144 P168 (2) E models Tie band E072 E096 E120 E144 E168 E192 E216 E240 GB-11 WT09115X03... -
Página 14: Transporting The Unit
6. Transporting the unit When lifting the unit, pass the slings through the four designated sling holes. - Improper lifting will cause the unit to topple or fall, resulting in serious injury. ・Always use two slings to lift up the unit. Each sling must be at least 8 m (26 ft) long and must be able to support the weight of the unit. ・Put protective pads between slings and the unit where the slings touch the unit at the base to protect the unit from being scratched. -
Página 15: Installation Location
7. Installation location Do not install the unit where combustible gas may leak. - If combustible gas accumulates around the unit, fire or explosion may result. ・Provide sufficient space around the unit for effective operation, efficient air movement, and ease of access for maintenance. ・Note that refrigerant gas is heavier than air and will therefore tend to collect in low spots such as basements. -
Página 16: Multiple Unit Installation
7-2. Multiple unit installation ・When installing multiple units, make sure to take into consideration factors such as providing enough space for people to pass through, ample space between blocks of units, and sufficient space for airflow. (The areas marked with Ⓐ in the figures below must be left open.) ・In the same way as with the single unit installation, add the dimension that exceeds the height limit (shown as "h1"... -
Página 17: Foundation Work
8. Foundation work Install the unit in accordance with the instructions to minimize the risk of damage from earthquakes and strong winds. - Improper installation will cause the unit to topple, resulting in serious injury. The unit must be securely installed on a structure that can sustain its weight. - Failure to do so will cause the unit to fall, resulting in serious injury. -
Página 18: Refrigerant Piping Work
- It may also be in violation of applicable laws. - MITSUBISHI ELECTRIC CORPORATION cannot be held responsible for malfunctions or accidents resulting from the use of the wrong type of refrigerant. After the installation has been completed, check for refrigerant leaks. - Página 19 (2) The distance between the unit bottom and the pipe (H) must be 0.2 m (7-7/8 in) or below. In the figure on the right, because the distance is more than 0.2 m (7-7/8 in), the oil accumulates in Unit 1 when Unit 2 is in operation and Unit 1 is stopped. Unit 1 Unit 2 Ⓐ...
-
Página 20: Pipe Selection
9-2. Pipe selection Use refrigerant piping made of phosphorus deoxidized copper (copper and copper alloy seamless pipes) that meets local requirements. Pipe joints should also meet local requirements. Keep the inner and outer surfaces of the pipes clean and free of sulphur, oxides, dust/dirt, shaving particles, oils, moisture, or any other contaminants. -
Página 21: Pipe Connection Example
9-4. Pipe connection example 9-4-1. Example of pipe connection between outdoor units Ⓐ On-site piping Ⓑ Twinning Kit Ⓒ The pipe section before the twinning pipe must have at least 500 mm (19-11/16 in) of straight section. Ⓐ Ⓑ Ⓐ Ⓑ... - Página 22 9-4-2. Example of pipe connection between an outdoor unit and BC controller, and between a BC controller and indoor unit (R2 system) P072 to P168 E072 to E240 Ⓐ Outdoor unit Unit 1 BC controller (Main) Ⓑ Ⓐ BC controller (Sub) Ⓒ...
- Página 23 Pipes A, A [mm (in)] Combination unit Pipe A Pipe A Pipe A Unit model Unit 1 Unit 2 High-pressure Low-pressure High-pressure Low-pressure High-pressure Low-pressure P072 ø15.88 (5/8) ø19.05 (3/4) P096 ø19.05 (3/4) ø22.2 (7/8) P120 ø19.05 (3/4) ø28.58 (1-1/8) P144 ø22.2 (7/8) ø28.58 (1-1/8)
-
Página 24: Piping Connections And Valve Operations
・Do not use any commercially available anti-oxidizing agents since they may cause pipe corrosion and degrading of the refrigerant oil. Please contact Mitsubishi Electric for more details. ・Make sure that the pipes are not in contact with each other, unit panels, or base plates. - Página 25 <Refrigerant piping connection examples> ・Obtain joints and elbows on site as necessary according to the pipe diameter, and connect the pipes as shown in the figures below. (1) When routing the pipes through the front of the unit <A> <B> Ⓓ...
-
Página 26: Air-Tightness Test
9-5-3. Sealing the openings around the pipes Seal all openings around pipes and wires to keep out small animals, rainwater, or snow. - Failure to do so may result in current leakage, electric shock, or damage to the unit. Example of closure materials (not supplied) Ⓐ... -
Página 27: Thermal Insulation For Pipes
9-7. Thermal insulation for pipes Insulate pipes to prevent condensation. - Condensation may collect and drip from the unit onto the ceiling or floor. Insulate the high- and low-pressure pipes, and liquid and gas pipes separately with polyethylene foam insulation materials. Inadequate insulation may cause condensation to drip. -
Página 28: Evacuation Of The System
9-7-2. Insulation for the section of the pipe that goes through a wall (1) Inner wall (concealed) (2) Outer wall (3) Outer wall (exposed) Ⓓ Ⓔ Ⓐ Ⓑ Ⓒ Ⓑ Ⓐ Ⓑ Ⓗ (4) Floor (waterproof) (5) Rooftop pipe shaft (6) Protecting the penetrating parts in a fire limit zone or through a parting wall Ⓓ... -
Página 29: Additional Refrigerant Charge
Ⓐ Gauge manifold Ⓓ Low pressure knob Ⓑ Ⓝ Ⓔ High pressure knob Ⓒ Ⓓ Service valve Ⓝ Ⓕ Ⓔ Low-pressure pipe Ⓞ Ⓐ Ⓕ High-pressure pipe Ⓖ Service port Ⓖ Ⓑ Ⓒ Ⓗ Three-way joint Ⓘ Ⓗ Ⓘ Valve (vacuum pump) Ⓙ... - Página 30 The amount of refrigerant that is shown in the table below is the maximum total amount in the system. Unit model Maixmum total amount in the system [kg (oz)] Unit model Maixmum total amount in the system [kg (oz)] P072 33.5 (1182) E072 33.5 (1182)
- Página 31 * In the case all connected indoor unit models are Case 1 or Case 2, do NOT add the refrigerant listed in table Ⓐ. Instead, add the following amount of refrigerant. Case 1: TPLFYP006/018/036EM14** → Add 0.67 kg per TPLFYP006/018/036EM14**. Case 2: TPEFYP006/024/036MA14** →...
- Página 32 ø9.52; 5 m ø9.52; 5 m The total length of the high-pressure piping and liquid piping in each case is as follows: ø28.58 total length: 40 (A) ø19.05 total length: 3 (A ) + 1 (A ) = 4 ø9.52 total length: 10 (B) + 5 (C) + 5 (D) + 5 (E) + 5 (F) + 5 (G) + 5 (H) + 5 (I) + 10 (a) + 5 (b) + 5 (f) + 5 (g) + 5 (h) = 75 ø6.35 total length: 5 (c) + 10 (d) + 5 (e) = 20 Therefore, when the piping length from the outdoor unit to the farthest indoor unit is longer than 30.5 m (100 ft),...
- Página 33 ・When the piping length from the outdoor unit to the farthest indoor unit is longer than 30.5 m (100 ft) Amount of High-pressure pipe ø1-1/8 High-pressure pipe ø7/8 High-pressure pipe ø3/4 High-pressure pipe ø5/8 additional charge total length total length total length total length (oz)
-
Página 34: Charging Additional Refrigerant
The total length of the high-pressure piping and liquid piping in each case is as follows: ø1-1/8 total length: 131 (A) ø3/4 total length: 9 (A ) + 3 (A ) = 12 ø3/8 total length: 32 (B) + 16 (C) + 16 (D) + 16 (E) + 16 (F) + 16 (G) + 16 (H) + 16 (I) + 32 (a) + 16 (b) + 16 (f) + 16 (g) + 16 (h) = 240 ø1/4 total length: 16 (c) + 32 (d) + 16 (e) = 64 Therefore, when the piping length from the outdoor unit to the farthest indoor unit is longer than 30.5 m (100 ft),... -
Página 35: Electrical Work
・Be sure to use the appropriate type of overcurrent breaker. Note that generated overcurrent may include some amount of direct current. ・Select the type of breaker for an inverter circuit as an earth leakage breaker. (Mitsubishi Electric NV-C series or its equivalent) ・The earth leakage breaker should be used in combination with a local switch. - Página 36 ・Power cable size and device capacity MOP is used to select the fuse, switch, or breaker for current leakage. (1) 208 V Minimum size [mm (AWG)] Outdoor unit model Unit combination Earth leakage breaker MCA (A) MOP (A) Power cable Ground TURYP0723AN40AN/AB –...
- Página 37 (2) 230 V Minimum size [mm (AWG)] Outdoor unit model Unit combination Earth leakage breaker MCA (A) MOP (A) Power cable Ground TURYP0723AN40AN/AB – 5.3 (10) 5.3 (10) 30 A 30 mA or 100 mA 0.1 sec. or less TURYP0963AN40AN/AB –...
-
Página 38: Control Cable Specifications
(3) 460 V Minimum size [mm (AWG)] MCA (A) MOP (A) Outdoor unit model Unit combination Earth leakage breaker (460 V) (460 V) Power cable Ground TURYP0724AN40AN/AB – 2.1 (14) 2.1 (14) 15 A 30 mA or 100 mA 0.1 sec. or less TURYP0964AN40AN/AB –... -
Página 39: System Configuration
10-4. System configuration ・Unit code and the maximum number of connectable units Unit type Code Number of connectable units Main unit – Outdoor unit Sub unit – Indoor unit 1 to 50 units per OC (depends on the unit model) Main 1 unit per OC BC controller... - Página 40 (2) When MA remote controllers are connected Group 1 Group 3 Group 5 * Move the power jumper from CN41 to CN40. * CN41 CN40 * SW5-1: ON * (51) (52) (01) (04) (55) (05) (06) TB02 TB02 TB15 TB15 TB15 TB15 M1 M2 S...
-
Página 41: Wiring Connections In The Control Box
10-5. Wiring connections in the control box Connections must be made securely and without tension on the terminals. - Improperly connected cables may break, overheat, or cause smoke or fire. 10-5-1. Threading power cable through the knockout hole ・Open the front panel when performing wiring work. ・Punch out the knockout holes at the bottom of the front panel or base with a hammer. - Página 42 10-5-2. Fixing the cables in place Route the cables as shown in the figures below. ・P072, E072 (460 V) Inverter Box Main Box Power supply terminal block Cable strap Rubber bushing Transmission terminal block (for FAN cable) Rubber bushing Tie band (for main inverter connection (Supplied) wiring (200 V) and unit wiring...
- Página 43 ・P096 to 168 (460 V), E096 to 240 (460 V) Power supply terminal block Cable strap Transmission terminal block Rubber bushing Tie band (for main inverter connection (Supplied) wiring (200 V) and unit wiring (solenoid coil wiring)) Rubber bushing 1 Tie band (Supplied) Rubber bushing 2...
- Página 44 Take the procedure below. ① Thread the power cable through the rubber bushing 1. (See * and * below.) ② Thread the unit wiring (sensor wiring) and the transmission cable through the rubber bushing 2. (See * and * below.) ③...
-
Página 45: Connecting The Cables
10-5-3. Connecting the cables P072, E072 Ⓐ Control box Ⓒ Ⓓ Ⓐ-1 Ⓐ-2 Ⓑ Power supply terminal block (TB1) Ⓑ L1 L2 L3 Ⓒ Terminal block for indoor-outdoor transmission cable (TB3) Ⓓ Terminal block for centralized control transmission cable (TB7) P096 to 168, E096 to 240 Ⓒ... -
Página 46: Address Setting
10-6. Address setting ・Set the address setting switch as follows. Address setting method Address Assign the lowest address to the main indoor unit in the group, and assign sequential addresses to the rest of the indoor units in the same group. * In an R2 system with a sub BC controller, make the settings for the indoor units in the following order. -
Página 47: Test Run
11. Test run 11-1. Before a test run After the wiring work has been completed, measure the insulation resistance, and make sure that it reads at least 1 MΩ. - Failure to do so may result in electric leakage, malfunction, or fire. Turn on the power at least 12 hours before starting operation. -
Página 48: Function Setting
11-2. Function setting Make function settings by setting the dipswitches SW4, SW6, and SWP3 on the main board. Write down the switch settings on the electrical wiring diagram label on the control box front panel for future reference when the control box needs to be replaced. -
Página 49: Operation Check
・Please contact local MITSUBISHI ELECTRIC sales office for maintenance frequency and tasking recommendations. ・When the outdoor unit is installed on the waterproof sheet, the sheet may become dirty due to the copper component seeped out from the unit. In this case, installing a drain pan for centralized drainage is recommended. -
Página 50: Rating Plate Information
13. Rating plate information (1) 208–230 V Model TURYP0723AN40AN/AB TURYP0963AN40AN/AB TURYP1203AN40AN/AB TURYP1443AN40AN/AB TURYP1683AN40AN/AB Unit combination – – – – – Refrigerant (R410A) 5.2 kg [11 lbs 7 oz] 8.0 kg [17 lbs 10 oz] 8.0 kg [17 lbs 10 oz] 10.8 kg [23 lbs 12 oz] 10.8 kg [23 lbs 12 oz] Allowable pressure (Ps) - Página 51 (2) 460 V Model TURYP0724AN40AN/AB TURYP0964AN40AN/AB TURYP1204AN40AN/AB TURYP1444AN40AN/AB TURYP1684AN40AN/AB Unit combination – – – – – Refrigerant (R410A) 5.2 kg [11 lbs 7 oz] 8.0 kg [17 lbs 10 oz] 8.0 kg [17 lbs 10 oz] 10.8 kg [23 lbs 12 oz] 10.8 kg [23 lbs 12 oz] Allowable pressure (Ps) HP: 4.15 MPa [601 psi], LP: 2.21 MPa [320 psi]...
- Página 52 GB-50 WT09115X03...
- Página 53 Contenido 1. Precauciones de seguridad ····························································································2 1-1. Precauciones generales ......................2 1-2. Precauciones para el transporte de la unidad ............... 3 1-3. Precauciones para la instalación de la unidad ..............3 1-4. Precauciones para los trabajos de instalación de los tubos ..........4 1-5.
-
Página 54: Precauciones De Seguridad
- La puesta en marcha de la unidad con un dispositivo de seguridad cuya configuración haya sido alterada puede dar lugar a roturas, incendios o explosiones. - El uso de dispositivos de seguridad no especificados por Mitsubishi Electric puede dar lugar a roturas, incendios o explosiones. -
Página 55: Precauciones Para El Transporte De La Unidad
No toque los componentes eléctricos con las manos sin protección durante e inmediatamente después del funcionamiento. - Si lo hace, podría quemarse. Ventile la habituación durante las tareas de mantenimiento de la unidad. - Las fugas de refrigerante pueden producir una deficiencia de oxígeno. Si el refrigerante entra en contacto con una fuente de calor, generará... -
Página 56: Precauciones Para Los Trabajos De Instalación De Los Tubos
No permita que los niños jueguen con los materiales de embalaje. - Estos materiales pueden provocar asfixia o lesiones graves. Corte en pedazos los materiales de embalaje antes de desecharlos. Todos los trabajos de instalación deben ser realizados por personal cualificado de acuerdo con este manual. - Una instalación inadecuada podría provocar fugas de refrigerante, fugas de agua, lesiones graves, descargas eléctricas o incendios. -
Página 57: Precauciones Para Reubicar O Reparar La Unidad
Los trabajos eléctricos deben ser realizados por personal cualificado de acuerdo con las normativas locales y las instrucciones detalladas en este manual. Utilice exclusivamente los cables especificados y circuitos dedicados. - La capacidad inadecuada de la fuente de alimentación o el trabajo eléctrico inapropiado provocarán descargas eléctricas, averías o incendios. - Página 58 Los tubos de drenaje deben ser instalados por un distribuidor o personal cualificado para garantizar un drenaje adecuado. - La instalación incorrecta del tubo de drenaje puede provocar fugas de agua que dañen los muebles y los objetos circundantes. Tome medidas apropiadas contra la interferencia de ruido eléctrico cuando instale la unidad en hospitales o instalaciones con servicios de comunicación de radio.
- Página 59 No utilice cilindros de carga para cargar el refrigerante. - El uso de un cilindro de carga cambiará la composición del refrigerante y reducirá su rendimiento. En caso de gran flujo de corriente eléctrica debido a anomalía o cableado defectuoso, pueden funcionar los disyuntores de fugas a tierra en el lado de la unidad y en el lado ascendente del sistema de alimentación.
-
Página 60: Acerca Del Producto
2. Acerca del producto ・La unidad exterior descrita en este manual es un equipo de aire acondicionado diseñado únicamente por motivos de comodidad. ・Los valores numéricos del nombre del modelo de la unidad (por ejemplo, TURYP-AN40AN/AB, TURYE-AN40AN/AB) indican el índice de capacidad de la unidad. -
Página 61: Especificaciones
4. Especificaciones (1) 208 230 V – Modelo TURYP0723AN40AN TURYP0963AN40AN Nivel de ruido* 56,5 dB <A> 58,5 dB <A> Presión estática externa 0 Pa* Capacidad total 50% a 150%* Unidad interior Modelo 05 a 96 Cantidad Sistema R2 1 a 18 1 a 24 Interior B.H. - Página 62 Modelo TURYE2883BN40AN TURYE3123BN40AN TURYE3363BN40AN TURYE3843BN40AN TURYE4323BN40AN Nivel de ruido* 65,0 dB <A> 62,5 dB <A> 62,5 dB <A> 67,5 dB <A> 69,5 dB <A> Presión estática externa 0 Pa* Capacidad total 50% a 150%* Unidad interior Modelo 05 a 96 Cantidad 2 a 50 2 a 50...
- Página 63 Modelo TURYE2164AN40AN TURYE2164BN40AN TURYE2404AN40AN TURYE2404BN40AN TURYE2644BN40AN Nivel de ruido* 66,5 dB <A> 60,0 dB <A> 67,5 dB <A> 60,0 dB <A> 65,0 dB <A> Presión estática externa 0 Pa* Capacidad total 50% a 150%* Unidad interior Modelo 05 a 96 Cantidad 2 a 50 2 a 50...
-
Página 64: Contenido Del Embalaje
5. Contenido del embalaje La siguiente tabla enumera todas las piezas y el número de ellas incluidas en el embalaje. (1) Modelos P Cinta P072 P096 P120 P144 P168 (2) Modelos E Cinta E072 E096 E120 E144 E168 E192 E216 E240 E-12 WT09115X03... -
Página 65: Transporte De La Unidad
6. Transporte de la unidad Cuando levante la unidad, pase las eslingas por los cuatro orificios especificados. - Si no levanta correctamente la unidad, esta podría caerse y provocar lesiones graves. ・Utilice siempre dos eslingas para levantar la unidad. Cada eslinga debe tener al menos 8 m (26 pies) de largo y debe poder soportar el peso de la unidad. -
Página 66: Lugar De Instalación
7. Lugar de instalación No instale la unidad donde pueda producirse fuga de gas combustible. - La acumulación de gas combustible alrededor de la unidad puede provocar incendios o explosiones. ・Deje suficiente espacio alrededor de la unidad para permitir un uso eficiente de la misma y una circulación adecuada de aire, y facilitar el acceso para las tareas de mantenimiento. -
Página 67: Instalación De Varias Unidades
(3) Cuando existan obstáculos aéreos ≥ 1000 (39-3/8) ≥ 1000 (39-3/8) ≥ 240 (9-1/2) ≥ 240 (9-1/2) ≥ 45° ≥ 45° Guía de salida de aire (no suministrada) ≥ 50 (2) ≥ 50 (2) 7-2. Instalación de varias unidades ・A la hora de instalar varias unidades, asegúrese de tener en cuenta factores como dejar suficiente espacio para que pasen los operarios, un espacio amplio entre los bloques de unidades y suficiente espacio para permitir la circulación de aire. -
Página 68: Combinación De Instalaciones Enfrentadas Y Contiguas
(3) Combinación de instalaciones enfrentadas y contiguas Cuando haya paredes en la parte frontal y trasera del bloque de Cuando haya dos paredes en forma de L unidades Ⓐ Altura de la unidad Altura de la Altura de la unidad unidad h2’... -
Página 69: Trabajo De Cimentación
8. Trabajo de cimentación Instale la unidad de acuerdo con las instrucciones para minimizar el riesgo de daños producidos por terremotos y fuertes vientos. - Si no instala correctamente la unidad, esta podría caerse y provocar lesiones graves. La unidad debe fijarse con seguridad a una estructura que pueda soportar su peso. - Si no lo hace, la unidad podría caerse y provocar lesiones graves. - Página 70 ・Si la unidad se usa en una región fría y la operación de calefacción se realiza continuamente durante un período prolongado cuando la temperatura exterior está por debajo del punto de congelación, instale un calefactor en la base elevada o tome otras medidas adecuadas para impedir que el agua se congele en la base elevada.
-
Página 71: Trabajos Sobre Los Tubos De Refrigerante
- También podría suponer un quebrantamiento de la normativa aplicable. - MITSUBISHI ELECTRIC CORPORATION no es responsable de cualquier anomalía o accidente derivantes del uso del tipo de refrigerante equivocado. - Página 72 (2) La distancia entre la parte inferior de la unidad y el tubo (H) debe ser de 0,2 m (7-7/8 pulg.) como máximo. En la figura de la derecha, debido a que la distancia es superior a 0,2 m (7-7/8 pulg.), el aceite se acumula en la unidad 1 cuando la unidad 2 está en marcha y la unidad 1 detenida. Unidad 1 Unidad 2 Ⓐ...
-
Página 73: Selección Del Tubo
9-2. Selección del tubo Utilice tubos de refrigerante fabricados con cobre fosforoso desoxidado (tubos sin costuras de cobre y aleación de cobre) que cumplan con los requisitos locales. Las juntas de tubos también deben cumplir con los requisitos locales. Mantenga las superficies internas y externas de los tubos limpias y libres de azufre, óxido, polvo/suciedad, virutas metálicas, aceites, humedad o cualquier otro contaminante. -
Página 74: Ejemplo De Conexión De Tubos
9-4. Ejemplo de conexión de tubos 9-4-1. Ejemplo de conexión de tubo entre unidades exteriores Ⓐ Instalación de tubos in situ Ⓑ Kit de emparejamiento La sección de tubo que precede al tubo de Ⓒ emparejamiento debe tener al menos 500 mm (19-11/16 pulg.) de sección recta. - Página 75 9-4-2. Ejemplo de conexión de tubos entre una unidad exterior y el controlador BC, y entre un controlador BC y la unidad interior (sistema R2) P072 a P168 E072 a E240 Ⓐ Unidad exterior Unidad 1 Ⓑ Controlador BC (principal) Ⓐ...
- Página 76 Tubos A, A [mm (pulg.)] Unidad combinada Tubo A Tubo A Tubo A Modelo de unidad Unidad 1 Unidad 2 Alta presión Baja presión Alta presión Baja presión Alta presión Baja presión P072 ø15,88 (5/8) ø19,05 (3/4) P096 ø19,05 (3/4) ø22,2 (7/8) P120 ø19,05 (3/4)
-
Página 77: Conexiones De Los Tubos Y Funcionamiento De Las Válvulas
9-5. Conexiones de los tubos y funcionamiento de las válvulas Antes de calentar las secciones soldadas, purgue el gas y el aceite atrapado en los tubos. - No hacerlo podría dar lugar a un incendio, con la consecuente posibilidad de lesiones graves. Ventile la habituación durante las tareas de mantenimiento de la unidad. - Página 78 ・No utilice antioxidantes comerciales, ya que pueden provocar corrosión en los tubos y degradar el aceite refrigerante. Si desea más información, póngase en contacto con Mitsubishi Electric. ・Asegúrese de que los tubos no entren en contacto con otros tubos, paneles de unidad o placas base.
-
Página 79: Sellado De Las Aperturas De Los Tubos
・A la hora de extender los tubos in situ, respete el requisito de profundidad de inserción mínima indicado a continuación. Tamaño de tubo [mm (pulg.)] Profundidad de inserción mínima [mm (pulg.)] ø5 (ø1/4) o más, menos de ø8 (ø3/8) 6 (1/4) ø8 (ø3/8) o más, menos de ø12 (ø1/2) 7 (5/16) ø12 (ø1/2) o más, menos de ø16 (ø11/16) -
Página 80: Aislamiento Térmico Para Tubos
9-7. Aislamiento térmico para tubos Aísle los tubos para evitar la formación de condensación. - La condensación puede provocar la caída de gotas desde la unidad al techo o al suelo. Aísle los tubos de alta y baja presión, y los tubos de líquido y de gas por separado con materiales aislantes de espuma de polietileno. Un aislamiento inadecuado puede producir condensación con el consecuente goteo. -
Página 81: Aislamiento De La Sección De Tubo Penetrante En Pared
9-7-2. Aislamiento de la sección de tubo penetrante en pared (1) Pared interior (cerrada) (2) Pared exterior (3) Pared exterior (expuesta) Ⓓ Ⓔ Ⓐ Ⓑ Ⓒ Ⓑ Ⓐ Ⓑ Ⓗ (4) Suelo (estanco) (5) Paso de tubo por techo (6) Protección de las piezas penetrantes en paredes antiincendios y divisorias Ⓓ... -
Página 82: Carga Adicional De Refrigerante
Ⓐ Distribuidor Ⓓ Ⓑ Grifo de baja presión Ⓝ Ⓔ Grifo de alta presión Ⓒ Válvula de servicio Ⓓ Ⓝ Ⓕ Ⓔ Tubo de baja presión Ⓞ Ⓐ Ⓕ Tubo de alta presión Ⓖ Ⓖ Puerto de servicio Ⓑ Ⓒ Pieza de unión de 3 vías Ⓗ... -
Página 83: Cálculo De La Cantidad De Refrigerante Adicional
La cantidad de refrigerante que se muestra en la siguiente tabla es la cantidad total máxima en el sistema. Modelo de unidad Cantidad total máxima en el sistema [kg (onzas)] Modelo de unidad Cantidad total máxima en el sistema [kg (onzas)] P072 33,5 (1182) E072... - Página 84 * En el caso de que todos los modelos de unidades interiores conectados sean del Caso 1 o Caso 2, NO añada el refrigerante que se indica en la tabla Ⓐ. En su lugar, añada la siguiente cantidad de refrigerante. Caso 1 : TPLFYP006/018/036EM14** →...
- Página 85 ø9,52; 5 m ø9,52; 5 m La longitud total de los tubos de alta presión y de los tubos de líquido en cada caso es la siguiente: Longitud total de ø28,58: 40 (A) Longitud total de ø19,05: 3 (A ) + 1 (A ) = 4 Longitud total de ø9,52: 10 (B) + 5 (C) + 5 (D) + 5 (E) + 5 (F) + 5 (G) + 5 (H) + 5 (I) + 10 (a) + 5 (b) + 5 (f) + 5 (g) + 5 (h) = 75...
- Página 86 ・Cuando la longitud de los tubos desde la unidad exterior a la unidad interior más lejana sea superior a 30,5 m (100 pies) Tubo de alta presión con Tubo de alta presión con Tubo de alta presión con Tubo de alta presión con Cantidad de carga longitud total de ø1-1/8 longitud total de ø7/8...
-
Página 87: Carga De Refrigerante Adicional
La longitud total de los tubos de alta presión y de los tubos de líquido en cada caso es la siguiente: Longitud total de ø1-1/8: 131 (A) Longitud total de ø3/4: 9 (A ) + 3 (A ) = 12 Longitud total de ø3/8: 32 (B) + 16 (C) + 16 (D) + 16 (E) + 16 (F) + 16 (G) + 16 (H) + 16 (I) + 32 (a) + 16 (b) + 16 (f) + 16 (g) + 16 (h) = 240 Longitud total de ø1/4: 16 (c) + 32 (d) + 16 (e) = 64... -
Página 88: Trabajos Eléctricos
・Asegúrese de utilizar un disyuntor de sobrecarga adecuado. No olvide que el sobreamperaje generado puede contener pequeñas cantidades de corriente directa. ・Seleccione el tipo de disyuntor para circuito de inversor como disyuntor de fuga a tierra. (Serie NV-C de Mitsubishi Electric o equivalente) ・El disyuntor de fuga a tierra debe utilizarse en combinación con un interruptor local. - Página 89 ・Si el cable de alimentación está dañado, para evitar riesgos, la sustitución del mismo debe confiarse al fabricante, su agente de reparaciones o personas igualmente cualificadas. ・Utilice fuentes de alimentación exclusivas para la unidad exterior y la unidad interior. Asegúrese de cablear la OC y la OS de forma individual. ・Tamaño del cable de alimentación, capacidad del dispositivo e impedancia del sistema (Si las normativas locales no especifican el tamaño de cable de alimentación y la capacidad del dispositivo mínimos, consulte los valores de la siguiente tabla).
- Página 90 (2) 230 V Tamaño mínimo [mm (AWG)] Modelo de unidad exterior Combinación de unidades Disyuntor de fuga a tierra MCA (A) MOP (A) Cable de Cable de tierra alimen tación TURYP0723AN40AN/AB – 5,3 (10) 5,3 (10) 30 A 30 mA o 100 mA 0,1 s. o menos TURYP0963AN40AN/AB –...
-
Página 91: Especificaciones Del Cable De Control
(3) 460 V Tamaño mínimo [mm (AWG)] MCA (A) MOP (A) Modelo de unidad exterior Combinación de unidades Disyuntor de fuga a tierra Cable de (460 V) (460 V) Cable de tierra alimen tación TURYP0724AN40AN/AB – 2,1 (14) 2,1 (14) 15 A 30 mA o 100 mA 0,1 s. -
Página 92: Configuración Del Sistema
10-4. Configuración del sistema ・Código de unidad y número máximo de unidades conectables Tipo de unidad Código Número de unidades conectables Unidad principal – Unidad exterior Unidad – subordinada Unidad interior 1 a 50 unidades por OC (dependiendo del modelo de unidad) Principal 1 unidad por OC Controlador BC... -
Página 93: Cuando Se Conectan Controladores Remotos Ma
(2) Cuando se conectan controladores remotos MA Grupo 1 Grupo 3 Grupo 5 * Desplace el conector de puente de CN41 a CN40. * CN41 CN40 * SW5-1: ON * (51) (52) (55) (01) (04) (05) (06) TB02 TB02 TB15 TB15 TB15 TB15... -
Página 94: Conexiones De Cables De La Caja De Control
10-5. Conexiones de cables de la caja de control Realice las conexiones de forma segura y sin tensión en los terminales. - Los cables mal conectados pueden romperse, sobrecalentarse o provocar humo o incendios. 10-5-1. Paso del cable de alimentación a través del orificio troquelado ・Abra el panel frontal cuando realice trabajo de cableado. -
Página 95: Fijación De Los Cables
10-5-2. Fijación de los cables Pase los cables como se muestra en las figuras a continuación. ・P072, E072 (460 V) Caja del inversor Caja principal Bloque de terminales de la fuente de alimentación eléctrica Cinta de sujeción de cables Bloque de terminales Manguito de goma de la transmisión (para el cable del ventilador) - Página 96 ・P096 a 168 (460 V), E096 a 240 (460 V) Bloque de terminales de la fuente de alimentación eléctrica Cinta de sujeción de cables Bloque de terminales de la transmisión Manguito de goma Cinta (para el cableado de la conexión (suministrada) del inversor principal (200 V) y cableado de la unidad (cableado...
- Página 97 Siga el procedimiento a continuación. ① Pase el cable de alimentación a través del manguito de goma 1. (Consulte * a continuación). ② Pase el cableado de la unidad (cableado del sensor) y el cable de transmisión a través del manguito de goma 2. (Consulte * continuación).
-
Página 98: Conexión De Los Cables
10-5-3. Conexión de los cables P072, E072 Caja de control Ⓐ Ⓑ Bloque de terminales de la fuente de alimentación Ⓒ Ⓓ Ⓐ Ⓑ eléctrica (TB1) Bloque de terminales para la línea de transmisión Ⓒ L1 L2 L3 interior-exterior (TB3) Bloque de terminales del cable de transmisión de Ⓓ... -
Página 99: Ajuste De La Dirección
⑥ Si se conecta un controlador del sistema, establezca el SW5-1 de todas las unidades exteriores en ON. ⑦ Fije los cables firmemente con la cinta de sujeción de cables por debajo del bloque de terminales. 10-6. Ajuste de la dirección ・Active el interruptor de ajuste de la dirección tal como se muestra más abajo. -
Página 100: Funcionamiento De Prueba
11. Funcionamiento de prueba 11-1. Antes de realizar una prueba de funcionamiento Una vez completado el trabajo de cableado, mida la resistencia de aislamiento y asegúrese de que la lectura muestre 1 MΩ como mínimo. - Si no lo hace, podrían producirse descargas eléctricas, averías o incendios. Active la alimentación eléctrica al menos 12 horas antes de iniciar la puesta en funcionamiento. -
Página 101: Ajuste De Función
11-2. Ajuste de función Realice el ajuste de función configurando los interruptores DIP SW4, SW6 y SWP3 del panel principal. Anote los ajustes de los interruptores en la etiqueta del diagrama del cableado eléctrico en el panel frontal de la caja de control para referencia futura cuando sea necesario sustituir el tablero de control. -
Página 102: Comprobación De Funcionamiento
・Para más información sobre los intervalos de mantenimiento y recomendaciones operativas, póngase en contacto con su oficina local de ventas de MITSUBISHI ELECTRIC. ・Cuando la unidad exterior está instalada en la chapa impermeable, esta puede ensuciarse debido al componente de cobre que filtra de la unidad. -
Página 103: Información En La Placa De Datos Técnicos
13. Información en la placa de datos técnicos (1) 208–230 V Modelo TURYP0723AN40AN/AB TURYP0963AN40AN/AB TURYP1203AN40AN/AB TURYP1443AN40AN/AB TURYP1683AN40AN/AB Combinación de unidades – – – – – Refrigerante (R410A) 5,2 kg [11 lb 7 oz] 8,0 kg [17 lb 10 oz] 8,0 kg [17 lb 10 oz] 10,8 kg [23 lb 12 oz] 10,8 kg [23 lb 12 oz] Presión admisible (Ps) - Página 104 (2) 460 V Modelo TURYP0724AN40AN/AB TURYP0964AN40AN/AB TURYP1204AN40AN/AB TURYP1444AN40AN/AB TURYP1684AN40AN/AB Combinación de unidades – – – – – Refrigerante (R410A) 5,2 kg [11 lb 7 oz] 8,0 kg [17 lb 10 oz] 8,0 kg [17 lb 10 oz] 10,8 kg [23 lb 12 oz] 10,8 kg [23 lb 12 oz] Presión admisible (Ps) AP: 4,15 MPa [601 psi], BP: 2,21 MPa [320 psi]...
- Página 108 This product is designed and intended for use in the residential, commercial and light-industrial environment. Please be sure to put the contact address/telephone number on this manual before handing it to the customer. HEAD OFFICE: 1340 SATELLITE BLVD, SUWANEE GA 30024 USA WT09115X03...