Registrarse
Cargar
Manuales
Marcas
SMA Manuales
Inversores
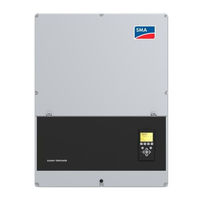
SUNNY HIGHPOWER PEAK1
SMA SUNNY HIGHPOWER PEAK1 Manuales
Manuales y guías de usuario para SMA SUNNY HIGHPOWER PEAK1. Tenemos
3
SMA SUNNY HIGHPOWER PEAK1 manuales disponible para descarga gratuita en PDF: Instrucciones De Instalación
SMA SUNNY HIGHPOWER PEAK1 Instrucciones De Instalación (240 páginas)
Marca:
SMA
| Categoría:
Inversores
| Tamaño: 19.58 MB
Tabla de contenido
Tabla de Contenido
3
Notes on this Document
13
Validity
13
Target Group
13
Content of this Document
13
Levels of Warning Messages
13
Symbols in the Document
14
Designations in the Document
14
Abbreviations
14
Additional Information
15
Safety
15
Intended Use
15
Important Safety Instructions
16
Product Overview
18
Front View of the Inverter
18
DC Load-Break Switch
19
Symbols on the Inverter
19
System Overview
20
Unpacking
21
Installation
21
Installation Sequence
21
Environment and Clearances
21
Mounting the Wall Mounting Bracket
23
Mounting the Inverter
24
Disassembly
24
Opening the Installation Area
25
Enclosure Opening
26
Installation Area Overview
27
AC Connection
27
Ethernet Connections
29
PV Connection
29
External PV Array Junction Boxes
29
Cable Requirements
30
Connecting PV
30
Close
31
Initial Setup and Start
32
User Interface
32
Operating Modes
32
Display
33
Initial Setup Via LCS-Tool
34
Switching on the DC Load-Break Switch
34
Commissioning
34
Grid Code File
35
Confguring the Fallback
35
Disconnecting from Voltage Sources
35
Service
37
Troubleshooting and Repair
37
Maintenance
43
44
Technical Data
44
Specifcations
44
Specifcations
46
Installation Conditions
46
Torque Specifcations
48
Specifcations for Grid Protection
49
Technical Data of the Communication Interface
50
Ethernet Connections
50
Network Topology
51
Contact
51
1Hinweise zum Dokument
52
Gültigkeitsbereich
52
Zielgruppe
52
Inhalt des Dokuments
52
Warnhinweisstufen
52
Symbole IM Dokument
53
Benennungen IM Dokument
53
Abkürzungen
53
Weiterführende Informationen
54
Sicherheit
54
Bestimmungsgemäße Verwendung
54
Wichtige Sicherheitshinweise
55
Produktübersicht
58
Frontansicht des Wechselrichters
58
DC-Lasttrennschalter
59
Symbole auf dem Wechselrichter
59
Typenschild des Wechselrichters
60
Systemübersicht
61
Auspacken
62
Installation
62
Installationsreihenfolge
62
Umgebung und Abstände
63
Montage der Wandhalterung
64
Montage des Wechselrichters
65
Demontage
66
Installationsbereich Öffnen
66
Kabeleinführung
67
Übersicht des Installationsbereichs
68
AC-Anschluss
69
Ethernet-Anschlüsse
70
PV-Anschluss
71
Externe Generatoranschlusskästen
71
Kabelanforderungen
71
PV Anschließen
72
Schließen
73
Ersteinrichtung und Start
74
Benutzerschnittstelle
74
Betriebsarten
74
Display
75
Ersteinrichtung über LCS-Tool
76
DC-Lasttrennschalter Einschalten
76
76
Inbetriebnahme
76
Grid-Code-Datei
76
Fallback Konfgurieren
76
Freischalten
77
Service
78
Fehlersuche und -Behebung
78
Wartung
86
Technische Daten
87
Spezifkationen
87
Konformität
89
Installationsbedingungen
90
Drehmomentspezifkationen
91
Spezifkation für die Netzsicherungen
92
Technische Daten der Kommunikationsschnittstellen
93
Ethernet-Anschlüsse
94
Netzwerktopologie
94
Kontakt
95
Indicaciones sobre el Documento
96
Área de Validez
96
Grupo de Destinatarios
96
Contenido del Documento
96
Niveles de Advertencia
96
Símbolos del Documento
97
Denominación en el Documento
97
Abreviaturas
97
Información Adicional
98
Seguridad
99
Uso Previsto
99
Indicaciones Importantes para la Seguridad
99
Vista General del Producto
103
Vista Frontal del Inversor
103
Interruptor-Seccionador de Potencia de CC
103
Símbolos del Inversor
103
Placa de Características del Inversor
104
Vista General del Sistema
105
Desembalaje
106
Instalación
106
Orden de Instalación
106
Entorno y Espacios Libres
107
Montaje del Soporte Mural
108
Montaje del Inversor
109
Desmontaje
110
Apertura del Área de Instalación
110
Entrada de Cables
111
Vista General del Área de Instalación
112
Conexión de CA
113
Conexiones de Ethernet
114
Conexión Fotovoltaica
115
Cajas de Conexión del Generador Externas
115
Requisitos para el Cableado
115
Conexión Fotovoltaica
116
Cierre
117
Confguración Inicial y Arrannue
118
Interfaz de Usuario
118
Modos de Funcionamiento
118
Pantalla
119
Ajuste Inicial Mediante LCS-Tool
120
Conecte el Interruptor-Seccionador de Carga de CC
120
120
Puesta en Marcha
120
Archivo del Código de Red
120
Confguración del Procedimiento de Emergencia
120
Desconexión
121
Mantenimiento
123
Resolución de Problemas
123
Mantenimiento
134
Datos Técnicos
135
Especifcaciones
135
Conformidad
137
Condiciones de la Instalación
138
Especifcaciones del Par de Apriete
139
Especifcaciones del Circuito de la Red Ellctrica
140
Especifcaciones de las Interfaces de Comunicación
141
Conexiones de Ethernet
142
Topología de Red
142
Contacto
143
Note Relative al Documento
144
Ambito DI Validità
144
Destinatari
144
Contenuto del Documento
144
Livelli Delle Avvertenze DI Sicurezza
144
Denominazioni Nel Documento
145
Abbreviazioni
145
Ulteriori Informazioni
146
Sicurezza
146
Utilizzo Conforme
146
Avvertenze DI Sicurezza Importanti
147
Panoramica del Prodotto
150
Vista Frontale Dell'inverter
150
DC-Lasttrennschalter
150
Simboli Sull'inverter
151
Targhetta DI Identifcazione Dell'inverter
151
Panoramica del Sistema
152
Disimballaggio
153
Ordine D'installazione
153
Ambiente E Distanze
153
Installazione
155
Montaggio del Supporto da Parete
155
Montaggio Dell'inverter
156
Smontaggio
157
Apertura Dell'area DI Installazione
157
Introduzione Dei Cavi
158
Panoramica Dell'area DI Installazione
159
Collegamento CA
159
Collegamenti Ethernet
161
Collegamento Dell'impianto FV
161
Quadri DI Parallelo Stringhe Esterni
161
Requisiti Dei Cavi
162
Collegare L'impianto FV
162
Chiudi
164
Setup Iniziale E Avviamento
164
Interfaccia Utente
164
Modalità DI Funzionamento
164
Display
165
Setup Iniziale Attraverso LCS Tool
166
Inserimento del Sezionatore CC
167
Messa in Servizio
167
167
File del Codice DI Rete
167
Confgurazione del Fallback
167
Disinserire
168
Assistenza
169
Ricerca Degli Errori
169
Manutenzione
179
Dati Tecnici
180
Specifche
180
Conformità
183
Condizioni DI Installazione
184
Specifche DI Coppia
185
Specifche Dei Fusibili DI Rete
186
Dati Tecnici Delle Interfacce DI Comunicazione
187
Collegamenti Ethernet
188
Topologia Della Rete
188
Contatti
189
Remarnues Relatives au Document
190
Champ D'application
190
Groupe Cible
190
Contenu du Document
190
Niveaux de Mise en Garde
190
Symboles Utilisls Dans le Document
191
Dlsignations Utilisles Dans le Document
191
Abrlviations
191
Informations Compllmentaires
192
Sécurité
193
Utilisation Conforme
193
Consignes de Slcuritl Importantes
193
Vue D'ensemble des Produits
197
Vue de Face de L'onduleur
197
Interrupteur-Sectionneur DC
197
Symboles Fgurant Sur L'onduleur
197
Plaque Signalltique de L'onduleur
198
Vue D'ensemble du Système
199
Déballage
200
Installation
200
Slquence D'installation
200
Environnement et Distances
200
Montage du Support Mural
202
Montage de L'onduleur
203
Dlmontage
203
Ouverture de la Zone D'installation
204
Entrle de Câbles
205
Vue D'ensemble de la Zone D'installation
206
Raccordement AC
206
Raccordements Ethernet
208
Raccordement Photovoltaïque
208
Exigences en Matière de Câbles
209
Raccordement de L'lnergie Photovoltaïque
209
Fermer
211
Confguration Initiale et Démarrage
212
Modes de Fonctionnement
212
Écran
213
Confguration Initiale Via LCS-Tool
214
Activation de L'interrupteur-Sectionneur DC
214
Mise en Service
214
Fichier de Codes Rlseau
214
Instructions D'installation
214
215
Confguration du Repli Automatique
215
Mettez Hors Tension
215
Service
217
Recherche D'erreurs et Dlpannage
217
Entretien
227
Données Techninues
228
Splcifcations
228
Conformitl
231
Conditions D'installation
232
Installation
232
Splcifcations de Couple
233
Splcifcations pour la Protection du Rlseau
234
Splcifcations de L'interface de Communication
235
Raccordements Ethernet
236
Topologie du Rlseau
236
Contact
237
Publicidad
SMA SUNNY HIGHPOWER PEAK1 Instrucciones De Instalación (196 páginas)
Marca:
SMA
| Categoría:
Inversores
| Tamaño: 10.48 MB
Tabla de contenido
English
3
Tabla de Contenido
3
Introduction
16
System Overview
17
Purpose of this Manual
17
Unpacking
19
Inverter Type Label
19
Installation Sequence
19
Installation
21
Environment and Clearances
21
Mounting the Wall Mounting Bracket
22
Mounting the Inverter
23
Disassembling the Inverter
24
Access to the Installation Area
24
AC Grid Connection
24
Cable Entry
26
Ethernet Connections
27
PV Connection
27
External PV Array Junction Boxes
27
Closure
29
Initial Setup and Start
29
User Interface
29
Operating Modes
29
Display
30
Initial Setup Via LCS-Tool
30
Switching on the PV Load-Break Switch
31
Commissioning
31
Grid Code File
31
Configuring the Fallback
31
Service
32
Troubleshooting and Repair
32
Maintenance
38
Technical Data
39
Specifications
39
Compliance
41
Installation Conditions
42
Torque Specifications
43
Specifications for Grid Protection
44
Technical Data of the Communication Interface
44
Ethernet Connections
45
Network Topology
45
Contact
46
German
50
Einführung
50
Systemübersicht
52
Zweck der Anleitung
52
Auspacken
54
Typenschild des Wechselrichters
54
Installationsreihenfolge
54
Installation
56
Umgebung und Abstände
56
Montage der Wandhalterung
57
Montage des Wechselrichters
58
Abbau des Wechselrichters
59
Zugang zum Installationsbereich
59
AC-Netzanschluss
60
Kabeleinführung
61
Ethernet-Anschlüsse
62
PV-Anschluss
62
Externe Generatoranschlusskästen
62
Schließen
64
Ersteinrichtung und Start
64
Benutzerschnittstelle
64
Betriebsarten
64
Display
65
Ersteinrichtung über LCS-Tool
66
PV-Lasttrennschalter Einschalten
66
Inbetriebnahme
66
Grid-Code-Datei
67
Fallback Konfigurieren
67
Service
68
Fehlersuche und -Behebung
68
Wartung
74
Technische Daten
75
Spezifikationen
75
Konformität
77
Installationsbedingungen
78
Drehmomentspezifikationen
79
Spezifikation für die Netzsicherungen
80
Technische Daten der Kommunikationsschnittstellen
80
Ethernet-Anschlüsse
81
Netzwerktopologie
81
Kontakt
82
Spanish
87
Introducción
87
Vista General del Sistema
88
Fin de las Instrucciones
88
Desembalaje
90
Placa de Características del Inversor
90
Orden de Instalación
90
Instalación
92
Entorno y Espacios Libres
92
Montaje del Soporte Mural
93
Montaje del Inversor
94
Desmontaje del Inversor
95
Acceso al Área de Instalación
95
Conexión de Red de CA
96
Introducción de Cables
97
Conexiones de Ethernet
98
Conexión Fotovoltaica
98
Cajas de Conexión del Generador Externas
98
Cierre
100
Configuración Inicial y Arranque
100
Interfaz de Usuario
100
Modos de Funcionamiento
100
Pantalla
101
Ajuste Inicial Mediante LCS-Tool
102
Activación del Interruptor-Seccionador Fotovoltaico
102
Puesta en Marcha
102
Archivo del Código de Red
102
Configuración del Procedimiento de Emergencia
102
Servicio
104
Resolución de Problemas
104
Mantenimiento
111
Datos Técnicos
112
Especificaciones
112
Conformidad
114
Condiciones de la Instalación
115
Especificaciones del Par de Apriete
116
Especificaciones del Circuito de la Red Eléctrica
117
Especificaciones de las Interfaces de Comunicación
117
Conexiones de Ethernet
118
Topología de Red
118
Contacto
119
French
123
Introduction
123
Vue D'ensemble du Système
125
Objet des Ces Instructions
125
Déballage
127
Plaque Signalétique de L'onduleur
127
Séquence D'installation
127
Installation
129
Environnement et Distances
129
Montage du Support Mural
130
Montage de L'onduleur
131
Démontage de L'onduleur
132
Accès à la Zone D'installation
132
Raccordement au Réseau AC
133
Insertion de Câbles
134
Raccordements Ethernet
135
Raccordement Photovoltaïque
135
Boîtiers de Jonction Externes
135
Fermer
137
Configuration Initiale et Démarrage
137
Interface Utilisateur
137
Modes de Fonctionnement
137
Écran
138
Configuration Initiale Via le LCS-Tool
139
Activation de L'interrupteur-Sectionneur DC
139
Mise en Service
139
Fichier de Codes Réseau
140
Configuration du Repli Automatique
140
Service
141
Recherche D'erreurs et Dépannage
141
Entretien
147
Données Techniques
148
Spécifications
148
Conformité
150
Conditions D'installation
151
Spécifications de Couple
152
Spécifications pour la Protection du Réseau
153
Spécifications de L'interface de Communication
153
Raccordements Ethernet
154
Topologie du Réseau
154
Contact
155
Italian
160
Introduzione
160
Panoramica del Sistema
161
Scopo Delle Istruzioni
161
Disimballaggio
163
Targhetta DI Identificazione Dell'inverter
163
Ordine D'installazione
163
Installazione
165
Ambiente E Distanze
165
Montaggio del Supporto da Parete
166
Montaggio Dell'inverter
167
Rimozione Dell'inverter
168
Accesso All'area DI Installazione
168
Collegamento Rete CA
169
Introduzione Dei Cavi
170
Collegamenti Ethernet
171
Collegamento Dell'impianto FV
171
Quadri DI Parallelo Stringhe Esterni
171
Chiusura
173
Setup Iniziale E Avviamento
173
Interfaccia Utente
173
Modalità DI Funzionamento
173
Display
174
Setup Iniziale Attraverso LCS-Tool
175
Attivazione Dell'interruttore del Carico FV
175
Messa in Servizio
175
File del Codice DI Rete
175
Configurazione del Fallback
176
Servizio DI Assistenza Tecnica
177
Ricerca Degli Errori
177
Manutenzione
183
Dati Tecnici
184
Specifiche
184
Conformità
186
Condizioni DI Installazione
187
Specifiche DI Coppia
188
Specifiche Dei Fusibili DI Rete
189
Dati Tecnici Delle Interfacce DI Comunicazione
189
Collegamenti Ethernet
190
Topologia Della Rete
190
Contatti
191
SMA SUNNY HIGHPOWER PEAK1 Instrucciones De Instalación (198 páginas)
Marca:
SMA
| Categoría:
Inversores
| Tamaño: 10.74 MB
Tabla de contenido
English
3
Tabla de Contenido
3
Introduction
16
System Overview
17
Purpose of this Manual
17
Installation
21
Environment and Clearances
21
Mounting the Wall Mounting Bracket
22
Mounting the Inverter
23
Disassembling the Inverter
24
Access to the Installation Area
24
AC Grid Connection
25
Enclosure Opening
27
Ethernet Connections
27
PV Connection
28
External PV Array Junction Boxes
28
Closing
30
Initial Setup and Start
30
User Interface
30
Operating Modes
30
Display
31
Initial Setup Via LCS-Tool
32
Switching on the PV Load-Break Switch
32
Commissioning
32
Grid Code File
33
Configuring the Fallback
33
Service
34
Troubleshooting and Repair
34
Maintenance
40
Technical Data
41
Specifications
41
Compliance
43
Installation Conditions
44
Torque Specifications
45
Specifications for Grid Protection
46
Technical Data of the Communication Interface
47
Ethernet Connections
47
Network Topology
47
Contact
47
German
52
Einführung
52
Systemübersicht
53
Zweck der Anleitung
53
Installation
57
Umgebung und Abstände
57
Montage der Wandhalterung
58
Montage des Wechselrichters
59
Abbau des Wechselrichters
60
Zugang zum Installationsbereich
60
AC-Netzanschluss
61
Kabeleinführung
63
Ethernet-Anschlüsse
63
PV-Anschluss
64
Externe Generatoranschlusskästen
64
Schließen
66
Ersteinrichtung und Start
67
Benutzerschnittstelle
67
Betriebsarten
67
Display
68
Ersteinrichtung über LCS-Tool
68
PV-Lasttrennschalter Einschalten
69
Inbetriebnahme
69
Grid-Code-Datei
69
Fallback Konfigurieren
69
Service
70
Fehlersuche und -Behebung
70
Wartung
76
Technische Daten
77
Spezifikationen
77
Konformität
79
Installationsbedingungen
80
Drehmomentspezifikationen
81
Spezifikation für die Netzsicherungen
82
Technische Daten der Kommunikationsschnittstellen
83
Ethernet-Anschlüsse
83
Netzwerktopologie
83
Kontakt
84
Spanish
89
Introducción
89
Vista General del Sistema
90
Fin de las Instrucciones
90
Instalación
94
Entorno y Espacios Libres
94
Montaje del Soporte Mural
95
Montaje del Inversor
96
Desmontaje del Inversor
97
Acceso al Área de Instalación
97
Conexión de Red de CA
98
Entrada de Cables
100
Conexiones de Ethernet
100
Conexión Fotovoltaica
101
Cajas de Conexión del Generador Externas
101
Cierre
103
Configuración Inicial y Arranque
103
Interfaz de Usuario
103
Modos de Funcionamiento
103
Pantalla
104
Ajuste Inicial Mediante LCS-Tool
105
Activación del Interruptor-Seccionador Fotovoltaico
105
Puesta en Marcha
105
Archivo del Código de Red
105
Configuración del Procedimiento de Emergencia
105
Mantenimiento
106
Resolución de Problemas
106
Datos Técnicos
115
Especificaciones
115
Conformidad
117
Condiciones de la Instalación
118
Especificaciones del Par de Apriete
119
Especificaciones del Circuito de la Red Eléctrica
120
Especificaciones de las Interfaces de Comunicación
121
Conexiones de Ethernet
121
Topología de Red
121
Contacto
122
Publicidad
Publicidad
Productos relacionados
SMA PLA Option FLX Serie
SMA PPM-RC-10
SMA SUNNY HIGHPOWER PEAK3
SMA SUNNY HIGHPOWER PEAK3 SHP 100-20
SMA FLP Pro 5
SMA FLP Pro 17
SMA SUNNY HIGHPOWER PEAK3-US SHP 125-US-20
SMA PC-SENS.BG1
SMA PIGGY-BACK
SMA PT100U-NR
SMA Categorias
Inversores
Controladores
Modules
Sistemas de Altavoces
Sistemas de Control
Más SMA manuales
Login
Entrar
O
Iniciar sesión con Facebook
Iniciar sesión con Google
Cargar el manual
Cargar desde el disco
Cargar desde la URL