SMA FLX Serie Guia De Instalacion
Ocultar thumbs
Ver también para FLX Serie:
- Guia de instalacion (49 páginas) ,
- Guia de instalacion (51 páginas)
Capítulos
Tabla de contenido

Manuales relacionados para SMA FLX Serie


Resumen de contenidos para SMA FLX Serie
- Página 1 SMA Solar Technology AG Solar Inverters FLX Series Installation Guide / Installationsanleitung / Guide d’installation / Guía de instalacion / Guida all’installazione www.SMA.de...
- Página 2 Choice of Language - Sprachauswahl - Choix de la langue - Selección de idioma - Scelta della lingua Page English UK Seite Deutsch Page Français Página Español Pagina Italiano L00410568-03_2q / Rev. date: 2014-06-20...
-
Página 3: General Safety
Safety and Conformity Safety and Conformity Safety Message Types General Safety The following symbols are used in this document: All persons installing and servicing inverters must be: • Trained and experienced in general safety rules DANGER for work on electrical equipment. •... - Página 4 Conformity Go to the download area at www.SMA.de, Approvals and Certifications, for information. See also 5 Technical Data. CE marking - This symbol certifies the conformity of...
- Página 5 Contents Contents 1 Introduction 1.1 Purpose of the Manual 1.2 Software Version 1.3 Spare Parts 1.4 Unpacking 1.5 Identification of Inverter 1.6 Installation Sequence 1.7 Return and Disposal 1.7.1 Return 1.7.2 Disposal 1.8 Overview of Installation Area 2 Installation 2.1 Environment and Clearances 2.2 Mounting the Mounting Plate 2.3 Mounting the Inverter 2.4 Removing the Inverter...
- Página 6 Contents 3.3.5 Plant, Group and Inverter Views 3.3.6 Autotest Procedure 4 Service 4.1 Troubleshooting 4.2 Maintenance 5 Technical Data 5.1 Specifications 5.1.1 Inverter Specifications 5.2 Derating Limits 5.3 Conformity 5.4 Installation Conditions 5.5 Cable Specifications 5.6 Torque Specifications 5.7 Mains Circuit Specifications 5.8 Auxiliary Interface Specifications 5.9 RS-485 and Ethernet Connections L00410568-03_2q / Rev.
-
Página 7: Purpose Of The Manual
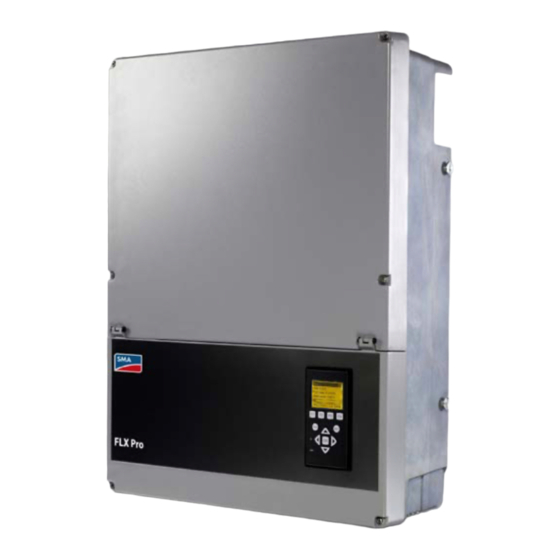
Fan Installation Instruction, for information required to replace a fan. Illustration 1.1 FLX Series Inverter These documents are available from the download area at www.SMA.de, or from the supplier of the solar inverter. The FLX series inverters feature: • IP65 enclosure •... - Página 8 SMA Solar Technology AG directly, or Illustration 1.2 Product Label disposed of according to local and national regulations. SMA Solar Technology AG is committed to its policy of environmental responsibility, and therefore appeals to end The product label on the side of the inverter shows: users who are disposing of inverters to follow local •...
- Página 9 SMA Solar Technology AG directly, or disposed of in the respective country. The shipping to the distributor or SMA Solar Technology AG is paid by the sender. Recycling and disposal of the inverter must be done according to the rules and regulations applicable in the country of disposal.
-
Página 10: Overview Of Installation Area
Introduction 1.8 Overview of Installation Area PELV (Safe to touch) RS-485 interface Option slot A (can be used for GSM option, optional sensor interface, or PLA option) Ethernet interface Option slot A (can be used for GSM option, optional sensor interface, or PLA option) Live Part PV connection area Communication board... -
Página 11: Environment And Clearances
Installation 2 Installation 2.1 Environment and Clearances Illustration 2.6 Mount Upright on Vertical Surface. Tilt of up to 10 degrees is permitted Illustration 2.1 Avoid Constant Stream of Water Illustration 2.7 Prevent Dust and Ammonia Gases Illustration 2.2 Avoid Direct Sunlight NOTICE When planning the installation site, ensure that inverter product and warning labels remain visible. -
Página 12: Mounting The Mounting Plate
Installation 2.2 Mounting the Mounting Plate Illustration 2.8 Safe Clearances NOTICE Ensure 620 mm base clearance for adequate airflow. L00410568-03_2q / Rev. date: 2014-06-20... -
Página 13: Mounting The Inverter
Installation Illustration 2.10 Mounting the Mounting Plate 2.3 Mounting the Inverter CAUTION Illustration 2.9 Mounting Plate For safe handling of the inverter, 2 people must carry the unit, or a suitable transport trolley must be used. Wear safety boots. NOTICE Use of the mounting plate delivered with the inverter is Procedure: mandatory. -
Página 14: Removing The Inverter
Installation On the inverter, position the side screws against Use 2 security screws, M5 x 8-12 (not supplied). the mounting plate slots. Insert screws through the pre-drilled anti-theft Push the inverter as shown so the side screws holes (see Illustration 1.3), through the mounting slide into the 2 lower slots, then the 2 upper plate to the wall. -
Página 15: Ac Grid Connection
Installation 2.6 AC Grid Connection Illustration 2.17 AC Connection Area Illustration 2.15 Installation Area L1, L2, L3 3 mains wires Neutral wire Primary protective earth Secondary protective earth Verify that the inverter rating matches the grid. Ensure that main circuit breaker is released, and take precautions to prevent reconnection. - Página 16 Installation NOTICE This product may generate DC current exceeding 6 mA, into the external grounded PE wire. Where a residual current-operated protective (RCD) or monitoring (RCM) device is used for protection in case of direct or indirect contact, only an RCD or RCM of Type B is allowed on the supply side of this product.
- Página 17 Installation 2.10 PV Connection WARNING PV modules generate voltage when exposed to light. Do NOT connect PV to earth. Illustration 2.21 Correct Polarity: Mounting Sunclix Connector on Cable Measure the DC voltage between the positive terminal of the PV array and earth (or the green/ yellow PE cable).
- Página 18 Installation 2.10.1 Protection Rating for PV Modules CAUTION PV installation The inverter must only be operated with PV modules of Unused PV inputs may not be short-circuited. protection class II, compliant to IEC 61730, application class Module voltage rating must be more than 480 V (typical module voltage rating is 1000 V).
-
Página 19: Initial Setup And Start
Initial Setup and Start 3 Initial Setup and Start 3.1 User Interface resistance between the PV arrays and earth. Meanwhile, it also monitors the grid parameters. When the grid The user interface comprises: parameters have been within the specifications for the required amount of time (depends on grid code), the •... - Página 20 Set up the inverter for manual PV configuration: • Via the display, security level 1, at [Setup → Setup Obtain the service logon from SMA Solar • Technology AG. details → PV configuration]. •...
- Página 21 Initial Setup and Start The menu structure is divided into 4 main sections: View - presents a short list of information, read only. Status - shows inverter parameter readings, read only. Log - shows logged data. Setup - shows configurable parameters, read/ write.
- Página 22 Initial Setup and Start NOTICE NOTICE To use the default language (English) simply press the Set the time and date accurately. The inverter uses this [OK] button twice to select and accept. information for logging. If an incorrect time/date is accidentally set, correct it immediately in the set date and time menu [Setup →...
- Página 23 Initial Setup and Start parallel, enter average installed PV power for each PV input, as shown in the examples. Enter this value for PV String Configuration “Installed PV power” Example 1: PV1, PV2 and PV3 are each set to individual mode. Nominal PV power installed: PV 1: 6000 W PV 1: 6000 W...
-
Página 24: Web Interface
If facilitates remote access to the inverter. an incorrect grid code is accidentally accepted at the Refer to the download area at www.SMA.de for the newest first selection, simply accept the “Grid: Undefined” in the instructions. -
Página 25: Setup Wizard
Initial Setup and Start • For Windows XP and older Windows Find the serial number marked on the product label on the versions: http://invertername, where side of the inverter enclosure. See Illustration 1.2. 'invertername' is the final 10 digits of the serial number. - Página 26 Initial Setup and Start Illustration 3.12 Step 2 of 8: Master Setting To change this setting later, go to [Inverter level: Setup → Inverter details]. Step 3 of 8: Time and date Enter: • Time in 24-hour format • Date •...
- Página 27 Initial Setup and Start CAUTION Incorrect setting can have serious consequences for production efficiency. Illustration 3.14 Step 4 of 8: Installed Power To change the installed power, go to [Inverter level: Setup → Calibration, PV Array]. Step 5 of 8: Country of Installation Select the setting to match the location of the installation.
- Página 28 Initial Setup and Start • The default setting is [undefined]. Select the grid code again, to confirm. • The setting is activated immediately. CAUTION Correct selection is essential to comply with local and national standards. Illustration 3.16 Step 6 of 8: Grid Code NOTICE If the initial and confirmation settings are different, •...
- Página 29 Initial Setup and Start NOTICE When the PV configuration, installed PV power and PV array area of follower inverters in the network differ from that of the master, do not replicate. Set up the follower inverters individually. Illustration 3.17 Step 7 of 8: Replication Step 8 of 8: Inverter start-up The wizard displays an overview of the setup configuration.
- Página 30 Initial Setup and Start Illustration 3.18 Step 8 of 8: Inverter start-up To change the setup later, access the inverter via the web interface or the display, at inverter level. To change the name of the inverter, go to [Inverter level: Setup → Inverter details]. •...
- Página 31 The default inverter • Contact: Opens a pop-up window, name is based on the serial number. which displays SMA Solar Technology • Click on an inverter name to display the AG contact information. inverter view.
- Página 32 Initial Setup and Start NOTICE The content of the main menu changes depending on which view is currently selected: the plant, a group of inverters, or an individual inverter. 3.3.5 Plant, Group and Inverter Views The overview screens for plant view, group view, and inverter view display the same overall status information.
- Página 33 Initial Setup and Start Item Unit View Description Plant and Inverter Group Overall plant status Red: Plant PR <50%, or: Any inverter in the network - in fail safe mode, or - missing from the scan list, no contact with the master Yellow: Any inverter in the network - with PR <70%, or - in Connecting or Off grid mode...
- Página 34 Service 4 Service 4.1 Troubleshooting here. When the inverter enters the On grid mode, the most recent event is cleared and is shown as 0. This guide provides tables showing messages appearing in The event code is made up of 2 elements: the group the inverter display, known as events.
- Página 35 Service Status Description Action DNO Hotline PV message 34–37 Residual Current Monitoring Unit Turn both DC and AC off and wait until the display turns (RCMU) has measured an off. Then turn on DC and AC and observe if the event excessive current.
- Página 36 Service Internal Events Status Description Action DNO Hotline PV message 201–208 The internal temperature of the Check the inverter is not covered and that the inverter is too high. ventilation duct is not blocked. If not, call the installer. 209, 210 Voltage on DC bus is too high.
- Página 37 Service Events Caused by the Self-test Description Action DNO Hotline PV 264-271 Measurement circuit test failed. Restart the inverter. If event persists, call the installer. Installer: Call service. RCMU self-test failed. Call the installer. Installer: Call service. Current sensor test failed. 356-363 Transistor and relay test failed, or inverter relay has failed (contact assumed welded).
-
Página 38: Technical Data
Technical Data 5 Technical Data 5.1 Specifications 5.1.1 Inverter Specifications Nomen- Parameter FLX series clature Rated apparent 5 kVA 6 kVA 7 kVA 8 kVA 9 kVA power 5 kW 6 kW 7 kW 8 kW 9 kW Rated active power ac,r Active power at 4.75 kW... - Página 39 Technical Data Nomen- Parameter FLX series clature Max. short-circuit current DC (at STC) 13.5 A per PV input Min. on grid power 20 W Efficiency Max. efficiency 97.9% 97.9% 97.9% 97.9% 97.9% Euro efficiency, V at 96.1% 96.4% 96.4% 97.1% 97.2% dc,r Other...
- Página 40 Technical Data Nomen- Parameter FLX series clature 12.5 Max. current AC 3 x 15.1 A 3 x 18.8 A 3 x 22.6 A 3 x 25.6 A acmax AC current distortion (THD at nominal <2 % output power, %) Inrush current 0.5 A / 10 ms cosphi Power factor at...
- Página 41 Technical Data Nomen- Parameter FLX series clature 12.5 Storage temperature -25..60 °C Overload operation Change of operating point Overvoltage Grid: OVC III categories PV: OVC II Table 5.2 Specifications At rated grid voltage (V ), Cos(phi)=1. At symmetric input configuration. ac,r To utilise the full range, asymmetrical layouts must be considered SPL (Sound Pressure Level) at 1 m under normal operating...
- Página 42 Technical Data 5.2 Derating Limits To ensure that the inverters can produce the rated power, measurement inaccuracies are taken into account when enforcing the derating limits stated in Table 5.5. (Limit = rated value + tolerance). FLX series 12.5 Grid current, per phase 7.5 A 9.0 A 10.6 A...
-
Página 43: Installation Conditions
Technical Data 5.4 Installation Conditions Parameter Specification −25 °C - +60 °C (for temperature derating see the FLX Series Design Guide.) Temperature Relative humidity 95 % (non-condensing) Pollution degree Environmental class according to IEC IEC60721-3-3 3K6/3B3/3S3/3M2 Air quality - general ISA S71.04-1985 Level G2 (at 75% RH) Air quality - coastal, heavy industrial and agricultural zones... -
Página 44: Cable Specifications
Technical Data 5.5 Cable Specifications NOTICE NOTICE Avoid power loss in cables greater than 1% of the Table states only cable lengths less than 100 m. nominal inverter rating by following the values stated in the tables and illustrations. Specification FLX series AC cable maximum AC cable size... - Página 45 Technical Data Illustration 5.2 FLX Series 5, Cable Losses [%] versus Cable Illustration 5.5 FLX Series 8, Cable Losses [%] versus Cable Length [m] Length [m] Illustration 5.3 FLX Series 6, Cable Losses [%] versus Cable Illustration 5.6 FLX Series 9, Cable Losses [%] versus Cable Length [m] Length [m] Illustration 5.4 FLX Series 7, Cable Losses [%] versus Cable...
-
Página 46: Torque Specifications
Technical Data 5.6 Torque Specifications Illustration 5.8 FLX Series 12.5, Cable Losses [%] versus Cable Length [m] Illustration 5.11 Overview of Inverter with Torque Indications Parameter Tool Tightening Torque M16 cable gland Wrench 19 mm 3.75 Nm body M16 cable gland, Wrench 19 mm 2.5 Nm compression nut... - Página 47 Technical Data Parameter Tool Tightening Torque M32 cable gland Wrench 42 mm 7.5 Nm body M32 cable gland, Wrench 42 mm 5.0 Nm compression nut Terminals on AC Pozidriv PZ2 or 2.0 - 4.0 Nm terminal block Straight slot 1.0 x 5.5 mm Torx TX 20 or 2.2 Nm...
- Página 48 Technical Data Illustration 5.13 Auxiliary Interfaces 5.9 RS-485 and Ethernet Connections RS-485 RX/TX A (-) BIAS L Terminate the RS-485 communication bus at both ends. BIAS H • RX/TX B (+) Termination is automatic when no RJ-45 plug is Not connected inserted into the socket.
-
Página 49: Network Topology
Technical Data Illustration 5.15 RJ-45 Pinout Detail for Ethernet Colour Standard Pinout Cat 5 Cat 5 Ethernet T-568A T-568B 1. RX+ Green/white Orange/white Illustration 5.16 Network Topology 2. RX Green Orange 3. TX+ Orange/white Green/white Blue Blue Linear Daisy Chain Blue/white Blue/white Star Topology... -
Página 50: Allgemeine Sicherheit
Sicherheit und Konformität Sicherheit und Konformität Arten von Sicherheitsmeldungen Allgemeine Sicherheit In diesem Dokument werden folgende Symbole Alle Personen, die mit der Installation und Wartung von verwendet: Wechselrichtern betraut sind, müssen: • in allgemeinen Sicherheitsrichtlinien für Arbeiten GEFAHR an elektrischen Betriebsmitteln geschult und erfahren sein. - Página 51 über dem maximalen Betriebsstrom und ist abhängig von der Stärke der Sonneneinstrahlung. Konformität Weitere Informationen sind im Download-Bereich unter www.SMA.de, Zulassungen und Zertifizierungen erhältlich. Siehe auch 5 Technical Data. CE-Kennzeichnung: Diese Kennzeichnung zeigt die Konformität der Geräte mit den Vorschriften der geltenden EG-Richtlinien an.
- Página 52 Inhaltsverzeichnis Inhaltsverzeichnis 1 Einführung 1.1 Zweck des Handbuchs 1.2 Softwareversion 1.3 Ersatzteile 1.4 Auspacken 1.5 Identifizierung des Wechselrichters 1.6 Installationsreihenfolge 1.7 Rückgabe und Entsorgung 1.7.1 Rückgabe 1.7.2 Entsorgung 1.8 Überblick über den Installationsbereich 2 Installation 2.1 Umgebung und Abstände 2.2 Montage der Wandhalterung 2.3 Montage des Wechselrichters 2.4 Abbau des Wechselrichters 2.5 Zugang zum Installationsbereich...
-
Página 53: Tabla De Contenido
Inhaltsverzeichnis 3.3.5 Ansichten „Anlage“, „Gruppe“ und „Wechselrichter“ 3.3.6 Autotest-Verfahren 4 Service 4.1 Fehlersuche und -behebung 4.2 Wartung 5 Technische Daten 5.1 Spezifikationen 5.1.1 Spezifikationen zu den Wechselrichtern 5.2 Grenzwerte für die Reduzierung des Auslegungsverhältnisses 5.3 Konformität 5.4 Installationsbedingungen 5.5 Kabelspezifikationen 5.6 Drehmomentvorgaben 5.7 Spezifikation für die Netzsicherungen 5.8 Technische Daten der Hilfsschnittstelle... -
Página 54: Zweck Des Handbuchs
Austausch eines defekten Lüfters beschrieben. • PV-Trennschalter Diese Dokumente sind im Downloadbereich unter • Sunclix-Steckverbinder für die PV-Eingänge www.SMA.de verfügbar. Sie können Sie auch über den • Manueller Zugriff über das lokale Display, zur Hersteller des Solar-Wechselrichters beziehen. Konfiguration und Überwachung des Wechsel- richters. - Página 55 Seriennummer zur Identifizierung des Wechsel- 1.3 Ersatzteile richters (unter dem Barcode). 1.6 Installationsreihenfolge Für weitere Informationen zu Ersatzteilen, Ersatzteil- nummern und Bestellung kontaktieren Sie bitte SMA Solar Bitte beachten Sie besonders den Abschnitt Technology AG. 1.1 Safety Message Types. 1.4 Auspacken Den Wechselrichter gemäß...
- Página 56 Verpackung an SMA Solar Technology AG zurückgesendet werden. Bei Rückgabe des Produkts aufgrund eines Wechselrichterausfalls, wenden Sie sich bitte an Ihren SMA Solar Technology AG Wechsel- richter-Hersteller. Kontaktieren Sie für Rücksendung und Details die SMA Solar Technology AG-Hotline.
-
Página 57: Überblick Über Den Installationsbereich
Einführung 1.8 Überblick über den Installationsbereich PELV (berührungssicher) RS-485-Schnittstelle Options-Steckplatz A (kann für GSM-Option, Sensorschnittstellen-Option oder PLA-Option verwendet werden) Ethernet-Schnittstelle Options-Steckplatz A (kann für GSM-Option, Sensorschnittstellen-Option oder PLA-Option verwendet werden) Spannungsführende Bereiche PV-Anschlussbereich Kommunikationskarte AC-Klemmenleiste Sonstiges Position für Sicherheitsschrauben PV-Trennschalter 10 Position für Sicherheitsschrauben Abbildung 1.3 Überblick über den Installationsbereich L00410568-03_2q / Rev. -
Página 58: Umgebung Und Abstände
Installation 2 Installation 2.1 Umgebung und Abstände Abbildung 2.6 Gerade auf vertikaler Oberfläche einbauen. Eine Neigung von bis zu 10 Grad ist zulässig. Abbildung 2.1 Ständigen Kontakt mit Wasser vermeiden Abbildung 2.7 Staub und Ammoniakgase vermeiden Abbildung 2.2 Direkte Sonneneinstrahlung vermeiden HINWEIS Bei der Auswahl des Installationsorts sicherstellen, dass die Produkt- und Warnhinweise auf dem Wechselrichter... -
Página 59: Montage Der Wandhalterung
Installation 2.2 Montage der Wandhalterung Abbildung 2.8 Sicherheitsabstände HINWEIS Für eine ausreichende Luftströmung einen Mindest- abstand von 620 mm einhalten. L00410568-03_2q / Rev. date: 2014-06-20... -
Página 60: Montage Des Wechselrichters
Installation Abbildung 2.10 Montage der Wandhalterung 2.3 Montage des Wechselrichters VORSICHT Abbildung 2.9 Wandhalterung Das Gerät muss aus Sicherheitsgründen von zwei Personen getragen oder mithilfe eines geeigneten Transportwagens bewegt werden. In jedem Fall Sicher- HINWEIS heitsschuhe tragen. Die mitgelieferte Wandhalterung muss zwingend verwendet werden. -
Página 61: Abbau Des Wechselrichters
Installation Abbildung 2.11 Ausrichtung des Wechselrichters Abbildung 2.13 Einführung der Schrauben in die Schlitze – Detailansicht Am Wechselrichter die seitlichen Schrauben in die Schlitze der Wandhalterung einsetzen. Darauf achten, dass die vier seitlichen Schrauben Den Wechselrichter so nach vorn drücken, dass sicher in den Schlitzen der Wandhalterung sitzen. -
Página 62: Zugang Zum Installationsbereich
Installation 2.5 Zugang zum Installationsbereich 2.6 AC-Netzanschluss VORSICHT Die ESD-Schutzvorschriften beachten. Eventuelle elektro- statische Ladung vor Handhabung von Elektroteilen durch Berühren des geerdeten Gehäuses entladen. Vorgehensweise: Zum Öffnen der Abdeckung die beiden vorderen Schrauben mit einem TX20-Schraubendreher lösen. Die Schrauben können nicht herausfallen. Die Abdeckung um 180 Grad anheben. - Página 63 Installation HINWEIS Dieses Produkt kann in dem externen, geerdeten PE- Leiter Gleichstrom erzeugen, der 6 mA überschreitet. Bei Verwendung einer Fehlerstrom-Schutzeinrichtung (RCD) oder eines Differenzstrom-Überwachungsgeräts (RCM) zum Schutz bei direktem oder indirektem Kontakt darf auf der Primärseite dieses Produkts nur ein RCD bzw. RCM des Typs B verwendet werden.
- Página 64 Installation HINWEIS Alle Schrauben und Kabelverschraubungen gründlich festziehen. 2.9 Schließen Die Abdeckung des Installationsbereichs des Wechselrichters schließen. Die beiden vorderen Schrauben festziehen. AC-Leistung einschalten. 2.10 PV-Anschluss WARNUNG PV-Module erzeugen bei Lichteinfall Spannung. PV darf NICHT mit an den Masseanschluss angeschlossen werden! Abbildung 2.18 Kabelführung durch Kabelverschraubungen Abbildung 2.19 Befestigung der Kabel mit Kabelbindern...
- Página 65 Installation • Die PV-Leerlaufspannung darf 1000 V (Standard Test Conditions, STC) DC nicht überschreiten. Der Wechsel- überschreitet nicht 13,5 A pro Eingang. richter verfügt über einen Verpolungsschutz, kann jedoch erst VORSICHT nach korrektem Anschluss Leistung PV-Installation erzeugen. Durch eine vertauschte Ungenutzte PV-Eingänge dürfen nicht kurzgeschlossen Polarität werden weder der Wechsel- werden.
- Página 66 Installation Abbildung 2.23 Anschluss an PV-Eingang 2.10.1 Schutzklasse der PV-Module Der Wechselrichter darf nur mit PV-Modulen der Schutz- klasse II nach IEC 61730, Anwendungsklasse A, betrieben werden. Die Modulnennspannung muss 480 V überschreiten (Modulnennspannung liegt normalerweise bei 1000 V). Dies verhindert nicht die Nutzung von Strings mit niedrigerer Betriebsspannung.
-
Página 67: Ersteinrichtung Und Start
Ersteinrichtung und Start 3 Ersteinrichtung und Start 3.1 Benutzerschnittstelle Der Wechselrichter ist vom Netz getrennt. Die Benutzer-, , Kommunikations- und Optionsschnitt- Die Benutzerschnittstelle besteht aus folgenden stellen werden nicht mit Leistung versorgt. Elementen: • Anschlussmodus (Grüne LED blinkt) Lokale Anzeige. Ermöglicht manuelles Setup des Der Wechselrichter läuft an, wenn die PV-Eingangs- Wechselrichters. - Página 68 Sicherheitsebene für die Dauer Wenn Sensordaten erforderlich sind, muss die von einem Tag. Sensorschnittstellenoption mit Sensoren installiert sein. • Rufen Sie die Service-Anmeldung ab unter SMA • Solar Technology AG. Der Wechselrichter muss in einer „Daisy-Chain“- Netzwerktopologie im kürzesten Abstand zum •...
- Página 69 Ersteinrichtung und Start Zur manuellen Einstellung der Konfiguration über das Display: AC einschalten, um den Wechselrichter zu starten. Das Installateur-Passwort erhalten Sie vom Händler. Zu [Setup → Sicherheit → Passwort] navigieren und das Passwort eingeben. Auf [Zurück] drücken. Mit den Pfeiltasten zu [Setup →...
- Página 70 Ersteinrichtung und Start Taste Funktion Bei dem Wechsel- richter handelt es sich um einen Follower, der an einen Master angeschlossen ist. Dieses Symbol wird oben rechts angezeigt. Tabelle 3.1 Übersicht der Displaytasten und -funktionen HINWEIS Das Kontrastniveau des Displays kann bei gedrückter F1- Taste durch Drücken von der Pfeil-nach-oben-/Pfeil-nach- unten-Taste geändert werden.
- Página 71 Ersteinrichtung und Start Abbildung 3.4 Uhrzeit einstellen Abbildung 3.5 Datum einstellen Die Uhrzeit laut Meldung auf dem Display einstellen. Die Datum laut Meldung auf dem Display einstellen. Durch ▲ ▲ Taste [OK] drücken, um eine Zahl auszuwählen. [ Drücken von [OK] auswählen. [ ] drücken, um durch die drücken, um durch die Zahlen zu blättern.
- Página 72 Ersteinrichtung und Start PV-Stringkonfiguration Diesen Wert für „Installierte PV- Leistung“ eingeben. Beispiel 1: PV1, PV2 und PV3 befinden sich alle im Einzelmodus. Installierte PV-Nennleistung: PV 1: 6000 W PV 1: 6000 W PV 2: 6000 W PV 2: 6000 W PV 3: 3000 W PV 3: 3000 W Beispiel 2: PV1 und PV2 sind parallel...
- Página 73 Der Wechselrichtername darf keine Leerzeichen enthalten. siertem Personal ist es erlaubt, den Wechselrichter zu konfigurieren. Änderungen werden protokolliert und Bei Anlagen-, Gruppen- und Wechselrichternamen sind nur SMA Solar Technology AG übernimmt keine Haftung für folgende Zeichen erlaubt: Beschädigungen, die durch Änderungen der Wechselrich- terkonfiguration entstehen.
- Página 74 Ersteinrichtung und Start 3.3.2 Ersteinrichtung über die Web- • Bei Windows XP und älteren Windows- Schnittstelle Versionen: http://invertername, dort wo die zehn letzten Zeichen der Serien- nummer (= „invertername“) den Namen VORSICHT des Wechselrichters bezeichnen. DieWeb Server Anmeldedaten und das Passwort des •...
- Página 75 Ersteinrichtung und Start • Ein Scanvorgang wird durchgeführt, um die Wechselrichter im Netzwerk zu identifizieren. • Ein Popup-Fenster zeigt die Wechselrichter, die erfolgreich identifiziert wurden. Auf [OK] klicken, um zu bestätigen, dass die korrekte Anzahl an Wechselrichtern gefunden wurde. Abbildung 3.12 Schritt 2 von 8: Master-Einstellung Um diese Einstellung später zu ändern, [Wechselrichterniveau: Setup →...
- Página 76 Ersteinrichtung und Start Schritt 4 von 8: Anschlussleistung Für jeden PV-Eingang die installierte PV-Leistung eingeben. Anhand dieser Werte wird der Nutzungsgrad berechnet. Weitere Informationen finden Sie im Projektierungshandbuch der FLX-Serie. VORSICHT Falsche Einstellungen können schwerwiegende Folgen für die Produktionseffizienz haben. Abbildung 3.14 Schritt 4 von 8: Anschlussleistung Um die installierte Leistung zu ändern, [Wechselrichterniveau: Setup →...
- Página 77 Ersteinrichtung und Start VORSICHT Die korrekte Auswahl ist wichtig, um die lokalen und nationalen Standards einzuhalten. Abbildung 3.15 Schritt 5 von 8: Installationsland L00410568-03_2q / Rev. date: 2014-06-20...
- Página 78 Ersteinrichtung und Start Schritt 6 von 8: Grid Code Grid Code gemäß Installationsort auswählen. • Die Standardeinstellung ist [nicht definiert]. Die Grid Code-Einstellungen zur Bestätigung erneut auswählen. • Die Einstellung wird sofort aktiviert. VORSICHT Die korrekte Auswahl ist wichtig, um die lokalen und nationalen Standards einzuhalten.
- Página 79 Ersteinrichtung und Start HINWEIS Wenn die PV-Konfiguration, die installierte PV-Leistung und der PV--Array-Bereich der Follower-Wechselrichter im Netzwerk vom Master-Wechselrichter abweichen, keine Nachbildung durchführen. Die Einstellungen für die untergeordneten Wechselrichter einzeln vornehmen. Abbildung 3.17 Schritt 7 von 8: Nachbildung Schritt 8 von 8: Inbetriebnahme des Wechselrichters Der Assistent zeigt die Setup-Konfiguration im Überblick an.
- Página 80 Ersteinrichtung und Start Abbildung 3.18 Schritt 8 von 8: Inbetriebnahme des Wechselrichters Um das Setup später zu ändern, über die integrierte Web-Schnittstelle oder das Display auf den Wechselrichter auf Wechsel- richterniveau zugreifen. Der Wechselrichtername kann unter [Wechselrichterniveau: Setup → Wechselrichterdetails] geändert werden. •...
- Página 81 Ersteinrichtung und Start 3.3.4 Web-Schnittstelle Die Web-Schnittstelle ist folgendermaßen strukturiert. Abbildung 3.19 Übersicht • Anlagenname: Zeigt den aktuellen Namen der Auf den Namen eines Wechselrichters Anlage an: klicken, um die Wechselrichteransicht anzuzeigen. • Auf den Anlagennamen klicken, um die • Den Namen des Wechselrichters unter Anlagenansicht anzuzeigen.
-
Página 82: Ansichten „Anlage", „Gruppe" Und „Wechselrichter
Sitzung einzustellen. Der Inhalt des Hauptmenüs ändert sich abhängig davon, • Kontakt: Öffnet ein Einblendfenster mit welches Menü derzeit ausgewählt ist: die Anlage, eine den Kontaktdaten von SMA Solar Gruppe von Wechselrichtern oder ein individueller Technology AG. Wechselrichter. • Abmeldung: Öffnet das Dialogfeld für die Anmeldung bzw. -
Página 83: Autotest-Verfahren
Ersteinrichtung und Start Element Einheit Ansicht Beschreibung Anlage und Wechsel- Gruppe richter Gesamtanlagenstatus Rot: Nutzungsgrad der Anlage < 50 %, oder: Ein beliebiger Wechselrichter im Netzwerk – im Modus Ausfallsicher oder – fehlt auf der Prüfliste, keine Verbindung mit dem Master Gelb: Ein beliebiger Wechselrichter im Netzwerk –... -
Página 84: Service
Service 4 Service 4.1 Fehlersuche und -behebung Liste mit den 20 neuesten Ereignissen angezeigt. Wenn der Wechselrichter in die Betriebsart „Am Netz“ wechselt, wird Diese Anleitung enthält Tabellen mit Meldungen das letzte Ereignis gelöscht und als 0 angezeigt. (Ereignisse), die auf dem Wechselrichterdisplay angezeigt Der Ereigniscode setzt sich aus zwei Elementen zusammen: werden. - Página 85 Service Status- Beschreibung Maßnahme VNB Hotline PV meldung 25– Netzausfall, Außenleiterspannungen Den Installateur über die Spannung an allen drei zu niedrig. Phasen informieren. Außenleiterspannung und AC-Installation überprüfen. 28– Netzausfall, ROCOF außerhalb des Den VNB kontaktieren, wenn das Ereignis mehrmals zulässigen Bereichs. innerhalb eines Tages auftritt.
- Página 86 Service Status- Beschreibung Maßnahme VNB Hotline PV meldung 103-105 Der PV-Strom Zu viele PV-Module sind parallel Installateur kontaktieren. ist zu hoch/ geschaltet. Dies sollte nur bei neu instal- Installateur: Anzahl der parallel geschalteten wartend. lierten Systemen angezeigt werden. Strings und Stromnennwerte prüfen. Wurde der Stromgrenzwert überschritten? Wurde der PV-Strom des Wechselrichters verringert? Strings wieder parallel anschließen, ggf.
-
Página 87: Wartung
Service Statusmeldung Beschreibung Maßnahme VNB Hotline PV Fehlerstromüberwachungs- Drahtbruch in der Fehlerstromüberwa- Installateur kontaktieren. einheit (RCMU) über chungseinheit (RCMU). Installateur: Servicepartner kontak- zulässigem Bereich tieren, wenn Selbsttest nicht erfolgreich abgeschlossen wird. 225–240 Störung im Speicher/EEPROM. Wechselrichter neu starten. Den Installateur kontaktieren, wenn das 241, 242, Interner Kommunikationsfehler. - Página 88 Service rund um den Kühlkörper oben und seitlich am Wechselrichter (dort tritt die Luft aus) und zum Lüfter an der Unterseite des Wechselrichters hin. Um Verstopfungen zu entfernen, mit Druckluft, einem weichen Tuch oder einer Bürste reinigen. WARNUNG Die Temperatur des Kühlkörpers kann 70 °C überschreiten.
-
Página 89: Technische Daten
Technische Daten 5 Technische Daten 5.1 Spezifikationen 5.1.1 Spezifikationen zu den Wechselrichtern Nomen- Parameter FLX- Serie klatur Wechselspannung (AC) Nennwert Schein- 5 kVA 6 kVA 7 kVA 8 kVA 9 kVA leistung Nenn-Wirkleistung 5 kW 6 kW 7 kW 8 kW 9 kW ac,r Wirkleistung bei... - Página 90 Technische Daten Nomen- Parameter FLX- Serie klatur Ausschaltspannung dcmin 220 V Max. MPP-Strom 12 A pro PV-Eingang dcmax Max. Kurzschlussstrom DC 13,5 A pro PV-Eingang (bei Standardtestbe- dingungen) Mind.-Leistung am 20 W Netz Wirkungsgrad Max. Wirkungsgrad 97.9% 97.9% 97.9% 97.9% 97.9% Euro-Wirkungsgrad V 96.1%...
- Página 91 Technische Daten Nomen- Parameter FLX- Serie klatur 12.5 Wechselspannung (AC) Nennwert Schein- 10 kVA 12,5 kVA 15 kVA 17 kVA leistung 10 kW 12,5 kW 15 kW 17 kW Nenn-Wirkleistung ac,r Wirkleistung bei 9,5 kW 11,9 kW 14,3 kW 16,2 kW cos(phi) = 0,95 Wirkleistung bei 9,0 kW...
- Página 92 Technische Daten Nomen- Parameter FLX- Serie klatur 12.5 Wirkungsgrad Max. Wirkungsgrad 97.9% 98.0% 98.0% 98.1% Euro-Wirkungsgrad V 97.2% 97.3% 97.4% 97.6% bei dc,r Sonstiges Abmessungen (H, B, T), Wechselrichter / 667 x 500 x 233 mm / 774 x 570 x 356 mm einschl.
-
Página 93: Grenzwerte Für Die Reduzierung Des Auslegungsverhältnisses
Technische Daten Parameter FLX-Serie Elektrisch Sicherheit (Schutzklasse) Klasse I (geerdet) PELV auf der Kommuni- Klasse II kations- und Steuerkarte Überspannungskategorien Netz: Überspannungskategorie III (OVC III) PV: Überspannungskategorie II (OVC II) Funktional • Inselbetriebserkennung – Trennung Netzausfall • Dreiphasenüberwachung • ROCOF Spannungsamplitude Trennung, enthalten Frequenz... -
Página 94: Installationsbedingungen
Technische Daten EN 61000-6-3 EMV-Störaussendung EN 61000-6-4 Oberschwingungsströme EN 61000-3-2/-3 EN 61000-3-11/-12 IEC 61727 Eigenschaften des Versor- gungsnetzes EN 50160 S0-Stromzähler (optional) EN 62053-31 Anhang D Tabelle 5.6 Konformität mit internationalen Normen 5.4 Installationsbedingungen Parameter Technische Daten −25 °C - +60 °C (die Reduzierung des Auslegungsverhältnisses für Temperaturen finden Sie im FLX Temperatur Projektierungshandbuch der Serie.) Relative Luftfeuchtigkeit... -
Página 95: Kabelspezifikationen
Technische Daten 5.5 Kabelspezifikationen HINWEIS HINWEIS Halten Sie sich an die Vorgaben in den Tabellen und In der Tabelle sind nur Kabellängen von weniger als 100 Abbildungen, einen Verlust größer 1 % zur Wechsel- m angegeben. richter-Nennleistung zu vermeiden. Technische Daten FLX-Serie Max. - Página 96 Technische Daten Abbildung 5.2 FLX-Serie 5, Kabelverluste [%] gegenüber Abbildung 5.5 FLX-Serie 8, Kabelverluste [%] gegenüber Kabellänge [m] Kabellänge [m] Abbildung 5.3 FLX-Serie 6, Kabelverluste [%] gegenüber Abbildung 5.6 FLX-Serie 9, Kabelverluste [%] gegenüber Kabellänge [m] Kabellänge [m] Abbildung 5.4 FLX-Serie 7, Kabelverluste [%] gegenüber Abbildung 5.7 FLX-Serie 10, Kabelverluste [%] gegenüber Kabellänge [m] Kabellänge [m]...
-
Página 97: Drehmomentvorgaben
Technische Daten 5.6 Drehmomentvorgaben Abbildung 5.8 FLX-Serie 12.5, Kabelverluste [%] gegenüber Kabellänge [m] Abbildung 5.11 Überblick über Wechselrichter mit Drehmo- mentvorgaben 1 Parameter Werkzeug Anzugsmoment M16-Kabelver- Schlüssel 19 mm 3,75 Nm schraubung M16-Kabelver- Schlüssel 19 mm 2,5 Nm schraubung, Überwurfmutter M25-Kabelver- Schlüssel 27 mm 7,5 Nm... -
Página 98: Spezifikation Für Die Netzsicherungen
Technische Daten Parameter Werkzeug Anzugsmoment M32-Kabelver- Schlüssel 42 mm 7,5 Nm schraubung M32-Kabelver- Schlüssel 42 mm 5,0 Nm schraubung, Überwurfmutter Klemmen an AC- Pozidriv PZ2 oder 2,0 - 4,0 Nm Klemmenleiste Schlitz 1,0 x 5,5 Torx TX 20 oder 2,2 Nm Schlitz 1,0 x 5,5 Tabelle 5.12 Nm-Spezifikationen 2 Abbildung 5.12 Überblick über Wechselrichter mit Drehmo-... -
Página 99: Technische Daten Der Hilfsschnittstelle
Technische Daten 5.8 Technische Daten der Hilfsschnittstelle Schnittstelle Parameter Parameterdetails Technische Daten RS-485 und Ethernet Kabel 2 x 5-7 mm Durchmesser Kabelmantel (⌀) Kabeltyp STP-Kabel (Shielded Twisted Pair, CAT 5e oder SFTP CAT 5e) 2) 100 Ω – 120 Ω Wellenwiderstand (Impedanz) der Kabel RJ-45-Steckverbinder:... - Página 100 Technische Daten Abbildung 5.14 Pinbelegung des RJ-45-Steckers für RS-485 Abbildung 5.15 Pinbelegung des RJ-45-Steckers für Ethernet Farbstandard Pinbelegu Kat. 5 Kat. 5 Ethernet T-568A T-568B RX/TX A (-) 1. RX+ Grün/Weiß Orange/Weiß BIAS L 2. RX Grün Orange BIAS H 3.
- Página 101 Technische Daten Abbildung 5.16 Netzwerktopologie Linienförmige „Daisy Chain“-Verbindungen Sterntopologie Ringtopologie (nicht zulässig) (Ethernet-Switch) HINWEIS Eine Mischung der beiden Netzwerktypen ist nicht möglich. Der Wechselrichter kann nur an reine RS-485- oder Ethernet-Netzwerke angeschlossen werden. L00410568-03_2q / Rev. date: 2014-06-20...
-
Página 102: Sécurité Et Conformité
Sécurité et conformité Sécurité et conformité Types de messages de sécurité Sécurité générale Les symboles suivants sont utilisés dans ce document : Toutes les personnes amenées à installer et entretenir des onduleurs doivent : DANGER • être formées et expérimentées en matière de consignes de sécurité... - Página 103 Sécurité et conformité Conformité Pour plus d'informations, accéder à la rubrique de téléchargement à l'adresse www.SMA.de, Agréments et certifications. Voir aussi 5 Technical Data. Marquage CE - Ce symbole certifie la conformité de l'équipement aux exigences des directives CE en vigueur.
- Página 104 Table des matières Table des matières 1 Introduction 1.1 Objet du manuel 1.2 Version du logiciel 1.3 Pièces de rechange 1.4 Déballage 1.5 Identification de l'onduleur 1.6 Séquence d'installation 1.7 Retour et mise au rebut 1.7.1 Retour 1.7.2 Mise au rebut 1.8 Présentation de la zone d'installation 2 Installation 2.1 Environnement et dégagements...
- Página 105 Table des matières 3.3.5 Vues de l'onduleur, du groupe et de l'installation 3.3.6 Procédure de test automatique 4 Service 4.1 Dépannage 4.2 Maintenance 5 Données techniques 5.1 Spécifications 5.1.1 Spécifications de l'onduleur 5.2 Limites de réduction 5.3 Conformité 5.4 Conditions d'installation 5.5 Spécifications des câbles 5.6 Spécifications de couple 5.7 Spécifications du secteur...
-
Página 106: Introduction
• Protection IP65 • Ces documents sont disponibles dans la rubrique de Interrupteur PV téléchargement à l'adresse www.SMA.de, ou auprès du • Connecteurs Sunclix pour entrée photovoltaïque fournisseur de l'onduleur solaire. • Accès manuel à la configuration et à la surveillance de l'onduleur via l'affichage •... -
Página 107: Pièces De Rechange
Numéro de série, situé sous le code à barres, pour l'identification de l'onduleur. 1.3 Pièces de rechange 1.6 Séquence d'installation Contacter SMA Solar Technology AG pour obtenir des Tenir particulièrement compte de la section informations sur les pièces de rechange, les références et 1.1 Safety Message Types. -
Página 108: Retour Et Mise Au Rebut
à SMA Solar Technology AG, ou mis au rebut conformément aux réglementations locales et nationales. SMA Solar Technology AG est très attaché à sa politique de responsabilité environnementale et demande par conséquent aux utilisateurs mettant au rebut les onduleurs de respecter la législation locale en matière... -
Página 109: Présentation De La Zone D'iNstallation
Introduction 1.8 Présentation de la zone d'installation PELV (peuvent être touchés sans danger) Interface RS-485 Fente d'option A (peut être utilisée pour l'option GSM, l'option interface capteur ou l'option PLA) Interface Ethernet Fente d'option A (peut être utilisée pour l'option GSM, l'option interface capteur ou l'option PLA) Partie sous tension Zone de connexion PV Carte de communication... -
Página 110: Installation
Installation 2 Installation 2.1 Environnement et dégagements Illustration 2.6 Installer à la verticale sur une surface verticale. Une inclinaison inférieure ou égale à 10 degrés est permise. Illustration 2.1 Éviter toute exposition continue à l'eau Illustration 2.7 Éviter la présence de poussière et de gaz Illustration 2.2 Éviter la lumière directe du soleil ammoniac AVIS! -
Página 111: Montage De La Plaque De Montage
Installation 2.2 Montage de la plaque de montage Illustration 2.8 Dégagements de sécurité AVIS! Veiller à un dégagement de 620 mm à la base pour que l'air circule correctement. L00410568-03_2q / Rev. date: 2014-06-20... -
Página 112: Montage De L'oNduleur
Installation Illustration 2.10 Montage de la plaque de montage 2.3 Montage de l'onduleur ATTENTION Illustration 2.9 Plaque de montage Pour manipuler l'onduleur en toute sécurité, faire appel à deux personnes pour porter l'appareil ou utiliser un chariot de transport adapté. Porter des chaussures de AVIS! sécurité. -
Página 113: Démontage De L'oNduleur
Installation Sur l'onduleur, placer les vis latérales contre les Protection antivol (en option) fentes de la plaque de montage. Pour protéger l'onduleur contre le vol, fixer comme suit : Pousser l'onduleur comme indiqué afin que les Utiliser 2 vis de sécurité, M5 x 8-12 (non fournies). vis latérales glissent dans les 2 fentes inférieures Insérer les vis dans les orifices antivol prépercés puis dans les 2 fentes supérieures. -
Página 114: Raccordement Au Réseau Ca
Installation Illustration 2.16 Dénudage du câble CA Illustration 2.14 Desserrer les vis avant et soulever le couvercle Sur le câble CA, dénuder l'isolation des 5 fils. Le fil de terre de protection doit être plus long que les fils de neutre et 2.6 Raccordement au réseau CA secteur. -
Página 115: Connexions Rs-485 Ou Ethernet
Installation Insérer le câble dans le presse-étoupe CA jusqu'aux borniers. Connecter les 3 fils secteur (L1, L2, L3), le fil de neutre (N) et le fil de terre de protection (PE) au bornier avec les repères correspondants. En option : Effectuer un raccordement PE supplé- mentaire au niveau des points de mise à... -
Página 116: Fermeture
Installation 2.9 Fermeture polarité ne risque d'endommager ni l'onduleur, ni les connecteurs. Fermer le couvercle de la zone d'installation de l'onduleur. Serrer les 2 vis avant. Allumer l'alimentation CA. 2.10 Connexion PV AVERTISSEMENT Les modules photovoltaïques génèrent de la tension lorsqu'ils sont exposés à... -
Página 117: Classe De Protection Pour Les Modules Pv
Installation 2.10.1 Classe de protection pour les ATTENTION modules PV Installation PV Les entrées PV inutilisées ne peuvent pas être court- L'onduleur ne doit être utilisé qu'avec des modules PV de circuitées. classe de protection II, conformes à la norme CEI 61730, classe d'application A. -
Página 118: Configuration Initiale Et Démarrage
Configuration initiale et d... 3 Configuration initiale et démarrage 3.1 Interface utilisateur Connexion en cours (voyant vert clignotant) L'onduleur démarre lorsque la tension d'entrée PV atteint L'interface utilisateur comprend : 250 V. L'onduleur effectue une série de tests internes, dont la détection automatique PV et la mesure de la résistance •... -
Página 119: Préparation Pour Onduleur Maître
Maître → Réseau]. • Demander les codes de connexion de service à SMA Solar Technology AG. 3.1.4 Configuration PV manuelle • Saisir l'identifiant de connexion à l'écran ou dans la fenêtre d'ouverture de session de l'interface Configurer l'onduleur pour une configuration PV manuelle : Web. -
Página 120: Écran
Configuration initiale et d... 3.2 Écran Touche Fonction Revenir en arrière/ Back AVIS! désélectionner Voyant allumé/ L'écran reste activé pendant 10 secondes maximum On (LED clignotant = en ligne/ après la mise sous tension. verte) connexion en cours Alarme (LED Voyant clignotant = L'écran intégré... - Página 121 Configuration initiale et d... Sélectionner la langue lorsque l'écran le demande. Cette Pour activer le mode Maître, accéder au menu Détails onduleur [Configuration → Détails onduleur → Mode sélection n'a pas d'influence sur les paramètres de fonctionnement de l'onduleur et il ne s'agit pas d'une Maître] et régler le mode Maître sur Activé.
- Página 122 Configuration initiale et d... AVIS! connectées en parallèle, saisir la puissance PV installée moyenne de chaque entrée PV, comme montré dans les Régler la date et l'heure avec précision. L'onduleur utilise exemples. ces informations pour la journalisation. Si la date/l'heure sont mal réglées par erreur, il convient de les rectifier Saisir cette valeur immédiatement en passant par le menu de réglage de la...
-
Página 123: Activer L'iNterrupteur Pv
Seul du personnel agréé est autorisé à configurer très important de choisir le code réseau qui convient. l'onduleur. Les modifications seront enregistrées dans un journal et SMA Solar Technology AG n'assume aucune responsabilité pour tout dommage causé suite à une modification de la configuration de l'onduleur. -
Página 124: Procédure De Test Automatique
à distance à l'onduleur. connectivité limitée (si aucun DHCP n'est Se reporter à la rubrique de téléchargement à l'adresse présent). Ouvrir le navigateur Internet et s'assurer www.SMA.de pour consulter les instructions les plus que les fenêtres contextuelles ne sont pas récentes. bloquées. - Página 125 Configuration initiale et d... AVIS! Cette sélection définit la langue de l'affichage, mais pas le code réseau. Illustration 3.11 Étape 1 sur 8 : langue d'affichage Pour modifier le paramètre de langue ultérieurement, aller à [Configuration → Détails de configuration]. Étape 2 sur 8 : définition du maître Pour définir un onduleur maître, cliquer sur Définir comme maître.
- Página 126 Configuration initiale et d... • le fuseau horaire. La précision est importante car la date et l'heure sont utilisées aux fins de journalisation. Le passage à l'heure d'été est automatique. Illustration 3.13 Étape 3 sur 8 : heure et date Pour changer ces réglages ultérieurement, accéder à...
- Página 127 Configuration initiale et d... ATTENTION Un réglage incorrect peut avoir de lourdes conséquences sur l'efficacité de la production. Illustration 3.14 Étape 4 sur 8 : puissance installée Dans l'interface Web, accéder à [Niveau onduleur : Configuration → Calibrage, panneau PV]. Étape 5 sur 8 : pays d'installation Sélectionner le réglage qui correspond au lieu de l'installation.
- Página 128 Configuration initiale et d... Choisir de nouveau le code réseau pour confirmer. • Ce réglage s'active automatiquement. ATTENTION La sélection adéquate est essentielle pour être en conformité avec les normes locales et nationales. Illustration 3.16 Étape 6 sur 8 : code réseau AVIS! Si le réglage initial et le réglage de confirmation diffèrent,...
- Página 129 Configuration initiale et d... AVIS! Lorsque la configuration PV, la puissance PV installée et la surface des panneaux PV des onduleurs suiveurs du réseau diffèrent de celles de l'onduleur maître, ne pas reproduire les réglages. Configurer individuellement les onduleurs suiveurs. Illustration 3.17 Étape 7 sur 8 : reproduction des réglages Étape 8 sur 8 : mise en service de l'onduleur L'assistant affiche un aperçu de la configuration.
- Página 130 Configuration initiale et d... Illustration 3.18 Étape 8 sur 8 : mise en service de l'onduleur Pour changer le réglage ultérieurement, accéder à l'onduleur via l'interface Web ou via l'écran, au niveau de l'onduleur. Pour modifier le nom de l'onduleur, aller dans [Niveau onduleur : Configuration → Détails onduleur]. •...
-
Página 131: Interface Web
Configuration initiale et d... 3.3.4 Interface Web La présentation de l'interface Web est structurée comme suit. Illustration 3.19 Présentation • Nom de l'installation : affiche le nom actuel de Cliquer sur un nom d'onduleur pour afficher la vue de l'onduleur. l'installation : •... -
Página 132: Vues De L'oNduleur, Du Groupe Et De L'iNstallation
Contact : ouvre une fenêtre contextuelle Le contenu du menu principal change selon la vue qui affiche les informations de contact actuellement sélectionnée : l'installation, un groupe de SMA Solar Technology AG. d'onduleurs ou un onduleur particulier. • Déconnexion : ouvre la boîte de dialogue d'ouverture/de fermeture de session. -
Página 133: Procédure De Test Automatique
Configuration initiale et d... Élément Unité Description Installation Onduleur et groupe État global de l'instal- Rouge : RP de l'installation < 50 % ou : lation un onduleur du réseau - est en mode Sécurité intégrée ou - est absent de la liste d'analyse, aucun contact avec le maître. Jaune : un onduleur du réseau - a un RP<... -
Página 134: Service
Service 4 Service 4.1 Dépannage même que la liste des 20 derniers événements. Lorsque l'onduleur passe en mode En ligne, l'événement le plus Ce guide fournit des tableaux indiquant les messages récent est supprimé et remplacé par 0. apparaissant à l'écran de l'onduleur, appelés événements. Le code d'événement se compose de deux éléments : le Les tableaux contiennent la description des événements et classificateur de groupe et l'ID événement. - Página 135 Service Message Description Action DNO Assistance d'état téléphonique 25– Perte de secteur, tensions Appeler l'installateur et l'informer de la tension sur les phase à phase trop basses. trois phases. Vérifier la tension phase à phase et l'installation CA. 28– Perte de secteur, taux de Si l'événement se produit de nouveau plusieurs fois changement de fréquence par jour, contacter le fournisseur d'électricité.
- Página 136 Service Message Description Action DNO Assistance d'état téléphonique 112-114 Défaut config. PV Appeler l'installateur. Installateur : Contacter le SAV. ISO PV trop La résistance entre la masse et le Procéder à une inspection visuelle de tous les basse PV est trop faible pour que câbles et modules PV pour une installation l'onduleur puisse démarrer.
-
Página 137: Maintenance
Service Message Description Action DNO Assistance d'état téléphonique Erreur de Un défaut de plausibilité s'est Contrôler le journal des événements pour plausibilité FSP produit au niveau du processeur consulter les autres événements de réseau de sécurité fonctionnelle. (1-55) et suivre les instructions correspon- dantes. -
Página 138: Données Techniques
Données techniques 5 Données techniques 5.1 Spécifications 5.1.1 Spécifications de l'onduleur Nomen- Paramètre Gamme FLX clature Puissance apparente 5 kVA 6 kVA 7 kVA 8 kVA 9 kVA nominale Puissance active ac,r 5 kW 6 kW 7 kW 8 kW 9 kW nominale Puissance active au... - Página 139 Données techniques Nomen- Paramètre Gamme FLX clature Rendement MPPT, 99,7 % dynamique Tension CC max. 1 000 V dcmax Tension de dcstart 250 V démarrage CC Tension d'arrêt CC 220 V dcmin Courant MPP max. 12 A par entrée PV dcmax Courant max.
- Página 140 Données techniques Nomen- Paramètre Gamme FLX clature 12.5 Puissance apparente 10 kVA 12,5 kVA 15 kVA 17 kVA nominale Puissance active ac,r 10 kW 12,5 kW 15 kW 17 kW nominale Puissance active au 9,5 kW 11,9 kW 14,3 kW 16,2 kW cos(phi) = 0,95 Puissance active au...
- Página 141 Données techniques Nomen- Paramètre Gamme FLX clature 12.5 Courant max. de court-circuit CC (en 13,5 A par entrée PV STC) Puissance min. en 20 W ligne Rendement Rendement max. 97.9% 98.0% 98.0% 98.1% Rendement Euro, V à 97.2% 97.3% 97.4% 97.6% dc,r Autres...
-
Página 142: Limites De Réduction
Données techniques Paramètre Gamme FLX Type de connecteur Sunclix Mode parallèle Interface Ethernet (interface Web), RS-485 Options Kit d'option GSM, Option interface capteur, Option PLA Balayage PV Fonctionnement en surcharge Changement du point de fonctionnement Fonctionnalité de réseau Alimentation sans panne Intégré, ou via un dispositif externe Contrôle de puissance active Contrôle de puissance réactive... -
Página 143: Conditions D'iNstallation
Données techniques Gamme FLX Normes 12.5 internationales Directive CEM 2004/108/EC Consignes de sécurité CEI 62109-1/CEI 62109-2 Interrupteur PV intégré VDE 0100-712 Sécurité fonctionnelle CEI 62109-2 EN 61000-6-1 Immunité CEM EN 61000-6-2 EN 61000-6-3 Émission CEM EN 61000-6-4 Interférence de raccor- EN 61000-3-2/-3 EN 61000-3-11/-12 dement au réseau... -
Página 144: Exigences Ute En France
Données techniques Paramètre Condition Spécification Plaque de montage Diamètre des trous 30 x 9 mm Perpendiculaire à des angles de ±5° Alignement Tableau 5.8 Spécifications de la plaque de montage 5.4.1 Exigences UTE en France AVIS! En France, observer les exigences UTE C 15-712-1 et NF C 15–100 exigences. - Página 145 Données techniques Illustration 5.2 Gamme FLX 5, Pertes de câble [%] par rapport Illustration 5.5 Gamme FLX 8, Pertes de câble [%] par rapport à la longueur de câble [m] à la longueur de câble [m] Illustration 5.3 Gamme FLX 6, Pertes de câble [%] par rapport Illustration 5.6 Gamme FLX 9, Pertes de câble [%] par rapport à...
-
Página 146: Spécifications De Couple
Données techniques 5.6 Spécifications de couple Illustration 5.8 Gamme FLX 12.5, Pertes de câble [%] par rapport à la longueur de câble [m] Illustration 5.11 Présentation de l'onduleur avec mentions de couple 1 Paramètre Outil Couple de serrage Corps de presse- Clé... -
Página 147: Spécifications Du Secteur
Données techniques Paramètre Outil Couple de serrage Corps de presse- Clé 42 mm 7,5 Nm étoupe M32 Presse-étoupe Clé 42 mm 5,0 Nm M32, écrou de compression Bornes sur Pozidriv PZ2 ou 2,0 - 4,0 Nm bornier AC fente droite 1,0 x 5,5 mm Torx TX 20 ou 2,2 Nm... -
Página 148: Connexions Rs-485 Et Ethernet
Données techniques Le nombre max. d'onduleurs est 100. Si un modem GSM est utilisé Pour un usage extérieur, un câble enterrable d'extérieur (s'il est pour l'envoi vers un portail, le nombre d'onduleurs dans un réseau enterré dans la terre) est recommandé pour Ethernet et RS-485. est limité... -
Página 149: Topologie Du Réseau
Données techniques Illustration 5.15 Détail du brochage RJ-45 pour Ethernet Couleur standard Brochage Cat 5 Cat 5 Ethernet T-568A T-568B 1. RX+ Vert/blanc Orange/blanc Linéaire en cascade 2. RX Vert Orange Topologie en étoile 3. TX+ Orange/blanc Vert/blanc Topologie en anneau (non autorisée) Bleu Bleu (commutateur Ethernet) -
Página 150: Seguridad Y Conformidad
Seguridad y Conformidad Seguridad y Conformidad Tipos de mensajes de seguridad Seguridad general En este documento, se utilizan los símbolos descritos a Todas las personas que efectúen tareas de instalación y continuación: mantenimiento de inversores deberán: • tener experiencia y formación sobre las normas PELIGRO generales de seguridad para trabajar con equipos eléctricos;... -
Página 151: Conformidad
Seguridad y Conformidad Conformidad Para obtener más información, vaya a la zona de descarga en www.SMA.de, Homologaciones y certificados. Consulte también 5 Technical Data. Marcado CE: este símbolo certifica la conformidad del equipo con los requisitos de las directivas CE aplicables. - Página 152 Índice Índice 1 Introducción 1.1 Objetivo de este manual 1.2 Versión de software 1.3 Recambios 1.4 Desembalaje 1.5 Identificación del inversor 1.6 Secuencia de instalación 1.7 Devolución y eliminación 1.7.1 Devolución 1.7.2 Eliminación 1.8 Información general sobre el área de instalación 2 Instalación 2.1 Entorno y espacios 2.2 Montaje de la placa de montaje...
- Página 153 Índice 3.3.5 Vistas de planta, grupo e inversor 3.3.6 Procedimiento de verificación automática 4 Mantenimiento 4.1 Resolución de problemas 4.2 Mantenimiento 5 Datos técnicos 5.1 Especificaciones 5.1.1 Especificaciones del inversor 5.2 Límites de reducción de potencia 5.3 Conformidad 5.4 Condiciones de la instalación 5.5 Especificaciones de los cables 5.6 Especificaciones del par 5.7 Especificaciones del circuito de la red eléctrica...
-
Página 154: Introducción
• Carcasa IP65 Estos documentos están disponibles en la zona de • Seccionador de corte en carga FV descarga en www.SMA.de, o a través del proveedor del inversor solar. • Conectores Sunclix para las entradas FV • Acceso manual a la configuración y monitori- zación del inversor mediante el display... -
Página 155: Recambios
Active la CA con el interruptor de la red eléctrica. • Tornillos de seguridad, M5 × 8-12 (opcionales) Configure el idioma, el modo maestro, la hora, la (no disponibles como productos de SMA Solar fecha, la potencia FV instalada, el país y el ajuste Technology AG) de red: 1.5 Identificación del inversor... -
Página 156: Devolución Y Eliminación
1.7.1 Devolución Para la devolución a SMA Solar Technology AG, el inversor debe estar siempre en su embalaje original o un embalaje equivalente. Si el producto se devuelve por un fallo del inversor, póngase en contacto con su proveedor del... -
Página 157: Información General Sobre El Área De Instalación
Introducción 1.8 Información general sobre el área de instalación PELV (contacto seguro) Interfaz RS-485 Ranura opcional A (puede utilizarse para la opción GSM, Sensor Interface opcional u opción PLA) Interfaz Ethernet Ranura opcional A (puede utilizarse para la opción GSM, Sensor Interface opcional u opción PLA) Pieza en tensión Área de conexión FV Placa de comunicación... -
Página 158: Instalación
Instalación 2 Instalación 2.1 Entorno y espacios Ilustración 2.6 Móntelo recto en una superficie vertical. Se permite una inclinación de hasta 10º Ilustración 2.1 Evite el flujo constante de agua Ilustración 2.7 Evite que se produzcan polvo y gases de Ilustración 2.2 Evite la luz solar directa amoniaco AVISO! -
Página 159: Montaje De La Placa De Montaje
Instalación 2.2 Montaje de la placa de montaje Ilustración 2.8 Espacios de seguridad AVISO! Asegureun espacio libre de 620 mm en la base para que el aire fluya adecuadamente. L00410568-03_2q / Rev. date: 2014-06-20... -
Página 160: Montaje Del Inversor
Instalación Ilustración 2.10 Montaje de la placa de montaje 2.3 Montaje del inversor PRECAUCIÓN Ilustración 2.9 Placa de montaje Para manipular de forma segura el inversor, es necesario que dos personas transporten la unidad, o bien utilizar una carretilla para su transporte. Lleve botas de AVISO! seguridad. -
Página 161: Desmontaje Del Inversor
Instalación En el inversor, coloque los tornillos laterales Compruebe que los 4 tornillos laterales se hayan contra las ranuras de la placa de montaje. asentado correctamente en las ranuras de la placa de montaje. Empuje el inversor tal y como se muestra, de manera que los tornillos laterales se deslicen en Suelte el inversor. -
Página 162: Conexión De Red De Ca
Instalación Ilustración 2.16 Funda de cable de CA Ilustración 2.14 Aflojelos tornillosfrontalesy levante la cubierta En el cable de CA, quite el aislamiento de los cinco cables. 2.6 Conexión de red de CA El cable PE debe ser más largo que los cables neutros y de la red eléctrica. -
Página 163: Conexiones Ethernet O Rs
Instalación Abra la cubierta frontal. Introduzca el cable a través del prensaestopas de CA hasta el bloques de terminales. Conecte los tres cables de la red eléctrica (L1, L2 y L3), el cable neutro (N) y el cable de conexión a tierra protectora (PE) al bloque de terminales con el marcado correspondiente. -
Página 164: Cierre
Instalación 2.9 Cierre polaridad inversa no daña el inversor ni los conectores. Cierre la cubierta del área de instalación del inversor. Apriete los dos tornillos frontales. Active la potencia de CA. 2.10 Conexión FV ADVERTENCIA Los módulos FV producen tensión cuando se exponen a la luz. -
Página 165: Valor Nominal
Instalación 2.10.1 Valor nominal PRECAUCIÓN Instalación FV El inversor debe ejecutarse únicamente con módulos FV de Las entradas FV no utilizadas pueden no estar cortocir- clase de protección II, que cumplan con la norma IEC cuitadas. 61730, clase de aplicación A. La tensión nominal del módulo debe ser superior a 480 V (la tensión nominal del módulo habitual es de 1000 V). -
Página 166: Configuración Inicial Y Arranque
Configuración inicial y arr... 3 Configuración inicial y arranque 3.1 Interfaz de usuario Conectando (LED verde parpadeante) El inversor se inicia cuando la tensión de entrada FV La interfaz de usuario se compone de: alcanza los 250 V. Realiza una serie de autopruebas internas, que incluyen la autodetección FV y la medición •... -
Página 167: Preparación Del Inversor Maestro
3.1.4 Configuración FV manual • Obtenga el inicio de sesión de mantenimiento de SMA Solar Technology AG. Ajuste el inversor para configuración FV manual: • Introduzca el inicio de sesión en la pantalla o en •... -
Página 168: Configuración Inicial Mediante El Display
Configuración inicial y arr... El display tiene 2 modos: Tecla Función El inversor está Normal: el display se está utilizando. configurado como Ahorro de energía: transcurridos 10 minutos de master. Este icono inactividad, se desconecta la retroiluminación del aparece en la esquina display para ahorrar energía. - Página 169 Configuración inicial y arr... Ilustración 3.2 Selección de idioma Ilustración 3.4 Configuración de la hora En la puesta en marcha inicial, está preseleccionado el Puede configurar la hora desde el display. Pulse [OK] para ▲ idioma inglés. Para cambiarlo, pulse el botón [OK]. Pulse seleccionar el número.
- Página 170 Configuración inicial y arr... Configure la fecha como se indica en el display. Pulse [OK] ▲ para seleccionar. Pulse [ ] para desplazarse por los números. Pulse [OK] para seleccionar. Ilustración 3.7 Selección del país Ilustración 3.6 Potencia FV instalada Introduzca la potencia FV instalada para cada una de las entradas FV.
-
Página 171: Encienda El Interruptor De Carga Fv
No se permiten espacios para el nombre del inversor. personal autorizado puede configurar el inversor. Los cambios se registrarán y SMA Solar Technology AG no se Para el nombre de la planta, el grupo y el inversor, solo se hará responsable del daño causado al cambiar la admiten los caracteres siguientes: configuración del inversor. -
Página 172: Preparación Para La Configuración
Configuración inicial y arr... el explorador de internet y asegúrese de que las Minúsculas abcdefghijklmnopqrstuvwxyz ventanas emergentes estén habilitadas. Mayúsculas ABCDEFGHIJKLMNOPQRSTUVWXYZ Números 0123456789 Escriba una de las opciones siguientes en la barra Caracteres - _. de dirección: especiales • Para Windows XP y versiones de Windows más antiguas: http:// 3.3.1 Preparación para la configuración invertername, «invertername»... - Página 173 Configuración inicial y arr... AVISO! Esta selección define el idioma del display, no el ajuste de red. Ilustración 3.11 Paso 1 de 8: idioma del display Para cambiar el ajuste de idioma más tarde, vaya a [Configuración → Detalles de configuración]. Paso 2 de 8: configuración de inversor master Para configurar un inversor master, haga clic en «Configurar como master».
- Página 174 Configuración inicial y arr... La precisión es muy importante porque la fecha y la hora se usan para efectos de registro. El ajuste para el ahorro de luz diurna es automático. Ilustración 3.13 Paso 3 de 8: fecha y hora Para cambiar este ajuste más tarde, diríjase a [Nivel del inversor: Configuración →...
- Página 175 Configuración inicial y arr... Para modificar la potencia instalada, vaya a [Nivel del inversor: Configuración → Calibración, Matriz FV]. Paso 5 de 8: país de instalación Seleccione el ajuste que corresponda con la ubicación de la instalación. PRECAUCIÓN Seleccionar el ajuste correcto es fundamental para cumplir los estándares nacionales y locales.
- Página 176 Configuración inicial y arr... PRECAUCIÓN Seleccionar el ajuste correcto es fundamental para cumplir los estándares nacionales y locales. Ilustración 3.16 Paso 6 de 8: ajuste de red AVISO! Si los ajustes iniciales y de confirmación son distintos, • la selección de ajuste de red se cancela y •...
- Página 177 Configuración inicial y arr... AVISO! No realice la replicación si la configuración FV, la potencia FV instalada y el área de la matriz FV de los inversores follower en la red son distintos a los del inversor master. Configure los inversores follower de forma individual.
- Página 178 Configuración inicial y arr... Ilustración 3.18 Paso 8 de 8: arranque del inversor Para cambiar la configuración más tarde, acceda al inversor a través de la interfaz web o el display, en el nivel del inversor. Para cambiar el nombre del inversor, vaya a [Nivel del inversor: Configuración → Detalles del inversor]. •...
-
Página 179: Interfaz Web
Configuración inicial y arr... 3.3.4 Interfaz web La vista general de la interfaz web está estructurada de la forma siguiente. Ilustración 3.19 Información general • Nombre de la planta: muestra el nombre de la Haga clic en un nombre de inversor para mostrar la vista de inversor. -
Página 180: Vistas De Planta, Grupo E Inversor
El contenido del menú principal cambia en función de la que muestra la información de contacto vista seleccionada actualmente: la planta, el grupo de de SMA Solar Technology AG. inversores o un inversor individual. • Cierre de sesión: abre el cuadro de diálogo de inicio / cierre de sesión. -
Página 181: Procedimiento De Verificación Automática
Configuración inicial y arr... Concepto Unidad Visualización Descripción Planta y Inversor grupo Estado general de la Rojo: PR planta <50 %, o: planta cualquier inversor en la red - en modo a prueba de fallos, o - no existe en la lista de exploración, sin contacto con el master Amarillo: cualquier inversor en la red - con PR<70 % o - en modo Conectando o Desconectado de la red... -
Página 182: Mantenimiento
Mantenimiento 4 Mantenimiento 4.1 Resolución de problemas así como la lista de las veinte últimas incidencias registradas. Cuando el inversor se encuentra en el modo Esta guía proporciona tablas en las que se muestran los de red, la última incidencia se borra y se muestra como 0. mensajes que aparecen en el display del inversor, El código de incidencias consta de dos elementos: el conocidos como incidencias. - Página 183 Mantenimiento Mensaje Descripción Acción DNO Línea de de estado asistencia técnica 10– Tensión de red demasiado alta. Llame al instalador e infórmele acerca de la tensión en la fase de la red. 16– El inversor ha detectado un Compruebe la tensión y la instalación de CA. pico de tensión en la red.
- Página 184 Mantenimiento Mensaje de Descripción Acción DNO Línea de estado asistencia técnica 103-105 PV current is Hay demasiados módulos FV Póngase en contacto con el instalador. too high/ conectados en paralelo. Solo Instalador: compruebe el n.º de cadenas en waiting. debe aparecer en sistemas recién paralelo y las corrientes nominales.
- Página 185 Mantenimiento Mensaje Descripción Acción DNO Línea de de estado asistencia técnica RCMU over Un cable de la RCMU está roto. Póngase en contacto con el instalador. range Instalador: si la verificación automática no se realiza correctamente, póngase en contacto con el servicio técnico.
-
Página 186: Mantenimiento
Mantenimiento 4.2 Mantenimiento Normalmente, el inversor no necesita mantenimiento ni calibración. Asegúrese de que no se cubre el disipador térmico en la parte posterior del inversor. Limpie los contactos del dispositivo FV una vez al año. Realice la limpieza alternando el interruptor en las posiciones de encendido y apagado diez veces. -
Página 187: Datos Técnicos
Datos técnicos 5 Datos técnicos 5.1 Especificaciones 5.1.1 Especificaciones del inversor Nomen Parámetro Serie FLX clatura Potencia nominal 5 kVA 6 kVA 7 kVA 8 kVA 9 kVA aparente Potencia nominal ac,r 5 kW 6 kW 7 kW 8 kW 9 kW activa Potencia activa en... - Página 188 Datos técnicos Nomen Parámetro Serie FLX clatura Eficiencia MPP, 99,9 % estática Eficiencia MPP, 99,7 % dinámica Tensión de CC máx. 1000 V ccmáx. Tensión CC de ccarr. 250 V encendido Tensión CC de ccmín. 220 V apagado Corriente MPP máx. 12 A por entrada FV ccmáx.
- Página 189 Datos técnicos Nomen Parámetro Serie FLX clatura 12.5 Potencia nominal 10 kVA 12,5 kVA 15 kVA 17 kVA aparente Potencia nominal ac,r 10 kW 12,5 kW 15 kW 17 kW activa Potencia activa en 9,5 kW 11,9 kW 14,3 kW 16,2 kW cos(phi) = 0,95 Potencia activa en...
- Página 190 Datos técnicos Nomen Parámetro Serie FLX clatura 12.5 Tensión CC de ccmín. 220 V apagado Corriente MPP máx. 12 A por entrada FV ccmáx. CC de cortocircuito máx. (en STC) 13,5 A por entrada FV Mín. en potencia de 20 W Eficiencia Eficiencia máx.
-
Página 191: Límites De Reducción De Potencia
Datos técnicos Parámetro Serie FLX Protección frente a cortocircuitos en CC Sí Tabla 5.3 Funciones y características del inversor 5.2 Límites de reducción de potencia Control remoto mediante un dispositivo externo. Parámetro Serie FLX Para garantizar que los inversores puedan producir la Eléctrico potencia nominal, las imprecisiones de medición se tienen Seguridad (clase de... -
Página 192: Condiciones De La Instalación
Datos técnicos Serie FLX IEC 61727 Características de la red EN 50160 Contador de energía S0 EN 62053-31, anexo D (opcional) Tabla 5.6 Cumplimiento de los estándares internacionales 5.4 Condiciones de la instalación Parámetro Especificaciones De –25 °C a +60 °C (para reducción de potencia por temperatura, consulte la Guía de diseño de Temperatura la serie FLX). -
Página 193: Especificaciones De Los Cables
Datos técnicos 5.5 Especificaciones de los cables AVISO! AVISO! Evite la pérdida de potencia en los cables de más de un La tabla solo muestra longitudes de cable inferiores a 1 % del valor nominal del inversor según los valores 100 m. - Página 194 Datos técnicos Ilustración 5.2 Serie FLX 5, pérdidas de cable [%] frente a Ilustración 5.5 Serie FLX 8, pérdidas de cable [%] frente a longitud del cable [m] longitud del cable [m] Ilustración 5.3 Serie FLX 6, pérdidas de cable [%] frente a Ilustración 5.6 Serie FLX 9, pérdidas de cable [%] frente a longitud del cable [m] longitud del cable [m]...
-
Página 195: Especificaciones Del Par
Datos técnicos 5.6 Especificaciones del par Ilustración 5.8 Serie FLX 12.5, pérdidas de cable [%] frente a longitud del cable [m] Ilustración 5.11 Información general del inversor con indica- ciones del par 1 Parámetro Herramienta Par de apriete Prensaestopas de Llave de 19 mm 3,75 Nm calibre M16... -
Página 196: Especificaciones Del Circuito De La Red Eléctrica
Datos técnicos Parámetro Herramienta Par de apriete Prensaestopas de Llave de 42 mm 7,5 Nm calibre M32 Prensaestopas Llave de 42 mm 5,0 Nm M32, tuerca de compresión Bornero en la Pozidriv PZ2 o 2,0-4,0 Nm zona de ranura recta 1,0 × conexión CA 5,5 mm Torx TX 20 o... -
Página 197: Especificaciones De La Interfaz Auxiliar
Datos técnicos 5.8 Especificaciones de la interfaz auxiliar Interfaz Parámetro Datos de los parámetros Especificaciones RS-485 y Ethernet Cable 2 × 5-7 mm Diámetro exterior del cable (⌀) Tipo de cable Par trenzado apantallado (STP CAT 5e o SFTP CAT 5e) 100-120 Ω... -
Página 198: Topología De Red
Datos técnicos Ilustración 5.14 Datos del diagrama de pines RJ-45 para Ilustración 5.15 Datos del diagrama de pines RJ-45 para RS-485 Ethernet GND (tierra) Diagrama Colores estándar de pines GND (tierra) Cat. 5 Cat. 5 para T-568A T-568B RX/TX A (-) Ethernet BIAS L 1. - Página 199 Datos técnicos Conexión en string Topología en estrella Topología en anillo (no permitida) (Switch Ethernet) Ilustración 5.16 Topología de red AVISO! Los dos tipos de red no pueden ser mezclados. Los inversores solo pueden conectarse en RS-485 o en Ethernet. L00410568-03_2q / Rev.
- Página 200 Sicurezza e conformità Sicurezza e conformità Tipi di messaggio di sicurezza Sicurezza generale Nel presente documento vengono utilizzati i seguenti Tutte le persone che si occupano dell'installazione e della simboli: manutenzione degli inverter devono essere: • addestrate ed esperte delle norme generiche di PERICOLO sicurezza per lavorare sulle apparecchiature elettriche;...
- Página 201 Conformità Per maggiori informazioni, andare all'area di download in www.SMA.de, Approvazioni e certificazioni. Vedere anche 5 Technical Data. Marcatura CE - questo simbolo certifica la conformità dell'attrezzatura ai requisiti delle direttive CE applicabili L00410568-03_2q / Rev.
- Página 202 Sommario Sommario 1 Introduzione 1.1 Scopo del manuale 1.2 Versione software 1.3 Pezzi di ricambio 1.4 Disimballaggio 1.5 Identificazione dell'inverter 1.6 Sequenza d'installazione 1.7 Restituzione e smaltimento 1.7.1 Restituzione 1.7.2 Smaltimento 1.8 Panoramica dell'area di installazione 2 Installazione 2.1 Ambiente e spazi liberi 2.2 Montaggio della piastra di montaggio 2.3 Montaggio dell'inverter 2.4 Rimozione dell'inverter...
- Página 203 Sommario 3.3.5 Viste impianto, gruppo e inverter 3.3.6 Procedura di autotest 4 Assistenza 4.1 Ricerca guasti 4.2 Manutenzione 5 Dati tecnici 5.1 Specifiche 5.1.1 Specifiche dell’inverter 5.2 Limiti di declassamento 5.3 Conformità 5.4 Condizioni di installazione 5.5 Specifiche dei cavi 5.6 Specifiche di coppia 5.7 Specifiche della rete di alimentazione 5.8 Specifiche interfaccia ausiliaria...
-
Página 204: Introduzione
La serie di inverter FLX presenta: Questi documenti sono disponibili nell'area di download • Cassa IP65 alla voce www.SMA.de, oppure possono essere richiesti al • Sezionatore FV fornitore dell'inverter solare. • Connettori Sunclix per l'ingresso FV •... -
Página 205: Pezzi Di Ricambio
Numero di serie, situato sotto il codice a barre, per l'identificazione dell'inverter. 1.3 Pezzi di ricambio 1.6 Sequenza d'installazione Contattare SMA Solar Technology AG per informazioni sui Prestare particolare attenzione a 1.1 Safety pezzi di ricambio, i codici articolo e l'ordinazione. Message Types. -
Página 206: Restituzione
SMA Solar Technology AG direttamente o smaltito nel paese rispettivo. La spedizione al distributore o a SMA Solar Technology AG viene pagata dal mittente. Il riciclaggio e lo smaltimento dell'inverter deve essere effettuato in base a norme e regolamenti applicabili nel paese in cui viene effettuato lo smaltimento. -
Página 207: Panoramica Dell'aRea Di Installazione
Introduzione 1.8 Panoramica dell'area di installazione PELV (può essere toccato) Interfaccia RS 485 Slot opzionale A (può essere usato per l'opzione GSM, l'interfaccia sensori opzionale o l'opzione PLA) Interfaccia Ethernet Slot opzionale A (può essere usato per l'opzione GSM, l'interfaccia sensori opzionale o l'opzione PLA) Parte in tensione Area di connessione FV Scheda di comunicazione... -
Página 208: Installazione
Installazione 2 Installazione 2.1 Ambiente e spazi liberi Disegno 2.6 Montare in posizione eretta su una superficie verticale. È consentita un'inclinazione fino a 10 gradi Disegno 2.1 Evitare un flusso d'acqua continuo Disegno 2.7 Prevenire la polvere e i gas di ammoniaca Disegno 2.2 Evitare la luce solare diretta AVVISO! Quando si progetta un sito d'installazione, assicurarsi che... -
Página 209: Montaggio Della Piastra Di Montaggio
Installazione 2.2 Montaggio della piastra di montaggio Disegno 2.8 Spazi liberi sicuri AVVISO! Assicurare 620 mm di spazio libero alla base per un flusso d'aria adeguato. L00410568-03_2q / Rev. date: 2014-06-20... -
Página 210: Montaggio Dell'iNverter
Installazione Disegno 2.10 Montaggio della piastra di montaggio 2.3 Montaggio dell'inverter ATTENZIONE Disegno 2.9 Piastra di montaggio Per trasportare l'inverter in tutta sicurezza, sono necessarie 2 persone oppure un carrello di trasporto adeguato. Indossare stivali di sicurezza. AVVISO! L'utilizzo della piastra di montaggio fornita insieme all'in- Procedura: verter è... -
Página 211: Rimozione Dell'iNverter
Installazione Sull'inverter, posizionare le viti laterali contro gli Protezione antifurto (opzionale) slot della piastra di montaggio. Per proteggere l'inverter dai furti, fissare nel modo seguente: Spingere l'inverter come mostrato in modo che le viti laterali scorrano nei due slot inferiori, quindi Usare 2 viti di sicurezza, M5 x 8-12 (non fornite). -
Página 212: Connessione Alla Rete Ca
Installazione Disegno 2.16 Spelatura del cavo CA Disegno 2.14 Allentare le viti anteriori e sollevare il coperchio Sul cavo CA, rimuovere la guaina isolante su tutti i 5 2.6 Connessione alla rete CA conduttori. Il conduttore PE deve essere più lungo dei conduttori di rete e dei fili neutri Vedere Disegno 2.16. -
Página 213: Collegamenti Rs-485 O Ethernet
Installazione Inserire il cavo attraverso il passacavo CA fino alla morsettiera. Collegare i 3 cavi di alimentazione (L1, L2, L3), il conduttore neutro (N) e il conduttore di terra di protezione (PE) alla morsettiera con i contrassegni rispettivi. Opzionale: Realizzare un collegamento PE supple- mentare in corrispondenza dei punti di messa a terra PE secondari. -
Página 214: Chiusura
Installazione 2.9 Chiusura non danneggia né l'inverter né i connettori. Chiudere il coperchio dell'area di installazione dell'inverter. Fissare le 2 viti anteriori. Accendere l'alimentazione CA. 2.10 Collegamento dell'impianto FV AVVISO I moduli FV generano tensione quando sono esposti alla luce. NON collegare l'impianto FV a terra. -
Página 215: Grado Di Protezione Per Moduli Fv
Installazione 2.10.1 Grado di protezione per moduli FV ATTENZIONE Installazione FV L'inverter deve essere fatto funzionare solo con moduli FV Gli ingressi FV non devono essere cortocircuitati. con classe di protezione II conformi all'IEC 61730, classe di applicazione A. La tensione nominale del modulo deve essere superiore a 480 V (la tensione nominale tipica del modulo è... -
Página 216: Setup Iniziale E Avviamento
Setup iniziale e avviamento 3 Setup iniziale e avviamento 3.1 Interfaccia utente Conness. in corso (LED verde lampeggiante) L'inverter si avvia quando la tensione di ingresso FV L'interfaccia utente comprende: raggiunge 250 V. L'inverter esegue una serie di autotest interni, incluso il rilevamento automatico FV e la •... -
Página 217: Preparazione Per L'iNverter Master
3.1.4 Configurazione FV manuale durata della giornata corrente. • Richiedere l'accesso di servizio da SMA Solar Impostare l'inverter per la configurazione FV manuale: Technology AG. • Tramite il display, livello di sicurezza 1, in [Setup •... -
Página 218: Setup Iniziale Tramite Il Display
Setup iniziale e avviamento Il display dispone di 2 modalità: Tasto Funzione L'inverter è un follower, Normale: il display è in uso. collegato a un master. Risparmio energetico: Dopo 10 minuti di Questa icona appare inattività del display, la retroilluminazione del nell'angolo superiore display si disinserisce per risparmiare corrente. - Página 219 Setup iniziale e avviamento Disegno 3.2 Seleziona la lingua Disegno 3.4 Imposta l'ora Al primo avviamento la lingua è impostata su inglese. Per Quando sul display appare la corrispondente richiesta, cambiare questa impostazione, premere il pulsante [OK]. impostare l'ora. Premere [OK] per selezionare il numero. ▼...
- Página 220 Setup iniziale e avviamento Quando sul display appare la corrispondente richiesta, per scorrere l'elenco delle impostazioni verso il basso. Per impostare la data. Premere [OK] per selezionare. Premere selezionare l'impostazione desiderata, premere [OK]. ▲ ] per scorrere i numeri verso l'alto. Selezionare premendo [OK].
-
Página 221: Attivazione Dell'iNterruttore Del Carico Fv
Per il nome dell'inverter non sono consentiti spazi. Solo al personale autorizzato è consentito configurare l'inverter. Le modifiche verranno registrate e il SMA Solar Per il nome dell'impianto, del gruppo e dell'inverter, sono Technology AG non accetta alcuna responsabilità per... -
Página 222: Preparativi Per Il Setup
Setup iniziale e avviamento DHCP). Aprire il browser Internet ed assicurarsi Lettere abcdefghijklmnopqrstuvwxyz che i popup siano abilitati. Lettere ABCDEFGHIJKLMNOPQRSTUVWXYZ maiuscole Digitare 1 delle seguenti opzioni nel campo degli Numeri 0123456789 indirizzi: Caratteri - _. • Per Windows XP e versioni Windows più speciali vecchie: http://invertername, dove 'nomeinverter' sono le ultime 10 cifre... - Página 223 Setup iniziale e avviamento AVVISO! Questa selezione definisce la lingua nel display, non il codice di rete. Disegno 3.11 Passo 1 di 8: lingua di visualizzazione Per modificare l'impostazione della lingua in un secondo momento, andare a [Setup → Dettagli setup]. Passo 2 di 8: impostazione master Per impostare un inverter master, fare clic su •...
- Página 224 Setup iniziale e avviamento Disegno 3.13 Passo 3 di 8: ora e data Per modificare queste impostazioni in un secondo momento, andare su [Livello inverter: Setup → Imposta data e ora]. Passo 4 di 8: potenza installata Per ciascun ingresso FV, immettere la potenza FV installata. I valori della potenza FV installata vengono usati per calcolare il rapporto di prestazione.
- Página 225 Setup iniziale e avviamento Selezionare l'impostazione che corrisponda al luogo dell'installazione. ATTENZIONE La selezione corretta è essenziale per soddisfare gli standard locali e nazionali. Disegno 3.15 Passo 5 di 8: Paese di installazione Passo 6 di 8: Codice di rete Selezionare il codice di rete che corrisponda al luogo dell'impianto.
- Página 226 Setup iniziale e avviamento ATTENZIONE La selezione corretta è essenziale per soddisfare gli standard locali e nazionali. Disegno 3.16 Passo 6 di 8: Codice di rete AVVISO! Se le impostazioni iniziali e di conferma sono diverse, • la selezione del codice di rete viene cancellata e •...
- Página 227 Setup iniziale e avviamento AVVISO! Quando la configurazione FV, la potenza FV installata e PV l'area array degli inverter follower nella rete differiscono da quella del master, non replicare. Impostare gli inverter asserviti separatamente. Disegno 3.17 Passo 7 di 8: replica Passo 8 di 8: avviamento dell'inverter La procedura guidata visualizza una panoramica della configurazione del setup.
- Página 228 Setup iniziale e avviamento Disegno 3.18 Passo 8 di 8: avviamento dell'inverter Per modificare il setup in un secondo momento, accedere all'inverter tramite l'interfaccia web o il display a livello di inverter. Per modificare il nome dell'inverter, andare a [Livello Inverter: Setup → Dettagli inverter]. •...
-
Página 229: Interfaccia Web
Setup iniziale e avviamento 3.3.4 Interfaccia Web La panoramica dell'interfaccia web è strutturata come segue. Disegno 3.19 Panoramica • Nome dell'impianto: Visualizza il nome corrente Fare clic sul nome dell'inverter per dell'impianto: visualizzare la vista dell'inverter. • • Fare clic sul nome dell'impianto per Modificare il nome dell'inverter tramite [Setup →... -
Página 230: Viste Impianto, Gruppo E Inverter
Contatti: Apre una finestra a comparsa funzione della vista attualmente selezionata: l'impianto, che visualizza l'informazione di contatto un gruppo di inverter o un singolo inverter. SMA Solar Technology AG. • Logout: apre la casella di dialogo di login / logout. -
Página 231: Procedura Di Autotest
Setup iniziale e avviamento Elemento Unità Vista Descrizione Impianto e Inverter gruppo Stato dell'impianto Rosso: PR impianto <50% oppure: generale Qualsiasi inverter nella rete - in modalità a prova di guasto oppure - mancante dall'elenco di scansione, nessun contatto con il master Giallo: Qualsiasi inverter nella rete - con PR <70%, oppure - in modalità... -
Página 232: Assistenza
Assistenza 4 Assistenza 4.1 Ricerca guasti degli ultimi 20 eventi. Quando l'inverter passa alla modalità Connesso alla rete, evento più recente viene azzerato e il Questa guida fornisce tabelle che mostrano messaggi che valore visualizzato è 0. appaiono sul display dell'inverter, noti come eventi. La Il codice evento è... - Página 233 Assistenza Messaggio di Descrizione Azione DNO Hotline FV stato 25– Perdita di rete, tensioni da fase a Chiamare l'installatore ed informarlo sulla tensione fase troppo basse. presente su tutte e tre le fasi. Controllare le tensioni da fase a fase e l'installazione CA. 28–...
- Página 234 Assistenza Messaggio di Descrizione Azione DNO Hotline FV stato 112-114 Errore di config. FV Chiamare l'installatore. Installatore: Chiamare l'assistenza. ISO FV troppo La resistenza tra la massa e FV è Effettuare un'ispezione visiva di tutti i cavi FV e bassa troppo bassa per l'avviamento dei moduli per un'installazione corretta in base dell'inverter.
-
Página 235: Manutenzione
Assistenza Messaggio di Descrizione Azione DNO Hotline FV stato 255–257 Scatto di protezione islanding. Chiamare l'installatore. Installatore: Chiamare l'assistenza. La resistenza tra la massa e FV è Chiamare l'installatore. troppo bassa per l'avviamento Installatore: Chiamare l'assistenza. dell'inverter. In questo caso l'inverter eseguirà... -
Página 236: Dati Tecnici
Dati tecnici 5 Dati tecnici 5.1 Specifiche 5.1.1 Specifiche dell’inverter Nomen- Parametro Serie FLX clatura Potenza apparente 5 kVA 6 kVA 7 kVA 8 kVA 9 kVA nominale Potenza attiva ac,r 5 kW 6 kW 7 kW 8 kW 9 kW nominale1) Potenza attiva con 4,75 kW... - Página 237 Dati tecnici Nomen- Parametro Serie FLX clatura Tensione MPP - dcmin inseguimento attivo mppmin 220/250 - 800 V 220/260 - 800 V 220/300 - 800 V 220/345 - 800 V 220/390 - 800 V / potenza mppmax nominale Efficienza MPP, 99,9% statica Efficienza MPPT,...
- Página 238 Dati tecnici SPL (livello di pressione sonora) a 1 m in condizioni di funzio- namento normali. Misurata a 25 °C. Nomen- Parametro Serie FLX clatura 12.5 Potenza apparente 10 kVA 12,5 kVA 15 kVA 17 kVA nominale Potenza attiva ac,r 10 kW 12,5 kW 15 kW...
- Página 239 Dati tecnici Nomen- Parametro Serie FLX clatura 12.5 Tensione max. CC 1000 V dcmax Tensione CC di dcstart 250 V accensione Tensione CC di dcmin 220 V spegnimento Max. corrente MPP 12 A per ingresso FV dcmax Max. corrente di cortocircuito CC alle 13,5 A per ingresso FV condizioni di prova...
-
Página 240: Limiti Di Declassamento
Dati tecnici Parametro Serie FLX Opzioni Kit GSM opzionale, interfaccia sensori opzionale, opzione PLA Scansione FV Sì Funzionamento con sovraccarico Cambio del punto di funzionamento Funzionalità di supporto della rete di Insensibilità alle perturbazioni di rete distribuzione Integrato o tramite dispositivo esterno Controllo potenza attiva Sì... -
Página 241: Condizioni Di Installazione
Dati tecnici Serie FLX Sicurezza funzionale IEC 62109-2 EN 61000-6-1 Immunità elettromagnetica EN 61000-6-2 EN 61000-6-3 Emissioni elettroma- gnetiche EN 61000-6-4 Interferenza rete EN 61000-3-2/-3 EN 61000-3-11/-12 Sì IEC 61727 Caratteristiche rete EN 50160 Misuratore di energia S0 EN62053-31 Allegato D (opzione) Tabella 5.6 Conformità... -
Página 242: Specifiche Dei Cavi
Dati tecnici Disegno 5.1 Etichetta di avvertenza 5.5 Specifiche dei cavi AVVISO! AVVISO! Evitare perdite di potenza nei cavi superiori all'1% della La tabella indica solo lunghezze di cavi inferiori ai 100 potenza nominale dell'inverter seguendo i valori indicati nelle tabelle e illustrazioni. Specifiche Serie FLX Lunghezza massima... - Página 243 Dati tecnici Disegno 5.2 Serie FLX 5, perdite dovute al cavo [%] rispetto Disegno 5.5 Serie FLX 8, perdite dovute al cavo [%] rispetto alla lunghezza del cavo [m] alla lunghezza del cavo [m] Disegno 5.3 Serie FLX 6, perdite dovute al cavo [%] rispetto Disegno 5.6 Serie FLX 9, perdite dovute al cavo [%] rispetto alla lunghezza del cavo [m] alla lunghezza del cavo [m]...
-
Página 244: Specifiche Di Coppia
Dati tecnici 5.6 Specifiche di coppia Disegno 5.8 Serie FLX 12.5, perdite dovute al cavo [%] rispetto alla lunghezza del cavo [m] Disegno 5.11 Panoramica dell'inverter con indicazioni di coppia 1 Parametro Attrezzo Coppia di serraggio Corpo del Chiave inglese 19 3,75 Nm passacavo M16 Passacavo M16,... -
Página 245: Specifiche Della Rete Di Alimentazione
Dati tecnici Parametro Attrezzo Coppia di serraggio Corpo del Chiave inglese 42 7,5 Nm passacavo M32 Passacavo M32, Chiave inglese 42 5,0 Nm dado di compressione Morsetti sulla Pozidriv PZ2 o slot 2,0 - 4,0 Nm morsettiera CA diritto 1,0 x 5,5 Torx TX 20 o slot 2,2 Nm diritto 1,0 x 5,5... -
Página 246: Rs-485 E Collegamenti Ethernet
Dati tecnici Il numero massimo di inverter è 100. Se il modem GSM viene usato Per l'uso all'aperto, raccomandiamo il tipo di cavo per esterni per il caricamento sul portale, il numero di inverter in una rete è sotterraneo (se è posato sotto terra) sia per Ethernet che per RS-485. limitato a 50. -
Página 247: Topologia Della Rete
Dati tecnici Disegno 5.15 Dettaglio piedinatura RJ-45 per Ethernet Colore standard Piedinatur Cat 5 Cat 5 a Ethernet T-568A T-568B 1. RX+ Verde/bianco Arancione/bianco Lineare "daisy chain" 2. RX Verde Arancione Topologia a stella 3. TX+ Arancione/bianco Verde/bianco Topologia ad anello (non consentita) (Switch Ethernet) Blu/bianco Blu/bianco... - Página 248 This also applies to products already on order provided that such alterations can be made without subsequential changes being necessary in specifications already agreed. All trademarks in this material are property of the respective companies. SMA Solar Technology AG and the SMA Solar Technology AG logotype are trademarks of SMA Solar Technology AG All rights reserved.