Publicidad
Enlaces rápidos
Seitenschwellersatz
Side Sill Set
Jupe latérale
Minigonna laterale
Laterale minispoiler
Sidokjol
Faldón lateral
Bočnί lem
サイドスカート
サイドスカート
サイドスカート
サイドスカート
Teilenummer / Part number / Référence / Numero pezzo /
Onderdeelnummer
Artikelnummer / Número de pieza / Číslo dílu / 部品数
Montageanleitung
Fitting instructions
Notice de montage
Istruzioni di montaggio
Montagehandleiding
Monteringsanvisning
Instrucciones de montaje
Montážní návod
Scirocco VW Zubehör
1K8 071 685
Änderung des Lieferumfanges
vorbehalten.
The right to modify specifications
is reserved.
Sous réserve de modifications.
Ci riserviamo il diritto di apportare modifiche al
contenuto della fornitura.
Wijzigingen in leveringsomvang
voorbehouden.
Ändringar av leveransomfattningen
förbehålles.
Se reservan las modificaciones del volumen de
suministro.
Změny rozsahu dodávky vyhrazeny.
本品の内容を予告なく変更・改良する権利を有しま
す。
Distributed by Volkswagen Zubehör GmbH
USA: Distributed by Volkswagen of
America, Inc. – Corporate Parts Div. –
Troy, MI 48007 – 3951
10/08
Publicidad

Manuales relacionados para Volkswagen 1K8 071 685


Resumen de contenidos para Volkswagen 1K8 071 685
- Página 1 Ändringar av leveransomfattningen förbehålles. Se reservan las modificaciones del volumen de suministro. Změny rozsahu dodávky vyhrazeny. 本品の内容を予告なく変更・改良する権利を有しま す。 Distributed by Volkswagen Zubehör GmbH USA: Distributed by Volkswagen of America, Inc. – Corporate Parts Div. – Troy, MI 48007 – 3951 10/08...
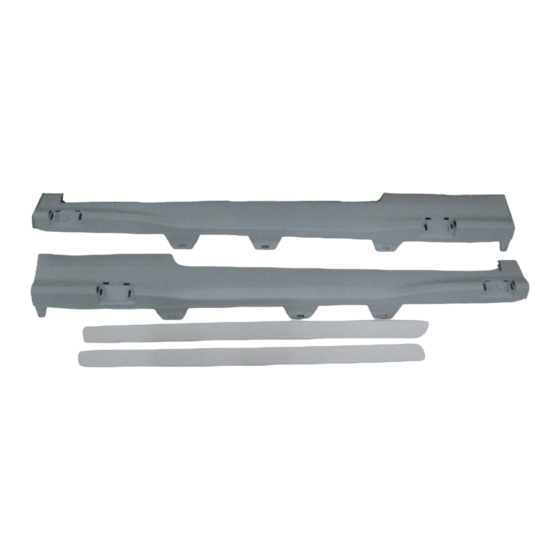
- Página 2 Stückliste Pos. Bezeichnung Stk. Seitenschweller links Seitenschweller rechts Türaufsatzteil Li Türaufsatzeil Re Lackierspezifikation Montageanleitung Schraube 5x16 Adapterteil Deckel Wagenheber Blechklammer ABE/TÜV-Gutachten Distanzstück Spare parts list Liste des pièces Lista dei pezzi Stuklijst Pos. Designation Q.ty Pos. Désignation Q.té Pos. Denominazione Q.tà...
- Página 3 Bitte die Montageanleitung vor Beginn Please read fitting instructions Lire attentivement la notice de sorgfältig lesen. thoroughly before commencing montage avant de commencer. installation. Wir empfehlen die Montage in einer Nous recommandons de confier le Fachwerkstatt durchführen zu lassen. We recommend that fitting is carried montage à...
- Página 4 Antes de comenzar, sírvase leer Před začátkem si laskavě přečtěte atentamente las instrucciones montážní návod! de montaje. Doporučujeme nechat montáž provést Les recomendamos efectuar el montaje v odborné dílně. en un taller especializado. Doporučení: Montážní díl je lícovaně Recomendación: La pieza adosada zpracovaný...
- Página 5 Montagevorbereitung Preparation for fitting 1.1 Bei geöffneter Tür Druckclip 1.1 While keeping the door open, entfernen und Dichtung beiseite remove the pressure clip and push drücken the gasket. 1.2 Schraube vorn und hinten endfernen 1.2 Remove the screws at the front and 1.3 Türleisten an Tür und Seitenteil rear.
- Página 6 Montagevorbereitung Preparation for fitting 1.4 Fahrzeugseitige Unterholme im 1.4 Carefully clean the lower struts on gesamten Anlagebereich der the left and right side skirts on the Seitenschweller li und re und Türen vehicle. gründlich reinigen. 1.5 Im Radhaus vorne li und re die 1.5 Remove the original screws from the untere original bodywork in the left and right front...
- Página 7 Montagevorbereitung Preparation for fitting 1.6 Originale Schraube an der 1.6 Remove the original screws from the Holmunterseite li und re hinten left and right lower struts on the rear entfernen. part. Achtung: Schrauben werden bei der Important: The screws will be used Montage wieder verwendet.
- Página 8 Montagevorbereitung Preparation for fitting 1.7 Entfernen der 3 Gummistopfen 1.7 Remove the 3 rubber caps (1.,2. and (1. 2. und 3. von vorne) re und li im 3. from the front) on the right and left unteren Bereich des Holmes. attached to the lower side of the Dortiges Anbringen der Adapterteile.
- Página 9 Probeverbau der Seitenschweller Trial fitting of side sills 2.1 Schweller mit Deckel und 2.1 Keep the side sills still along with the Türaufsatzteil anhalten und Paßform cover and door fender and check überprüfen. Danach Teile wieder that the profiles correspond. Then abnehmen und nach der Lackier- remove the components again and anleitung lackieren.
- Página 10 Vormontage Seitenschweller Preliminary assembly of side sills 3.1 Clean the lower struts on the left and 3.1 Fahrzeugseitige Unterholme und right side sills on the vehicle again. Türen im Anlagebereich der 3.2 Put the side sills and door fender in Seitenschweller li und re nochmals position and mark the right position gründlich reinigen.
- Página 11 Montaje preliminar de los faldones Předběžná montáž bočních lemů laterales 3.1 Znovu očistěte spodní nosníky levého a pravého bočního lemu automobilu. 3.1 Limpie nuevamente los largueros 3.2 Umístěte boční lemy a blatník dveří a inferiores de los faldones laterales vyznačte si pomocí vhodného nástroje izquierdo y derecho del automóvil.
- Página 12 Vorbereiten Montage Fitting of side sills 4.1 Das Abdeckband entfernen und mit 4.1 Remove the protective tape and rub Schleifpapier die Klebfläche des the adhesive surface of the sill with Schwellers und des Türaufsatzteiles sandpaper; remove any paint abschleifen und Lackreste sorgfältig residue carefully.
- Página 13 Montage Seitenschweller Fitting of side sills 4.3 Beschneiden Sie die Tülle mit einem 4.3 Cut the nozzle again to obtain a 7 Durchmesser von 7mm. mm diameter. 4.4 Den Kleber in einer gleichmäßigen 4.4 Apply a uniform line on the gluing Raupe von ca.
- Página 14 Montage Seitenschweller Fitting of side sills 4.5 Die Seitenschweller gemäß 4.5 Arrange the side sills in accordance Markierungen auflegen und fest with the marked position, then exert andrücken. firm pressure. 4.6 Mittels geeignetem Klebeband die 4.6 Attach the side sill in the right Seitenschweller an der korrekten position using special adhesive tape.
- Página 15 Montaje de los faldones laterales Montáž bočních lemů 4.5 Umístěte boční lemy podle 4.5 Coloque los faldones laterales según vyznačené polohy a poté na ně silou la posición marcada y presione con zatlačte. fuerza. 4.6 Pomocí příslušné lepicí pásky 4.6 Usando cinta adhesiva, fije los připevněte boční...
- Página 16 Montage Seitenschweller Fitting of side skirts 4.7 Schweller in der vorderen Radhaus- 4.7 Push back the skirt in the front wheel schale bis auf Anschlag nach hinten housing bodywork until it stops; schieben, zentrieren und mit der centre and attach to the wheel originalen Schraube in der Radhaus- housing bodywork using the original schale festziehen.
- Página 17 Montage Seitenschweller Fitting of side sills 4.8 An der Mittleren Befestigungslasche 4.8 Place a shim at the central fixing Distanzstück zwischenlegen. eyelet. 4.9 Schweller an den Adaptern mit je 3 4.9 Attach the sill to the adapter with mitgelieferten Schrauben und hinten the 3 screws supplied and behind mit 1 orignalen Schraube fixieren.
- Página 18 Montage Türaufsatzteil Fitting the door fender 5.1 Beschneiden Sie die Tülle mit einem 5.1 Cut the nozzle again to obtain a 7 Durchmesser von 7mm. mm diameter. 5.2 Den Kleber in einer gleichmäßigen 5.2 Apply a uniform line on the gluing Raupe von ca.
- Página 19 Montage Türaufsatzteil Fitting the door fender 5.3 Türaufsatzteil ansetzen und an die 5.3 Place the door fender on the door Tür drücken and press. 5.4 Türaufsatzteile positionieren und 5.4 Position the door fender and attach it mittels geeigneten Klebebands an der in the right position using adhesive korrekten Position fixieren.
- Página 20 Montáž blatníku dveří Montaje del guardabarros de la puerta 5.3 Opřete blatník dveří o dveře a 5.3 Apoye el guardabarros a la puerta y zatlačte na něho silou. presione. 5.4 Umístěte blatník dveří do správné 5.4 Fije el guardabarros de la puerta en polohy a upevněte ho pomocí...
- Página 21 Montage Seitenschweller Assembly of side skirts 5.5 Alle Schrauben an den Unterholmen 5.5 Fasten all screws in the lower strut und im Radhaus festziehen. and wheel housing. Montaggio delle minigonne laterali Montage des jupes latérales 5.5 Fissare tutte le viti sul longherone 5.5 Serrer toutes les vis sur le longeron inferiore e sul passaruota.
- Página 22 Montage Deckel Wagenheber Fitting the jack cover 6.1 Je 2 Blechklammern auf die Deckel 6.1 Put 2 plate clamps onto jack Wagenheber aufstecken. protective cover. 6.2 Den Verlierschutz sowie die zwei 6.2 Fasten protection above and below Laschen oben und unten einhaken along with the two cover plates and und nach innen drehen, bis es turn inwards until it locks into...
- Página 23 Montage Türaufsatzteil Fitting the door fender 7.1 Mit den Serienschrauben 7.1 Firmly tighten the door fender using Türaufsatzteil fest ziehen. (max. the screws supplied (max. 3 Nm) 3Nm) 7.2 Put the gasket back into position and 7.2 Dichtung wieder in Poszion bringen attach it using a pressure clip.
- Página 24 Achtung: Important: 8.1 Fahrzeug 12 Stunden nicht 8.1 Do not use the car for 12 hours! bewegen! The piece must not be subjected 24 Stunden darf keine to mechanical stress for 24 hours! mechanische Beanspruchung des Anbauteiles erfolgen! Do not wash for 48 hours 48 Stunden nicht waschen Attenzione: Attention:...
- Página 25 Bearbeitungsrichtlinie Guidelines for working für grundierte with primed PU hard integral foam PU-Hartintegralschaum-Teile components Schleifen: Naß P 600 Rubbing down: Wet P 600 Basislack: Qualität Herberts: Base paint: Quality Herberts: Entspricht: LMT 626 / ALD 626 UNI Vorlack Corresponds to: LMT 845 / ALD 645 Metallic Vorlack LMT 626 / ALD 626 UNI pore filler LPC 045 / ALD 045 Perlcolor Vorlack...
- Página 26 Instructions de préparation Direttiva di lavorazione per des pièces en mousse de PU rigide componenti in poliuretano espanso apprêtées integralecon verniciatura di fondo Ponçage: Humide P 600 Lucidatura: Ad umido P 600 Laque de Vernice di base: Qualità Herberts: base: Qualité...
- Página 27 Bewerkingsrichtlijn voor gegronde Bearbetningsdirektiv PU hard-integraal-schuim för grundade onderdelen PU-hårt integralskum-delar Slijpen: Nat P 600 Slipning: Våt P 600 Basislak: Kwaliteit Herberts: Grundlack: Kvalitet Herberts: Komt overeen met: Motsvarar: LMT 626 / ALD 626 UNI grondverf LMT 626 / ALD 626 UNI förlack LMT 845 / ALD 645 Metallic grondverf LMT 845 / ALD 645 Metallic förlack LPC 045 / ALD 045 Perlcolor grondverf...
- Página 28 Directiva para el tratamiento de Smìrnice pro zpracování dílù z piezas de material esponjoso inte- polyuretanové tvrdé kompaktní gral duro de poliuretano imprimadas pìny natøené základním lakem Lijado: En húmedo, P 600 brou ení: š za mokra P 600 Esmalte de základní...