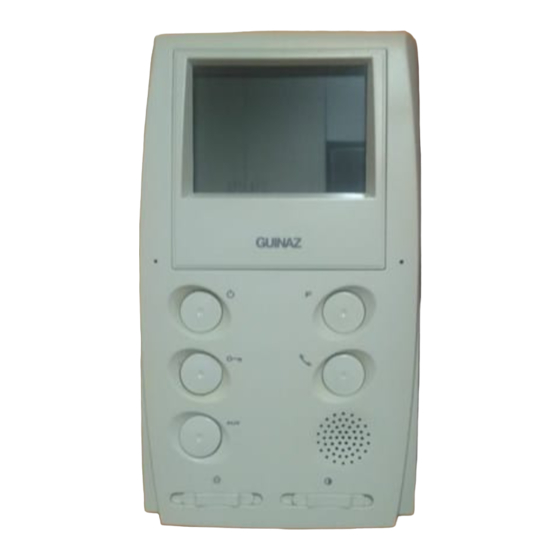
Resumen de contenidos para Guinaz A2420
- Página 1 All manuals and user guides at all-guides.com AUDIO CONTROL GROUP WITH ACCESS SELECTOR FOR HANDS-FREE VIDEO SYSTEMS REF. A2420 GUÍA DE INSTALACIÓN INSTALLATION GUIDE...
- Página 2 BUSY message while the busy line acoustic warning is given by group A2420. Viewer P2600 is connected to group A2420 by means of two connectors supplied with the viewer itself. The steps for installation are shown in the different...
- Página 3 This power supply is for exclusive use in GUINAZ entryphone and video entryphone installations. Its installation will be carried out as specified in this guide while applying the regulations in force.
- Página 4 All manuals and user guides at all-guides.com GRUPO CONTROL AUDIO A2420. AUDIO CONTROL GROUP A2420. The configuration options by means of micro-switches are the following: Microinterruptor 1 (MAIN / SEC): Micro-switch 1 (MAIN / SEC): This configures the street panel as Main (MAIN) or Secondary (SEC).
- Página 5 14F of group A2420. The camera will receive power supply by connecting terminal block 14T of group A2420 to terminal block 14 of the camera. All A2420 groups in an installation will be connected to each other by means of terminal block 9.
- Página 6 All manuals and user guides at all-guides.com INSTALACIÓN PLACA DE CALLE. STREET PANEL INSTALLATION. Place the flush-mounted box. Separate the covers, unscrew both screws and extract module joints. Attach the street panel with Insert modules and joints in the Assemble upper two screws.
-
Página 7: Importante
All manuals and user guides at all-guides.com 6bis Para apertura a la izquierda. To open towards the left. Unscrew right screw and loosen the left one. Move the street panel 1.5 mm to the right and the front. Open the street panel. Ajuste del volumen de placa calle y de monitor (1). - Página 8 All manuals and user guides at all-guides.com COLOCACIÓN DE LOS TARJETEROS. PLACEMENT OF NAME TAGS. Insert the card. Insert in the Separate push-button module Extract the name card unit translucent until it clips in. from the push-button glass part. module of the street panel.
- Página 9 All manuals and user guides at all-guides.com INSTALACIÓN MONITORES. INSTALLATION OF MONITORS. Assemble this wall base panel on the wall Configure the connection card of the wall base using four sleeper-screws and connect it to as indicated in page 14, and connect the the connection card.
- Página 10 All manuals and user guides at all-guides.com Remember 14 is the maximum number of accesses that can be managed with A2420 audio control groups in the same installation. The common audio and power supply wires can start towards dwellings from any street panel of the installation.
- Página 11 ESQUEMA CONEXIONES INSTALACIÓN VÍDEO CON 2 ACCESOS. CONNECTION DIAGRAM OF VIDEO INSTALLATION WITH 2 ACCESSES. POWER SUPPLY CABLE. SIGNAL CABLE. 75 Ohm COAXIAL CABLE. F1320 F1318 F1318 Configuration for Configuration for Group A2420 Group A2420 coaxial cable. coaxial cable. configuration. configuration. G18XXD G18XXD A2420 A2420 P2600...
- Página 12 ESQUEMA CONEXIONES PLACAS CALLE EN INSTALACIÓN DE VÍDEO CON m ACCESOS. CONNECTION DIAGRAM OF STREET PANELS IN VIDEO INSTALLATION WITH m ACCESSES. ACCESS m POWER SUPPLY CABLE. SIGNAL CABLE. Configuration for Group A2420 coaxial cable. 75 Ohm COAXIAL CABLE. configuration. G18XXD A2420 P2600 G02XX...
- Página 13 All manuals and user guides at all-guides.com FUNCIONALIDAD DE LA BORNA 9E. FUNCTION OF TERMINAL BLOCK 9E. Terminal block 9E of A2420 groups is used in installations with several blocks of dwellings with common accesses to all of them. As many street...
- Página 14 All manuals and user guides at all-guides.com CONFIGURACIÓN TELECÁMARA. CAMERA CONFIGURATION. Configuration for video installations with 75 ohms coaxial cable. Configuration for video installations with category 5 twisted pair cable (100 ohms). CONFIGURACIÓN BASE MURAL PARA MONITOR. CONFIGURATION OF WALL BASE FOR MONITOR. VIDEO ENDING RESISTANCE: 75 ohms: COAXIAL 100 ohms: TWISTED PAIR...
- Página 15 All manuals and user guides at all-guides.com INSTALACIÓN TELÉFONO SUPLETORIO. INSTALLATION OF A SUPPLEMENTARY TELEPHONE. T1105 POWER SUPPLY CABLE. SIGNAL CABLE. 75 ohm coaxial or cat. 5 twisted pair cable. From camera INSTALACIÓN MONITOR SUPLETORIO. INSTALLATION OF A SUPPLEMENTARY MONITOR. POWER SUPPLY CABLE.
- Página 16 All manuals and user guides at all-guides.com EJEMPLO DE DISTRIBUCIÓN DE SEÑAL DE VÍDEO EN CASCADA. EXAMPLE OF RISE VIDEO SIGNAL DISTRIBUTION. Special care must be taken when configuring the bridge in each wall base (see page 14). Coaxial Twisted pair 75 ohm coaxial or cat.
- Página 17 All manuals and user guides at all-guides.com EJEMPLO DE DISTRIBUCIÓN DE SEÑAL DE VÍDEO EN INSTALACIÓN DE COAXIAL CON DISTRIBUIDORES. EXAMPLE OF VIDEO SIGNAL DISTRIBUTION IN A COAXIAL CABLE INSTALLATION WITH DISTRIBUTORS. Specific 4-branch distributors, ref. M1934 for 75 ohm coaxial cable. Special care must be taken when configuring the bridge in each wall base (see page 14).
- Página 18 All manuals and user guides at all-guides.com EJEMPLO DE DISTRIBUCIÓN DE SEÑAL DE VÍDEO EN INSTALACIÓN DE PAR TRENZADO CON DISTRIBUIDORES. EXAMPLE OF VIDEO SIGNAL DISTRIBUTION IN A TWISTED PAIR INSTALLATION WITH DISTRIBUTORS. Specific 4-brach distributors ref. M1924 twisted pair cable will be used. Special care must be taken when configuring the bridge in each wall base (see page 14).
- Página 19 The LED is off: Group A2420 is idle. The LED is on without blinking: Group A2420 is active, that is to say, there is a call in progress. The LED blinks at 1 second intervals: It is a main panel with a secondary panel that is active.
- Página 20 All manuals and user guides at all-guides.com PROBLEMA POSIBLE FALLO PROBLEM POSSIBLE FAULT Hay distorsión en la imagen del monitor o esta aparece en blanco. There is a distortion in the image Check the connection of the video signal cable (coaxial or twisted pair) on the monitor or this appears and its distribution.


