Tabla de contenido
Publicidad
Idiomas disponibles
Idiomas disponibles
Enlaces rápidos
Publicidad
Capítulos
Tabla de contenido

Manuales relacionados para ARENDO 303528


Resumen de contenidos para ARENDO 303528
- Página 1 BREADMAKER User Manual Mod.-Nr.: 303528/20190108FS002...
-
Página 2: Tabla De Contenido
Table of contents 1. Deutsch........................ 3 2. English ....................... 30 3. Italiano ....................... 57 4. Français......................85 5. Español ......................115 Inhaltsverzeichnis Wichtige Sicherheitshinweise .................. 3 1. Lieferumfang ....................... 6 2. Technische Daten....................7 3. Produkt-Details ....................7 4. Vor dem ersten Gebrauch ................... 9 5. -
Página 3: Wichtige Sicherheitshinweise
WICHTIGE SICHERHEITSHINWEISE FÜR DIESES GERÄT • Stellen Sie vor dem Anschluss des Gerätes sicher, dass die Netzspannung mit der Angabe des Typen- schildes auf dem Gerät übereinstimmt! • Dieses Gerät darf nicht mit einem beschädigten oder defekten Kabel oder Stecker in Betrieb genommen werden! •... - Página 4 • Stellen Sie den Brotbackautomat nicht in der Nähe von anderen heißen Geräten wie z.B. einem Gas-, Elektro- oder Backofen auf. • Bewegen Sie das Produkt keinesfalls, wenn es mit heißer Flüssigkeit wie z.B. Marmelade gefüllt ist! • Berühren Sie keine bewegenden oder drehenden Teile des Gerätes, wenn es eingeschaltet ist! •...
- Página 5 • Um den Brotbackautomaten vollständig vom Strom- netz zu trennen, ziehen Sie den Netzstecker aus der Steckdose! • Benutzen Sie das Gerät nur für vorgesehene und in dieser Bedienungsanleitung aufgeführte Verwen- dungen! • Gebrauchen Sie es nicht im Freien! • Das Gerät darf von Kindern ab 8 Jahren und von Per- sonen mit verringerten physischen, sensorischen oder mentalen Fähigkeiten oder Mangel an Erfah- rung und/oder Wissen benutzt werden, wenn sie...
-
Página 6: Lieferumfang
ACHTUNG: Dieses Gerät wird während des Be- triebs sehr heiß! Es besteht Verbrennungsge- fahr! Vielen Dank, dass Sie sich für ein Produkt von Arendo entschieden haben. Damit Sie auch lange Freude mit Ihrem erworbenen Gerät haben werden, lesen Sie sich bitte die nachfolgende Bedienungsan- leitung aufmerksam durch. -
Página 7: Technische Daten
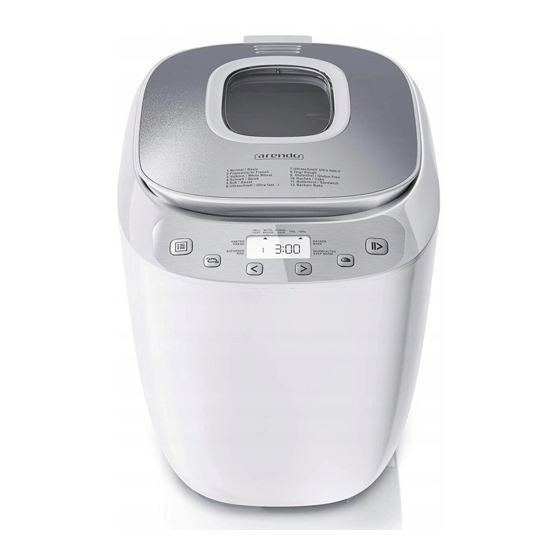
2. Technische Daten Spannungsversorgung 220-240 V AC 50/60 Hz Leistungsaufnahme 550 W Gewicht 4018 g Features • Anti-Rutsch-Füße • Überhitzungsschutz • Zeitverzögerungs-Funktion • Antihaftbeschichtete Backform • Konstante Temperatur • Warmhaltefunktion (1 Stunde) • Optimierte Heizfunktion (energiesparend) • 12 vordefinierte Programme •... - Página 8 Nummer Beschreibung Deckel Fenster Display Bedienelemente Backform Dosierlöffel Messbecher Knethaken Knethakenentferner Schaber Deutsch...
-
Página 9: Vor Dem Ersten Gebrauch
4. Vor dem ersten Gebrauch • Überprüfen Sie, ob das Zubehör und alle Teile vollständig und un- beschädigt im Lieferumfang enthalten sind. • Reinigen Sie alle Teile wie im Kapitel “Reinigung und Pflege” in dieser Bedienungsanleitung beschrieben. • Stellen Sie den Betriebsmodus “Bake” ein. Backen Sie ohne Inhalt etwa 10-15 Minuten. -
Página 10: Standardeinstellungen
6. Standardeinstellungen Sobald Sie den Stecker in die Steckdose gesteckt haben, werden fol- gende Standardeinstellungen angezeigt. Die Erklärungen zu den Angaben im Display können Sie in der folgen- den Tabelle entnehmen. • KNEAD1 Ist die Brotbackmaschine in der Knetphase, erscheint •... -
Página 11: Programme
Sie können die Programmabläufe für 10 Minuten pausieren, indem Sie die "START/STOP"-Taste einmal kurz während des Betriebs drü- cken. Die Zeit beginnt zu blinken. Anschließend läuft das Programm automatisch weiter. Sie können durch erneutes Drücken der Taste das Programm fortsetzen. 8. -
Página 12: Größe Des Brotes Und Des Bräunungsgrad S
9. Auswahl der Brotgröße und des Bräunungsgrads Drücken Sie die Taste “Größe”, um die Größe, bzw. das Gewicht des Brotes einzustellen. Sie können zwischen folgenden Werten wählen: 700 g (klein) oder 1000 g (groß) Ihre Auswahl wird auf dem Display oben rechts mit einem Pfeil angezeigt. -
Página 13: Pause
11. Pause Wenn das Programm begonnen hat, kann der Betrieb mit der “START/STOP”-Taste jederzeit unterbrochen werden. Die zuvor ein- gestellten Zeiten bleiben erhalten. Das Programm wird automatisch nach 10 Minuten fortgesetzt, oder wenn die “START/STOP”-Taste erneut betätigt wird. 12. Speicher Falls die Stromversorgung des Gerätes unterbrochen wird, kann der zuvor aktivierte Vorgang automatisch innerhalb von 10 Minuten forgesetzt werden. -
Página 14: Brot Backen
15. Brot backen Stellen Sie die Backform auf die Antriebswelle und drehen Sie diese im Uhrzeigersinn, bis die Backform einrastet. Stecken Sie anschlie- ßend den Knethaken auf die Antriebswelle. Es wird empfohlen, den Knethaken beispielsweise mit Margarine einzufetten, damit dieser sich nach dem Backvorgang leichter lösen lässt. - Página 15 Danach können Sie auswählen, ob der Brotbackvorgang direkt be- ginnen soll oder eine Zeitverzögerung geplant ist. Wenn Sie sich für die Zeitverögerung entscheiden, stellen Sie die gewünschte Zeit mit der “Zeit+” und “Zeit-"-Taste ein. Wenn Sie direkt starten möchten, überspringen Sie diesen Schritt und drücken die “Start/Stop”-Taste, bis ein Signalton ertönt und der Backvorgang gestartet wird.
- Página 16 Ziehen Sie den Knethaken aus der Unterseite des Brotes heraus, ver- wenden Sie dazu den Knethakenentferner. Lassen Sie das herausgeschüttelte Brot ungefähr 20 Minuten abküh- len. Wenn Sie nicht in der Nähe befinden, nachdem der Vorgang be- endet ist, schaltet sich automatisch ein Warmhaltemodus für eine Stunde ein.
-
Página 17: Besondere Hinweise
16. Besondere Hinweise 16.1 Programm 4 (Schnell) Brote werden normalerweise mit Backsoda oder Backpulver herge- stellt. Diese Zutaten werden durch Flüssigkeit und Hitze aktiviert. Für dieses Programm wird ebenfalls empfohlen, zuerst die Flüssigkeit in die Backform zu geben und im Anschluss die restlichen Zutaten. Während der ersten Knetphase ist es möglich, dass sich die trockenen Zutaten in den Ecken der Brotform sammeln. -
Página 18: Reihenfolge Von Zutaten
• Wenn Speiseöl oder andere Zutaten mit dem Becher gemessen wurden, reinigen Sie diesen im Anschluss gründlich. • Trockene Zutaten sollten mit dem Messbecher oder Messlöffel gemessen werden. Die große Seite des Messlöffels entspricht einem Esslöffel, während die kleine Seite einem Teelöffel ent- spricht. -
Página 19: Fehlerbehebung
Tuch ab. Verwenden Sie weder scheuernde oder aggressive Rei niger noch scharfe Gegenstände! Alternativ können Sie die Backform und den Knethaken in die Spülmaschine einlegen, um diese zu reinigen. Trocknen Sie die Backform und den Knethaken anschließend vollstän- dig ab. Setzen Sie diese wieder in den Brotbackautomaten, indem Sie die Backform auf das Getriebe setzen und im Uhrzeigersinn drehen, bis die Backform einrastet. - Página 20 Fehler Fehlergrund Fehlerbehebung Rauch entweicht Einige Zutaten befin- Ziehen Sie den Stecker aus der während des Backens den sich zu nah an den Steckdose, lassen Sie das Gerät aus der Lüftungsöff- Heizelementen oder vollständig abkühlen und reinigen nung haften daran Sie die Heizelemente.
-
Página 21: Hinweise Von Möglichen Zutaten
21. Hinweise zu möglichen Zutaten Verschiedene Mehlarten Vollkornmehl Vollkornmehl wird aus Getreide gemahlen. Dieses Mehl ist in der Regel schwerer als normale Mehle und hat ebenso mehr Nährstoffe. Es ist besonders gut geeignet, um mit anderen Mehlsorten ver- mischt zu werden. Mehl ohne Backpulver Das Mehl ohne Backpulver ist auch bekannt als Weißmehl. - Página 22 Zucker Zucker ist ein wichtiger Bestandteil und dient dem süßen Geschmack und der Farbe des Brotes. Meistens wird weißer Zucker verwendet, brauner Zucker oder Puderzucker können jedoch auch eingesetzt werden. Eier Eier machen das Brot nahrhaft und fülliger. Befreien Sie die Eier komplett von der Schale, bevor Sie gleichmäßig verrührt werden.
- Página 23 Wasser und andere Flüssigkeiten Wasser ist eine wichtige Zutat bei der Herstellung von Brot. Allge- mein ist eine Wassertemperatur zwischen 20°C und 25°C optimal. Sie können Wasser durch frische Milch oder Wasser gemischt mit 2% Milchpulver ersetzen. Dies verbessert Aroma und Farbe der Kruste.
-
Página 24: Beispielrezepte
22. Beispielrezepte Tipps: - Benutzen Sie Mineralwasser, um das Brot luftiger und leichter zu machen. - Wasser und/oder Milchpulver können ebenfalls durch die gleiche Menge an Milch ersetzt werden. Brotrezepte Vollkornbrot Eiweißbrot Brotgröße 850 g Brotgröße 750 g 350 ml 250 g lauwarmes Wasser Quark... - Página 25 Teig Pizzateig Mehl 300 g 1/2 Teelöffel Salz 1/2 Würfel Frischhefe 2 Esslöffel Olivenöl Wasser, lauwarm 200ml Zucker 1 Prise Zucker Programm 8 - Teig Zubereitung: Lösen Sie die Hefe im Wasser auf. Geben Sie diese mit den anderen Zutaten in den Brotbackautomaten.
- Página 26 Zeitphasen der verschiedenen Programme und Prozesse Programm/ 1. Normal 2 . Franzö- 3. Vollkorn 4. Schnell 5. Süss 6.Ultra Prozess sisch Weizen Schnell 1 Brotgröße in g 750 1000 750 1000 1000 1000 750 KNEAD1 (in Minuten) RISE1 (in Minuten) KNEAD2 (in Minuten) RISE2 (in...
-
Página 27: Sicherheitshinweise Und Haftungsausschluss
23. Sicherheitshinweise und Haftungsausschluss Versuchen Sie bitte nie das Gerät zu öffnen, um Reparaturen oder Umbauten vorzunehmen. Vermeiden Sie Kontakt zu den Netzspan- nungen. Schließen Sie das Produkt nicht kurz. Das Gerät ist nicht was- serdicht, bitte verwenden Sie es nur im Trockenen. Schützen Sie es vor hoher Luftfeuchtigkeit, Wasser und Schnee. -
Página 28: Entsorgungshinweise
Sie sind als Verbraucher nach dem Elektro- und Elektronikgerätege- setz (ElektroG) verpflichtet, elektrische und elektronische Geräte am Ende ihrer Lebensdauer an den Hersteller, die Verkaufsstelle oder an dafür eingerichtete, öffentliche Sammelstellen kostenlos zurückge- ben. Einzelheiten dazu regelt das jeweilige Landesrecht. Das Symbol auf dem Produkt, der Betriebsanleitung oder/und der Verpackung weist auf diese Bestimmungen hin. - Página 29 WEEE Richtlinie 2012/19/EU WEEE Register-Nr: DE 67896761 Hiermit erklärt die Firma WD Plus GmbH, dass sich das Gerät 303528/20190108FS002 in Übereinstimmung mit den grundlegenden Anforderungen und den übrigen einschlägigen Bestimmungen befindet. Eine vollständige Konformitätserklärung erhalten Sie bei: WD Plus GmbH, Wohlenbergstraße 16, 30179 Hannover...
- Página 30 Table of contents Important safety instructions ................31 1. Scope of delivery ....................34 2. Technical data ....................35 3. Product details ....................35 4. Before first use ....................37 5. Display and Controls ..................37 6. Default settings ....................38 7.
-
Página 31: Important Safety Instructions
IMPORTANT SAFETY GUIDELINES FOR THIS APPLI- ANCE • Before connecting the appliance, ensure that the mains voltage matches the specification on the nameplate of the appliance! • This appliance should not be operated if the cable or plug is damaged or defective! •... - Página 32 • Do not touch any moving or rotating parts of the ap- pliance when it is switched on! • Do not turn on the bread machine if the baking at- tachment has not been properly filled with ingredi- ents. • Never remove the baking mould during operation! •...
- Página 33 pervised or instructed with regard to safe use of the appliance, and have understood the resultant dan- gers. The appliance is not a toy. Cleaning and main- tenance of the appliance should not be done by chil- dren without supervision! •...
-
Página 34: Scope Of Delivery
CAUTION: This appliance becomes very hot during use! There is a risk of burns! Thank you for choosing an Arendo product. Please read the following user manual carefully so that you can get the most from the product you have purchased. Before using the product, first check that the delivered item is complete, accurate and undamaged. -
Página 35: Technical Data
2. Technical data Power supply 220-240 V AC 50/60 Hz Power consumption 550 W Weight 4018 g Features • Non-slip base • Overheating protection • Time delay function • Non-stick baking mould • Constant temperature • Keep-warm function (1 hour) •... - Página 36 Number Description Window Display Operating controls Baking mould Measuring spoon Measuring cup Kneader Kneader remover Scraper English...
-
Página 37: Before First Use
4. Before first use • Check that the accessories and all parts are complete as per the scope of supply and are not damaged. • Clean all the parts as described in the chapter "Cleaning and care" of this user manual. •... -
Página 38: Default Settings
6. Default settings The default settings are displayed once you insert the plug into the socket. The explanations about the information on the display are given in the following table. • KNEAD1 This symbol is displayed if the bread machine is in the •... -
Página 39: Programs
You can pause the program sequences for 10 minutes by pressing the "START / STOP" button once briefly during operation. The time starts flashing. The program then resumes automatically. You can resume the program by pressing the button. 8. Programs You can select the desired program by pressing the menu button. -
Página 40: Size Of The Bread And Degree Of Browning
9. Selection of bread size and degree of browning Press the "size" button to adjust the size or weight of the bread. You can choose between the following values: 700 g (small) or 1000 g (large) Your selection is shown on the display at the top right with an arrow. -
Página 41: Interval
11. Pause Once the program begins, the operation can be paused at any time using the "START / STOP" button. The previously adjusted times are retained. The program will resume automatically after 10 minutes or when the "START / STOP" button is pressed again. 12. -
Página 42: Baking Bread
15. Baking bread Place the baking mould on the drive shaft and turn it clockwise until the baking mould locks into place. Then place the kneader on the drive shaft. It is advisable, for example, to apply margarine to the kneader so that it can be removed easily after baking. - Página 43 The duration of the baking process depends on the selected program, the size, the weight and the desired browning. You can monitor the progress of the baking process through the window at the top of the appliance. Never open the lid of the bread machine during the bak- ing process! Once the entire process is completed, you will hear a beep.
- Página 44 Separate the kneader from the bottom of the bread using the knead- er remover for this purpose. Allow the bread to cool for about 20 minutes. If you are not near the bread machine when the process is completed, the keep-warm mode is automatically turned on for an hour.
-
Página 45: Special Notes
16. Special notes 16.1 Program 4 (Fast) Bread is normally made using baking soda or baking powder. These ingredients are activated by liquid and heat. It is likewise advisable for this program to first add the liquid in the baking mould and then the remaining ingredients. -
Página 46: Sequence Of Ingredients
• If cooking oil or other ingredients were measured with the cup, clean it thoroughly afterwards. • Dry ingredients should be measured with the measuring cup or measuring spoon. The large side of the measuring spoon corre- sponds to a tablespoon, while the small side corresponds to a teaspoon. -
Página 47: Troubleshooting
Do not use abrasive or aggressive cleaning agents or sharp objects! Optionally, you can place the baking mould and kneader in the dish- washer to clean them. Dry the baking mould and kneader complete- ly. Put them back in the bread machine by placing the baking mould on the shaft and turn it clockwise until the baking mould locks into place. - Página 48 Error Error reason Troubleshooting Some ingredients are Disconnect the plug from the sock- Smoke comes out too close to the heating et, allow the appliance to cool down of the vent during elements or sticking to completely and clean the heating baking them elements.
-
Página 49: Tips About Possible Ingredients
21. Notes on possible ingredients Different types of flour Whole grain Whole wheat flour is ground from grain. This flour is usually heavier than normal flour and also has more nutrients. It is especially well suited to be mixed with other flours. Flour without baking powder Flour without baking powder is also known as white flour. - Página 50 Eggs Eggs make the bread nutritious and more full. Remove the eggs completely from the shell before mixing them evenly. Baking soda Baking soda is very similar to baking powder. Baking soda can be used along with baking powder. Baking powder Baking powder is used, for example, to bake cakes or breads in "Program - 9 Ultra fast".
- Página 51 Yeast In the rising phase, the yeast releases carbon dioxide. The carbon dioxide makes the bread rise more and provides the soft inner structure. However, yeast needs sugar and flour as nutrient. Store fresh yeast only in your refrigerator, since high temperature can kill the yeast fungi.
-
Página 52: Sample Recipes
22. Sample recipes Tips: - Use mineral water to make the bread fluffier and lighter. - Water and / or milk powder can also be replaced with the same amount of milk. Bread recipes Brown bread Protein bread Bread size 850 g Bread size 750 g... -
Página 53: Pizza Dough
Dough Pizza dough Flour 300 g 1/2 teaspoon Salt 1/2 cube Fresh yeast 2 tablespoons Olive oil Water, lukewarm 200ml Sugar A pinch of sugar Program 8 - Dough Preparation: Dissolve the yeast in the water. Add this along with the other ingredients to the bread machine. - Página 54 Time phases of the various programs and processes Program / 1. Normal 2. French 3. Whole wheat 5. Sweet 6.Ultra process Fast fast 1 Bread size 1000 1000 1000 1000 in g KNEAD1 (in minutes) RISE1 (in minutes) KNEAD2 (in minutes) Rise2 (in minutes)
-
Página 55: Safety Instructions And Disclaimer
23. Safety instructions and disclaimer Please do not try to open the appliance to carry out repairs or mod- ifications. Avoid contact with the mains voltage. Do not short-circuit the product. The appliance is not waterproof, hence please use it only in dry surroundings. - Página 56 WEEE directive 2012/19/EU WEEE Register no.: DE 67896761 The company WD Plus GmbH hereby certifies that the appliance 303528/20190108FS002 complies with the fundamental requirements and all other relevant stipulations. A com- plete conformity statement can be obtained from: WD Plus GmbH, Wohlenbergstraße 16,...
- Página 57 Indice Importanti informazioni sulla sicurezza ..............58 1. Contenuto della confezione ................61 2. Dati tecnici ......................62 3. Dettagli del prodotto ..................62 4. Prima del primo utilizzo ..................64 5. Display ed elementi di controllo ............... 64 6. Impostazioni predefinite ................... 65 7.
-
Página 58: Importanti Informazioni Sulla Sicurezza
IMPORTANTI INFORMAZIONI SULLA SICUREZZA PER QUESTO APPARECCHIO • Prima di collegare l’apparecchio accertarsi che la tensione di rete disponibile corrisponda all’indica- zione riportata sulla targhetta! • Non usare il prodotto se il cavo o la spina sono dan- neggiati o difettosi! •... - Página 59 • Non toccare le parti mobili o rotanti dell'apparec- chio quando è acceso! • Non accendere la macchina per il pane solo, se il cestello non è riempito correttamente con gli ingre- dienti. • Non rimuovere mai il cestello durante il funziona- mento! •...
- Página 60 • L’apparecchio può essere utilizzato dai bambini a partire dagli 8 anni di età e da persone con capacità fisiche, sensoriali o mentali ridotte o mancanza di esperienza e/o di conoscenza solo se sotto adeguata sorveglianza o se istruiti in merito all'utilizzo sicuro dell'apparecchio e ai pericoli che ne possono scatu- rire.
-
Página 61: Contenuto Della Confezione
ATTENZIONE: L’apparecchio durante l’uso si ri- scalda molto! Rischio di ustioni! Grazie per aver scelto un prodotto di Arendo. Per utilizzare con sod- disfazione il prodotto acquistato, si prega di leggere attentamente le seguenti istruzioni per l’uso. Prima della messa in funzione della merce consegnata, verificare che sia integra, esente da difetti e non danneggiata. -
Página 62: Dati Tecnici
2. Dati tecnici Alimentazione di tensione 220-240 V AC 50/60 Hz Potenza assorbita 550 W Peso 4018 g Caratteristiche • Piedini antiscivolo • Protezione contro il surriscaldamento • Funzione ritardo • Cestello con rivestimento antiaderente • Temperatura costante • Funziona di mantenimento del calore (1 ora) •... - Página 63 Numero Descrizione Coperchio Finestrella Display Elementi di comando Cestello Cucchiaio dosatore Misurino dosatore Pala impastatrice Gancio per estrarre la pala impastatrice Raschietto Italiano...
-
Página 64: Prima Del Primo Utilizzo
4. Prima del primo utilizzo • Controllare che gli accessori e i componenti siano completi e privi di danni. • Pulire tutti i componenti come descritto nel capitolo in "Pulizia e cura" delle presenti istruzioni per l’uso. • Impostare la modalità di funzionamento in “Bake”. Cuocere senza contenuto per circa 10-15 minuti. -
Página 65: Impostazioni Predefinite
6. Impostazioni predefinite Una volta inserita la spina nella presa di corrente, vengono visualizza- te le seguenti impostazioni predefinite. Le spiegazioni delle informazioni sul display si trovano nella seguente tabella. • KNEAD1 Quando la macchina per il pane è in fase di impasta- •... -
Página 66: Programmi
È possibile mettere in pausa il programma per 10 minuti, premendo il tasto "STOP" una volta durante il funzionamento. Il tempo inizierà a lampeggiare. Successivamente il programma continua a funziona- re automaticamente. È possibile continuare il programma premendo nuovamente il tasto. 8. -
Página 67: Ritardo
9. Selezione della dimensione del pane e del grado di doratura Premere il tasto "Dimensione" per impostare la dimensione o il peso del pane. Si può scegliere tra i seguenti valori: 700 g (piccolo) o 1000 g (grande) La vostra scelta verrà indicata da una freccia nell'angolo superiore destro del display. -
Página 68: Pausa
11. Pausa Una volta avviato il programma, il funzionamento può essere interrotto in qualsiasi momento con il tasto "START/STOP". I tempi impostati in precedenza vengono mantenuti. Il programma prosegue automaticamente dopo 10 minuti o quando si preme nuovamente il tasto "START/STOP". 12. -
Página 69: Cottura Del Pane
15. Cottura del pane Posizionare il cestello sull'albero motore e ruotarlo in senso orario fino a quando non scatta in posizione. Successivamente posizionare la pala impastatrice sull’albero motore. Si consiglia di ungere la pala con della margarina per riuscire ad estrarla più facilmente dopo la cottura. - Página 70 Si può quindi scegliere se il processo di cottura del pane deve iniziare immediatamente o se è previsto un ritardo. Se si decide impostare il ritardo, usare i tasti "Tempo+" e "Tempo-". Se si desidera iniziare di- rettamente, saltare questo passaggio e premere il tasto "Start/Stop" fino a quando non si sente un segnale acustico e il processo di cottura inizia.
- Página 71 Estrarre la pala impastatrice dal fondo del pane con l'apposito gancio. Lasciar raffreddare il pane per circa 20 minuti. Se non ci si trova nel- le vicinanze dopo il completamento del processo, viene automatica- mente attivata una modalità di mantenimento del calore per un'ora. Dei segnali acustici segnaleranno la fine della funzione di manteni- mento del calore.
-
Página 72: Istruzioni Particolari
16. Istruzioni particolari 16.1 Programma 4 (veloce) In genere, il pane viene fatto con bicarbonato o lievito in polvere. Questi ingredienti vengono attivati con il liquido e il calore. Per que- sto programma, si raccomanda di versare prima il liquido nel cestello e poi gli altri ingredienti. -
Página 73: Sequenza Degli Ingredienti
• Se l'olio da cucina o altri ingredienti sono stati misurati con il mi- surino, pulirlo accuratamente dopo l’uso. • Gli ingredienti secchi dovranno essere misurati con il misurino o il cucchiaio dosatore. Il lato grande del cucchiaio dosatore cor- risponde ad un cucchiaio da tavola, mentre il lato piccolo corri- sponde ad un cucchiaino da tè. -
Página 74: Risoluzione Anomalie
alternativa, è possibile lavare il cestello e la pala impastatrice in lava- stoviglie. Asciugare completamente il cestello e la pala impastatrice. Rimetterli nella macchina per il pane posizionando il cestello sull'in- granaggio e ruotandolo in senso orario fino a quando non scatta in posizione. -
Página 75: Motivo Anomalia
Anomalie Motivo anomalia Risoluzione anomalie Esce fumo dall'aper- Alcuni ingredienti Scollegare l'apparecchio dalla presa tura di ventilazione sono troppo vicini agli di corrente, lasciarlo raffreddare durante la cottura al elementi riscaldanti o si completamente e pulire l’elemento forno attaccano ad essi riscaldante. -
Página 76: Note Sui Possibili Ingredienti
21. Note sui possibili ingredienti Diversi tipi di farina Farina integrale La farina integrale viene macinata a partire dal grano. Questa farina è di solito più pesante delle farine normali e ha anche più sostanze nutritive. È particolarmente adatta per essere mescolata con altri tipi di farina. - Página 77 Zucchero Lo zucchero è un ingrediente importante e serve ad esaltare il gusto dolce e il colore del pane. Di solito si usa lo zucchero bianco, ma si può usare anche lo zucchero di canna o lo zucchero a velo. Uova Le uova rendono il pane più...
- Página 78 Acqua e altri liquidi L'acqua è un ingrediente importante nella produzione del pane. Generalmente, una temperatura dell'acqua tra i 20 °C e i 25 °C è ottimale. È possibile sostituire l'acqua con latte fresco o acqua miscelata con un 2% di latte in polvere. Questo migliora l’aroma e il colore della crosta.
-
Página 79: Alcuni Esempi Di Ricette
22. Alcuni esempi di ricette Suggerimenti: - Utilizzare acqua minerale per rendere il pane più leggero. Anche l'acqua e/o il latte in polvere possono essere sostituiti dalla stessa quantità di latte. Ricette per il pane Pane integrale Pane proteico Dimensione del pane 850 g Dimensione del pane 750 g... - Página 80 Impasto Impasto per pizza Farina 300 g 1/2 cucchiaino Sale 1/2 dado Lievito fresco 2 cucchiaio Olio d'oliva Acqua, tiepida 200ml Zucchero 1 presa di zucchero Programma 8 - Impasto Preparazione: Sciogliere il lievito in acqua. Versarlo nella macchina per pane con gli altri ingredienti. Selezionare il programma "8 - Impasto"...
- Página 81 Fasi dei vari programmi e processi Programma/ 1. Normale 3. Farina 4. Veloce 5. Biscotti 6. Ultrav- Processo Francese integrale eloce 1 Dimensione 1000 750 1000 1000 1000 del pane in g KNEAD1 (in minuti) RISE1 (in minuti) KNEAD2 (in minuti) RISE2 (in minuti)
-
Página 82: Avvertenze Sulla Sicurezza Ed Esclusione Della Responsabilità
23. Avvertenze di sicurezza ed esclusione della responsabilità Non tentare mai di aprire il prodotto per effettuare riparazioni o tra- sformazioni. Evitare il contatto con le tensioni di rete. Non cortocircu- itare il prodotto. L'apparecchio non è impermeabile, utilizzarlo solo in luoghi asciutti. - Página 83 Direttiva RAEE 2012/19/UE Numero reg. RAEE: DE 67896761 Con la presente la ditta WD Plus GmbH dichiara che l'apparecchio 303528/20190108FS002 è conforme ai requisiti essenziali e alle rimanenti disposizioni in materia. Una dichiarazi- one di conformità completa è disponibile presso: WD Plus GmbH, Wohlenbergstraße 16,...
- Página 84 Table des matières Consignes de sécurité importantes ............... 85 1. Contenu de la livraison ..................88 2. Données techniques ..................89 3. Détails du produit ....................89 4. Avant la première utilisation ................91 5. Affichage et éléments de commande ..............91 6.
-
Página 85: Consignes De Sécurité Importantes
CONSIGNES DE SÉCURITÉ IMPORTANTES POUR CET APPAREIL • Avant de connecter l'appareil, assurez-vous que la tension réseau correspond à l'indication de la plaque signalétique sur l'appareil! • Cet appareil ne doit pas mis en service avec un câble ou un connecteur défectueux ou endommagé ! •... - Página 86 à gaz, les fours électriques ou les fours à cuisson. • Ne déplacez aucunement le produit s’il est rempli avec un liquide chaud comme par ex. la confiture ! • Ne touchez pas de pièce mobile ou rotative de l’ap- pareil lorsque celui-ci est allumé...
- Página 87 • Ne l’utilisez pas en plein air ! • L’appareil peut être utilisé par des enfants de plus de 8 ans et des personnes avec des capacités phy- siques, sensorielles ou mentales diminuées et/ou un manque d'expérience et de savoir si elles ont été...
-
Página 88: Contenu De La Livraison
! Il existe un risque de brû- lures ! Nous vous remercions d'avoir acheté un produit d'Arendo. Pour que vous puissiez profiter longtemps de l'appareil acquis, veuillez lire at- tentivement le mode d'emploi suivant. Avant la mise en service du produit livré, vérifiez s'il est complet, sans défauts et intact. -
Página 89: Caractéristiques Techniques
2. Caractéristiques techniques Alimentation en tension 220-240 V CA 50/60 Hz Puissance absorbée 550 W Poids 4018 g Caractéristiques • Supports anti-dérapants • Protection contre la surchauffe • Fonction temporisation • Moule à revêtement antiadhésif • Température constante • Fonction de maintien de chaleur (1 heure) •... - Página 90 Numéro Description Couvercle Fenêtres Écran d’affichage Éléments de commande Moule Cuillère doseuse Gobelet gradué Crochet pétrisseur Outil de retrait du crochet pétrisseur Racloir Français...
-
Página 91: Avant La Première Utilisation
4. Avant la première utilisation • Vérifiez si les accessoires et toutes les pièces sont complets, in- tacts et contenus dans le volume de livraison. • Nettoyez toutes les pièces selon les instructions du chapitre « Nettoyage et entretien » du présent mode d'emploi. •... -
Página 92: Paramètres Par Défaut
6. Paramètres par défaut Dès que vous avez branché la fiche d'alimentation dans la prise de secteur, les paramètres par défaut suivants s'affichent. Vous pouvez consulter les explications sur les indications de l’écran d'affichage dans le tableau suivant. • KNEAD1 Si la machine à... -
Página 93: Programmes
Vous pouvez mettre en pause les déroulements de programme pen- dant 10 minutes en appuyant brièvement sur la touche « START/ STOP » pendant le fonctionnement. L'heure commence à clignoter. Ensuite, le programme est automatiquement relancé. Vous pouvez poursuivre le programme en rappuyant sur la touche. 8. -
Página 94: Taille Du Pain Et Degré De Brunissage
9. Sélection de la taille du pain et du degré de brunissage Touchez sur la touche « Taille » pour régler la taille ou le poids du pain. Vous avez le choix entre les valeurs suivantes : 700 g (petit) ou 1000 g (grand) Votre sélection s’affiche à... -
Página 95: Pause
11. Pause Une fois que le programme a commencé, le mode peut être inter- rompu à tout moment avec la touche « START/STOP ». Les temps préalablement réglés restent inchangés. Le programme est automatiquement reconduit au bout de 10 mi- nutes, ou en appuyant sur la touche «... -
Página 96: Cuire Le Pain
15. Cuire le pain Posez le moule sur l’arbre de transmission et tournez-le dans le sens horaire jusqu'à ce que le moule s'emboîte. Insérez ensuite le crochet pétrisseur sur l'arbre de transmission. Il est conseillé de lubrifier le crochet pétrisseur de margarine par exemple, afin d’en faciliter le desserrage après le processus de cuisson. - Página 97 Puis vous avez le choix entre le lancement direct du processus de cuisson ou la prévision d’une temporisation. Si vous optez pour la temporisation, réglez le temps souhaité avec la touche « Temps+ » et « Temps- ». Si vous voulez démarrer directement, sautez cette étape et appuyez sur la touche «...
- Página 98 Extrayez le crochet pétrisseur de la partie inférieure du pain, et utili- sez pour cela l’outil de retrait du crochet pétrisseur. Ensuite, laissez le pain secoué refroidir environ 20 minutes. Si vous ne vous trouvez pas à proximité, après avoir terminé le processus, une mode de maintien de chaleur s’allume automatiquement pen- dant une heure.
-
Página 99: Instructions Particulières
16. Instructions particulières 16.1 Programme 4 (Rapide) Les pains sont normalement fabriqués avec de la soude ou de la le- vure chimique. Ces ingrédients sont activés par le liquide et la cha- leur. Pour ce programme, il est même conseillé de verser d'abord le liquide dans le moule, puis le reste des ingrédients. -
Página 100: Nettoyage Et Entretien
• Si de l’huile alimentaire ou d’autres aliments sont mesurés avec le gobelet, alors nettoyez-le soigneusement. • Des ingrédients secs doivent être mesurés avec le gobelet doseur ou la cuillère doseuse. Le plus grand côté de la cuillère doseuse correspond à une cuillère à soupe, tandis que le petit côté cor- respond à... -
Página 101: Résolution Des Erreurs
sont à bannir ! Alternativement, vous pouvez passer le moule et le crochet pétrisseur au lave-vaisselle pour les nettoyer. Séchez com- plètement le moule, puis le crochet pétrisseur. Remettez-les dans la machine à pain, en posant le moule sur la transmission, et tournez-le dans le sens horaire jusqu'à... - Página 102 Erreur Motif du défaut Dépannage De la fumée peut Certains ingrédients sont Débranchez ensuite la fiche de la s’échapper de l’orifice trop près des éléments prise et laissez l’appareil se refroidir de ventilation pen- chauffants ou y adhèrent complètement, puis nettoyez ces dant la cuisson éléments chauffants.
-
Página 103: Indications Des Ingrédients Possibles
21. Indications des ingrédients possibles Différents types de farine Farine complète La farine complète est la mouture des céréales. En règle générale , cette farine pèse plus lourd que des farines normales et possède même plus de nutriments. Il convient surtout de mélanger avec d’autres sortes de farine. - Página 104 Sucre Le sucre joue un rôle important dans le goût sucré et la couleur du pain. Le sucre blanc est utilisé la plupart du temps, mais le sucre roux ou le sucre glace sont tout à fait envisageables. Œufs Les œufs rendent le pain plus riche et gorgé. Décortiquez les œufs avant de les mélanger uniformément.
- Página 105 Eau et autres liquides L’eau est un ingrédient important de la fabrication du pain. Généralement, la température de l’eau est optimale entre 20°C et 25°C. Vous pouvez remplacer l’eau par du lait frais ou de l’eau mélangée à 2 % de poudre de lait. Cela améliore le goût et la couleur de la croûte.
-
Página 106: Exemples De Recettes
22. Exemples de recettes Astuces : - Utilisez de l’eau minérale pour aérer et alléger le pain. - L’eau et/ou la poudre de lait peuvent même être remplacés par la même quantité de lait. Recettes de pain Pain complet Pain protéiné Taille du pain 850 g Taille du pain... - Página 107 Pâte Pâte à pizza Farine 300 g 1/2 cuillère à café 1/2 cube Levure fraîche 2 cuillères à soupe Huile d’olive Eau, tiède 200 ml Sucre 1 pincée de sucre Programme 8- Pâte Préparation : Faites dissoudre la levure dans l’eau. Versez les autres ingrédients dans la machine à pain.
- Página 108 Phases temporelles des différents programmes et processus Programme/ 1. Normal 2. Français 3. Blé complet 4. Rapi- 5. Sucré Processus Ultra rapi- de 1 Taille du pain 1000 1000 1000 1000 en g KNEAD1 (en minutes) RISE1 (en minutes) KNEAD2 (en minutes) RISE2 (en minutes)
-
Página 109: Consignes De Sécurité Et Clause De Non-Responsabilité
23. Consignes de sécurité et clause de non-responsabilité N'essayez jamais d'ouvrir l'appareil afin de réaliser des réparations ou des transformations. Évitez le contact avec les tensions du sec- teur. Ne court-circuitez pas le produit. L'appareil n'est pas étanche à l'eau, veuillez l’utiliser uniquement au sec. Protégez-le d'une humi- dité... - Página 110 Directive DEEE 2012/19/UE DEEE Numéro de registre : DE 67896761 La société WD Plus GmbH déclare par la présente que l’appareil 303528/20190828FS002 est conforme aux exigences fondamentales et aux autres dispositions pertinentes de la directive. Pour obtenir une déclaration de conformité complète, adressez-vous à : WD Plus GmbH, Wohlenbergstraße 16, 30179 Hanovre...
- Página 111 Índice de contenidos Indicaciones de seguridad importantes .............. 112 1. Volumen de suministro ................... 115 2. Datos técnicos ....................116 3. Detalles del producto ..................116 4. Antes del primer uso ..................118 5. Pantallas y controladores ................118 6. Configuración estándar ................... 119 7.
-
Página 112: Indicaciones Importantes De Seguridad Para Este Aparato
INDICACIONES IMPORTANTES DE SEGURIDAD PARA ESTE APARATO • Antes de conectar el aparato, asegúrese de que la tensión de red coincide con los datos que aparecen en la placa. • No utilice el aparato si el cable o el enchufe están dañados o defectuosos. - Página 113 cuando esté encendido. • No encienda la panificadora si no se llenado el mol- de correctamente. • No saque el molde mientras esté funcionando. • No golpee el molde sobre un borde o una encimera para sacar el pan, ya que podría dañarlo. •...
- Página 114 mismo. Este producto no es un juguete. No deje que los niños se encarguen de la limpieza y el manteni- miento del aparato sin supervisión. • Se debe vigilar a los niños para que no jueguen con el aparato. • A fin de evitar riesgos, los cables de red dañados solo deben ser sustituidos por el fabricante, el ser- vicio de atención al cliente o una persona con una cualificación similar...
-
Página 115: Volumen De Suministro
ATENCIÓN: ¡El aparato se calienta mucho du- rante el funcionamiento! ¡Peligro de quemadu- ras! Gracias por escoger un producto de Arendo. Para que pueda dis- frutar durante mucho tiempo de su adquisición, le rogamos que lea atentamente las siguientes instrucciones de uso. Antes de ponerlo en marcha, compruebe que el producto suministrado no presenta defectos ni daños. -
Página 116: Datos Técnicos
2. Datos técnicos Suministro de energía 220 - 240 V CA 50/60 Hz Consumo de potencia 550 W Peso 4018 g Propiedades • Pies antideslizantes • Protección contra sobrecalentamiento • Función de retardo • Molde con revestimiento antiadherente • Temperatura constante •... - Página 117 Número Descripción Tapa Mirilla Pantalla Elementos de mando Molde Cuchara dosificadora Jarra medidora Ganchos de amasar Varilla para retirar los ganchos de amasar Rasqueta Español...
-
Página 118: Antes Del Primer Uso
4. Antes del primer uso • Compruebe que no falta ninguna pieza ni ninguna presenta da- ños. • Limpie todas las piezas como se describe en el capítulo «Limpieza y cuidado» de estas instrucciones de uso. • Ajuste el modo de funcionamiento «Hornear». Deje funcionar el aparato vacío durante unos 10-15 minutos. -
Página 119: Configuración Estándar
6. Configuración estándar La configuración estándar se mostrará después de conectar el enchu- fe a una toma de corriente. Encontrará en la tabla siguiente las explicaciones sobre las informa- ciones en la pantalla. • KNEAD1 Este símbolo aparece cuando se está amasando. •... -
Página 120: Programas
Puede detener los programas durante 10 minutos pulsando el botón «START/STOP» una vez brevemente mientras el aparato está funcio- nando. La hora empezará a parpadear. A continuación, el programa se reanudará de forma automática. Para que el programa se ponga de nuevo en marcha, pulse el botón otra vez. -
Página 121: Tamaño Del Pan Y Nivel De Tostados
9. Selección del tamaño del pan y nivel de tostado Pulse el botón «Tamaño» para seleccionar el tamaño o el peso del pan. Puede escoger entre los valores siguientes: 700 g (pequeño) o 1000 g (grande) Una flecha en la parte superior derecha mostrará su selección. Ten- ga en cuenta que el tiempo de horneado puede variar en función el peso y el tamaño del pan. -
Página 122: Pausa
11. Pausa Puede detener el programa una vez que ha comenzado pulsando el botón «START/STOP». Se mantendrá el tiempo que haya configura- El programa se reanudará automáticamente tras 10 minutos, o si vuelve a pulsar el botón «START/STOP». 12. Memoria Si se interrumpe el suministro de corriente del aparato, es posible reanudar el programa activado previamente en un plazo de 10 mi- nutos. -
Página 123: Hornear Pan
15. Hornear pan Coloque el molde sobre el eje motriz y gírelo en sentido de las agu- jas del reloj hasta que se encaje. A continuación, inserte los ganchos de amasar en el eje motriz. Se recomienda engrasar los ganchos de amasar con, por ejemplo, margarina, para poder extraerlos con mayor facilidad después del horneado. - Página 124 Luego puede seleccionar si el programa debe comenzar de inmedia- to o más adelante. En este último caso, configure la hora deseada con los botones «Tiempo+» y «Tiempo-». Si desea comenzar de in- mediato, ignore este paso y pulse el botón «START/STOP» hasta que oiga un pitido y el programa se ponga en marcha.
- Página 125 Saque los ganchos en la parte inferior del pan, utilice para ello la va- rilla suministrada. Deje enfriar el pan unos 20 minutos. Si no apaga el programa una vez finalizado, se activa automáticamente el modo de mantenimien- to de calor. Unos pitidos señalan el fin del modo de mantenimiento de calor.
-
Página 126: Observaciones Especiales
16. Observaciones especiales 16.1 Programa 4 (rápido) Los panes se elaborar normalmente con bicarbonato o polvos de hornear. Estos ingredientes se activan con el líquido y el calor. Para este programa se recomienda también añadir primero el líquido al molde y luego el resto de ingredientes. Durante el amasado, es posible que los ingredientes secos se acumu- len en los rincones del molde. -
Página 127: Orden De Los Ingredientes
• Si ha medido aceite u otros ingredientes con el vaso, límpielo bien. • Mida los ingredientes secos con el vaso o la cuchara medidores suministrados. El lado grande de la cuchara medidora equivale a una cuchara, y el pequeño, a una cucharilla. No presione los ingredientes porque esto podría alterar la medición. -
Página 128: Solución De Errores
dora, para ello, ponga el molde sobre el engranaje y gírelo en sentido de las agujas del reloj hasta que se encaje. Utilice la varilla para sacar el gancho de amasar si se ha quedado pegado al pan. Utilice un paño humedecido para limpiar el resto de la carcasa y la tapa. - Página 129 Error Causa Solución de errores Sale humo por los Algunos ingredientes Desconecte el aparato del suminis- agujeros de venti- están demasiado cerca tro de corriente, deje que se enfríe lación durante el o se han pegado a los por completo y limpie los elementos horneado elementos calentadores calentadores.
-
Página 130: Notas Sobre Posibles Ingredientes
21. Notas sobre posibles ingredientes Distintos tipos de harina Harina integral La harina integral se muele a partir de cereales. Esta harina suele ser más pesada que la harina normal, y también tiene más nutrien- tes. Es ideal para mezclarla con otras. Harina sin polvos de hornear Esta harina es conocida como harina de trigo. - Página 131 Huevos Los huevos aportan nutrientes e intensidad al pan. Elimine cualqui- er resto de cáscara antes de batirlos. Bicarbonato El bicarbonato es muy parecido a los polvos de hornear. Se puede utilizar junto con estos. Polvos de hornear Se utilizan para hornear bizcochos o panes en el «Programa - 9 Ul- trarrápido».
- Página 132 Levadura Durante el levado, la levadura emite dióxido de carbono, que hace que el pan se hinche y garantiza una estructura interna suave. Pero necesita azúcar y harina como alimento. Guarde la levadura fresca en la nevera, porque las temperaturas demasiado altas pueden matarla.
-
Página 133: Ejemplos De Recetas
22. Ejemplos de recetas Consejos: - Use agua mineral para obtener un pan más esponjoso y ligero. - También puede sustituir el agua y la leche en polvo por la misma cantidad de leche. Recetas de pan Pan integral Pan de proteínas Tamaño del pan 850 g Tamaño del pan... - Página 134 Masa Masa de pizza Harina 300 g 1/2 cucharadita 1/2 dado Levadura fresca 2 cucharadita Aceite de oliva Agua, templada 200ml Azúcar 1 pizca de azúcar Programa 8 - Masa Preparación: Disuelva la levadura siempre en agua. Añádala junto con el resto de ingredientes a la panificadora.
- Página 135 Fases de los distintos programas y procesos Programa/ 1. Normal 2. Francés 3. Trigo inte- 4. Rápido 5. Dulce 6.Ultrar- proceso gral rápido 1 Tamaño del 1000 750 1000 1000 1000 pan en g KNEAD1 (en minutos) RISE1 (en minutos) KNEAD2 (en minutos) RISE2 (en...
-
Página 136: Advertencias De Seguridad Y Exoneración De Responsabilidad
23. Advertencias de seguridad y exoneración de responsabilidad No intente abrir el dispositivo para realizar reparaciones o modifi- caciones. Evite el contacto con la red eléctrica. No produzca un cor- tocircuito en el producto. El dispositivo no es estanco, utilícelo solo en entornos secos. - Página 137 Directiva WEEE 2012/19/UE Número de registro WEEE: DE 67896761 La empresa WD Plus GmbH declara por la presente que el aparato 303528/20190108FS002 satisface los requisitos esenciales y el resto de disposiciones pertinentes. Solicite una declaración de conformidad completa en: WD Plus GmbH, Wohlenbergstraße 16, 30179 Hannover (Alemania) Español...
- Página 138 Notes...
- Página 139 Notes...
- Página 140 WD Plus GmbH Wohlenbergstraße 16 D-30179 Hannover...