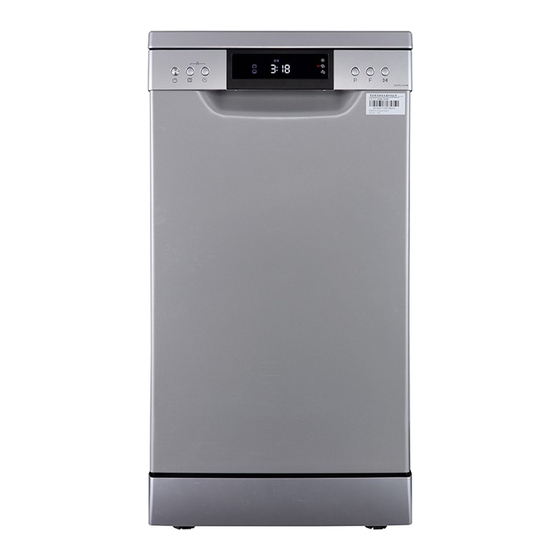
VALBERG 10S44 D SAD929C Manual De Instrucciones
Ocultar thumbs
Ver también para 10S44 D SAD929C:
- Instrucciones de uso (209 páginas) ,
- Instrucciones de uso (74 páginas) ,
- Instrucciones de uso (99 páginas)
Tabla de contenido
Publicidad
Idiomas disponibles
Idiomas disponibles
Enlaces rápidos
WARRANTY CONDITION
This product is guaranteed for a period of 2 years from the date of purchase* against
any failure resulting from a manufacturing or material defect. This warranty does not
EN
cover defects or damage resulting from incorrect installation, improper use or abnormal
wear of the product.
*as shown on the sales receipt.
CONDITION DE GARANTIE
Ce produit est garanti pour une période de 2 ans à partir de la date d'achat*, contre
toute défaillance résultant d'un vice de fabrication ou de matériau. Cette garantie ne
FR
couvre pas les vices ou les dommages résultant d'une mauvaise installation, d'une
utilisation incorrecte ou de l'usure anormale du produit.
*sur présentation du ticket de caisse.
GARANTIEVOORWAARDEN
Dit product wordt gegarandeerd voor een periode van 2 jaar vanaf de aankoopdatum*,
voor elke storing die het gevolg is van een fabricagefout of het materiaal. Gebreken of
NL
schade door slechte installatie, onjuist gebruik of abnormale slijtage van het product
worden niet gedekt door deze garantie.
*op vertoon van kassabon.
CONDICIONES DE GARANTÍA
El certificado de garantía de este producto tiene una duración de 2 años a partir de la
fecha de compra* que se limita a los defectos de fabricación y averías del material.
ES
Se excluyen de la garantía deficiencias o daños originados por una mala instalación,
errores en la manipulación o por un uso inadecuado.
*previa presentación del comprobante de compra.
ELECTRO DEPOT
1 route de Vendeville
59155 FACHES-THUMESNIL - FRANCE
01/2022 - V2
2/2
Dishwasher
Lave-vaisselle
Vaatwasser
Lavavajillas
972744 - 10S44 D SAD929C
INSTRUCTIONS FOR USE
.....................02
CONSIGNES D'UTILISATION
.....................50
GEBRUIKSAANWIJZINGEN
...................100
INSTRUCCIONES DE USO
...................150
Publicidad
Capítulos
Tabla de contenido
Solución de problemas

Manuales relacionados para VALBERG 10S44 D SAD929C


Resumen de contenidos para VALBERG 10S44 D SAD929C
- Página 1 *op vertoon van kassabon. CONDICIONES DE GARANTÍA 972744 - 10S44 D SAD929C El certificado de garantía de este producto tiene una duración de 2 años a partir de la fecha de compra* que se limita a los defectos de fabricación y averías del material.
-
Página 3: Tabla De Contenido
Aperçu de l’appareil Table of contents Product overview Overview of the Thanks! appliance T h a n k y o u f o r c h o o s i n g t h i s VA L B E R G p ro d u c t . Using your dishwasher Using the appliance Chosen, tested and recommended by ELECTRO DEPOT,... -
Página 4: Using The Appliance
Preview of the appliance Using the appliance Product overview Using your dishwasher • Before using your dishwasher : IMPORTANT To get the best performance from your dishwasher, read all operating instructions before using it for the first time. Inner pipe Inside Outside Salt container... - Página 5 Using the appliance Using the appliance WARNING NOTE Only fill with salt before running a cycle. • The salt container must only be refilled when the salt This will prevent any grains of salt or salty water, which may warning light in the control panel comes on.
- Página 6 Using the appliance Using the appliance Basket Loading Tips 4. Push in the upper basket. Adjusting the upper basket • Type 1: The height of the upper basket can be easily adjusted to accommodate taller dishes in either the upper or lower basket. To adjust the height of the upper rack, follow these steps: 1.
-
Página 7: Installation Instruction
Using the appliance Using the appliance Installation instruction Folding back the cup shelves To make room for taller items in the upper basket, raise the cup rack upwards. You can then lean the tall glasses against it. You can also remove it when it is not required for use. WARNING Electrical shock hazard Disconnect electrical power before installing dishwasher. - Página 8 Using the appliance Using the appliance Water supply and drain How to connect the safety supply hose 1. Pull the safety supply hoses out from storage compartment located at rear of dishwasher. Cold water connection • Connect the cold water supply hose to a threaded 3/4(inch) connector and make sure that 2.
- Página 9 Using the appliance Using the appliance How to drain excess water from hoses Free Standing Installation If the connection to the drain pipe is positioned higher than 1000 mm, excess water may Fitting between existing carbinets remain in the drain hose. It will be necessary to drain excess water from the hose into a bowl The height of the dishwasher, 845 mm, has been designed in order to allow the machine to be or suitable container that is held outside and lower than the sink.
-
Página 10: Loading The Baskets
Using the appliance Using the appliance Loading the baskets NOTE According to EN60436: Loading the dishwasher to its full capacity Max plate diameter : 30cm will contribute to energy and water savings. Upper basket: Cutlery rack: Number Item Cups Saucers Glasses Mugs Dessert bowls... -
Página 11: Quick User Guide
Using the appliance Using the appliance Quick user guide Number Item Please read the corresponding content 4. Fill the dispenser with detergent and rinse Soup spoons on the instruction manual for detailed aid. operating method. Forks 1. Install the dishwasher Knives (Please check the section “INSTALLATION 4 4 4... -
Página 12: Using Your Dishwasher
Using the appliance Using the appliance Using your dishwasher Display Control panel Upper When you select Upper, only the dishes in the upper rack will be washed. The spray system of the lower basket will not operate. Alt indicator Lower When you select Lower, only the dishes in the lower rack will be washed. - Página 13 Using the appliance Using the appliance 2. Within 60 seconds after the appliance was switched on, press the Programme button for Strwash more than 5 seconds to start the water softener setting mode; To wash very dirty, hard to clean dishes. (It can only be used with Intensive, Universal, ECO, Glass, 90 min ) 3.
-
Página 14: Water Softener
Using the appliance Using the appliance Recommendations for loading the dishwasher NOTE • Scrape off any large amounts of leftover food. Soften remnants of burnt food in pans. If your model does not have any water softener, you may It is not necessary to rinse the dishes under running water. For best performance of the dishwasher, follow these loading guidelines. - Página 15 Using the appliance Using the appliance Removing the dishes NOTE To prevent water dripping from the upper basket into the lower basket, we recommend that For the best washing effect, please load the baskets refer you empty the lower basket first, followed by the upper basket. to standard loading options.
-
Página 16: Proper Use Of Detergent
Using the appliance Using the appliance Function of detergent 2. Pour the rinse aid into the dispenser, being careful not to overfill. • The chemical ingredients that compose the detergent are necessary to remove, crush and dispense all dirt out of the dishwasher. •... - Página 17 Using the appliance Using the appliance Filling the detergent dispenser 2. Add detergent into the larger cavity for the main wash cycle. For better cleaning result, 1. Please choose an open way according to the actual situation. especially if you have very dirt items, pour a small amount of detergent onto the door. Open the cap by sliding the release catch.
-
Página 18: Wash Cycle Table
Using the appliance Using the appliance Wash cycle table Detergent Description of Running Energy Rinse Program pre/main Water (L) • The table below shows which programs are best for the levels of food residue on them and cycle time(min) (kWh) wash how much detergent is needed. - Página 19 Using the appliance Using the appliance Automatic opening / Activ'Door To reset the dishwasher, follow the instructions below: 1. Press the Start/Pause button to pause the washing. At the end of the wash, the door will open automatically for optimal drying. 2.
-
Página 20: Maintenance And Cleaning
Useful information Useful information Maintenance and cleaning Internal care External care Filtering system The door and the door seal • The filtering system in the base of the wash cabinet retains coarse debris from the washing cycle, including foreign • Clean the door seals regularly with a soft damp cloth to remove food deposits. - Página 21 Useful information Useful information 2. The fine filter can be pulled off the bottom of the filter 4. Reassemble the filters in the reverse order of the assembly. The coarse filter can be detached from the main disassembly, replace the filter insert, and rotate clockwise filter by gently squeezing the tabs at the top and pulling it to the close arrow.
- Página 22 Useful information Useful information Spray arm 3. Wash the arms in soapy and warm water and use a soft • It is necessary to clean the spray arm regularly for hard brush to clean the jets. Replace them after rinsing them water chemicals will clog the spray arm jets and bearings.
- Página 23 Useful information Useful information 4. Reconnect the water inlet pipe to the water valve. Moving the appliance • If the appliance must be moved, try to keep it in the vertical 5. Remove the filter at the bottom of the tub and use a sponge position.
-
Página 24: Troubleshooting Tips
Useful information Useful information Useful information Troubleshooting tips Problem Possible causes What to do Before calling for service • Use only the special Reviewing the charts on the following pages may save you from calling for service dishwasher detergent to avoid suds. - Página 25 Useful information Useful information Useful information Problem Possible causes What to do Problem Possible causes What to do • Interrupt the program and Dishes block detergent • Re-loading the dishes Detergent left in dispenser Knocking noise in the A spray arm is knocking rearrange the items which dispenser properly.
-
Página 26: Availability Of Spare Parts
Useful information Useful information Availability of spare parts Error codes Seven years after placing the last unit of the model on the market: If there is a malfunction the dishwasher will display an error code. The following table shows possible error codes and their causes. Motor, circulation and drain pump, heaters and heating elements, including heat pumps (separately or bundled), piping and related equipment including all hoses, valves, filters and Codes... - Página 27 Aperçu de l’appareil Table des matières Présentation du produit Aperçu de l'appareil Merci ! N o u s v o u s r e m e r c i o n s d ' a v o i r c h o i s i c e p r o d u i t Utilisation de votre lave-vaisselle Utilisation de VA L B E R G .
-
Página 28: Aperçu De L'aPpareil
Aperçu de l’appareil Utilisation de l’appareil Présentation du produit Utilisation de votre lave-vaisselle • Avant d'utiliser votre lave-vaisselle : IMPORTANT Pour que votre lave-vaisselle donne des résultats optimaux, lisez toutes les consignes d'utilisation avant de l'utiliser pour la première fois. Intérieur Extérieur Tuyau intérieur... -
Página 29: Utilisation De L'aPpareil
Utilisation de l’appareil Utilisation de l’appareil REMARQUE AVERTISSEMENT • Le compartiment à sel ne doit être rempli que lorsque Attendez d'être prêt(e) à lancer un cycle de lavage avant le témoin lumineux correspondant s'allume sur le de remplir le réservoir de sel. panneau de commande. - Página 30 Utilisation de l’appareil Utilisation de l’appareil Conseils pour le chargement des paniers 4. Poussez le panier supérieur dans le fond de l'appareil. Réglage du panier supérieur • Option 1: La hauteur du panier supérieur peut facilement être réglée de manière à accueillir de plus grands objets dans le panier supérieur ou inférieur.
-
Página 31: Instructions D'iNstallation
Utilisation de l’appareil Utilisation de l’appareil Instructions d'installation Repliage des étagères à tasses Pour faire de la place pour des objets de plus grande taille dans le panier supérieur, soulevez l'étagère à tasses vers le haut. Vous pourrez alors appuyer les grands verres contre AVERTISSEMENT l'étagère. - Página 32 Utilisation de l’appareil Utilisation de l’appareil AVERTISSEMENT AVERTISSEMENT Vérifiez que l'appareil est correctement mis à la terre avant Un tuyau relié à une douchette d'évier peut éclater s'il est de l'utiliser. installé sur la même conduite d'eau que le lave-vaisselle. Si votre évier en est équipé, il est recommandé...
- Página 33 Utilisation de l’appareil Utilisation de l’appareil Mise à niveau de l'appareil Une fois l'appareil positionné à l'emplacement requis, la hauteur du lave-vaisselle peut être Tuyau Plan de modifiée en tournant les pieds de réglage. L'appareil ne doit en aucun cas être incliné de d'évacuation travail plus de 2°...
-
Página 34: Chargement Des Paniers
Utilisation de l’appareil Utilisation de l’appareil Chargement des paniers AVERTISSEMENT Selon la norme EN60436 : Après avoir ôté le plan de travail, les vis doivent être Charger le lave-vaisselle à sa pleine capacité permet d'économiser de l'énergie et de revissées sous le bord arrière de la partie supérieure l'eau. - Página 35 Utilisation de l’appareil Utilisation de l’appareil Nombre Catégorie NOTE Cuillères à soupe Diamètre assiette maximum : 30cm Fourchettes Couteaux 4 4 4 Cuillères à thé Compartiment à couverts : Cuillères à dessert Informations pour les tests de comparabilité, conformément à la norme EN 60436 Cuillères de service Capacité : 10 couverts Position du panier supérieur : position basse...
-
Página 36: Guide D'uTilisation Rapide
Utilisation de l’appareil Utilisation de l’appareil Guide d'utilisation rapide Utilisation de votre lave-vaisselle Merci de lire les chapitres correspondants 4. Remplissez les compartiments de Panneau de commande dans le guide d'utilisation pour obtenir des détergent et de liquide de rinçage. consignes d'utilisation plus détaillées. - Página 37 Utilisation de l’appareil Utilisation de l’appareil Affichage Lavage puissant Pour laver la vaisselle très sale, difficile à nettoyer. Haut (Ne peut être utilisé qu'avec les programmes Quand vous sélectionnez Haut, seule la vaisselle Intensif, Universel, Éco, Verres et 90 min.) dans le panier supérieur sera lavée. Le système de Séchage supplémentaire lavage du panier inférieur ne fonctionnera pas.
- Página 38 Utilisation de l’appareil Utilisation de l’appareil Réglage de la consommation de sel REMARQUE • Ce lave-vaisselle est conçu pour permettre le réglage de la quantité de sel utilisée en fonction de la dureté de l'eau. Cela permet d'optimiser et d'adapter le niveau de Veuillez consulter le paragraphe «...
- Página 39 Utilisation de l’appareil Utilisation de l’appareil - Les verres en cristal • Les couverts longs et/ou tranchants, tels que des couteaux à découper, doivent être - Les objets en acier susceptibles de rouiller positionnés horizontalement dans le panier supérieur. - Les plateaux en bois - Les objets fabriqués à...
- Página 40 Utilisation de l’appareil Utilisation de l’appareil • Le témoin Produit de rinçage faible ( ) s'allume lorsqu'il est nécessaire d'ajouter du produit de rinçage. • Évitez de trop remplir le compartiment à produit de rinçage. Chargement du compartiment à couverts Fonction du détergent Les couverts doivent être placés dans le compartiment à...
- Página 41 Utilisation de l’appareil Utilisation de l’appareil 2. Versez le produit de rinçage dans le compartiment, en veillant à ne pas trop le remplir. 4. Le réglage s'enregistrera si vous appuyez sur le bouton d'alimentation pour sortir du mode réglage, ou si vous n'effectuez aucune intervention pendant 5 secondes. Remplissage du compartiment à...
-
Página 42: Tableau Des Cycles De Lavage
Utilisation de l’appareil Utilisation de l’appareil Tableau des cycles de lavage 2. Ajoutez du détergent dans la plus grande cavité pour le cycle de lavage principal. Pour un lavage optimal, particulièrement si la vaisselle est très sale, versez une petite quantité •... - Página 43 Utilisation de l’appareil Utilisation de l’appareil Changement de programme en cours de cycle Détergent Durée de Produit Description du Énergie • Le programme ne peut être changé que s'il ne fonctionne que depuis peu de temps, sinon Programme prélavage/ fonctionne- Eau (l) cycle (kWh)
-
Página 44: Informations Pratiques
Utilisation de l’appareil Informations pratiques Entretien et nettoyage AVERTISSEMENT Entretien de l'extérieur de l'appareil Il est dangereux d'ouvrir la porte en cours de cycle, car la vapeur chaude pourrait vous brûler. Porte et joint de la porte • Nettoyez régulièrement les joints de porte à l'aide d'un chiffon doux humide, pour éliminer les résidus de nourriture. - Página 45 Informations pratiques Informations pratiques Entretien de l'intérieur de l'appareil Système de filtration • Le système de filtration à la base de la cuve retient les petits débris du cycle de lavage, y compris des corps étrangers comme les cure-dents ou les tessons. Les résidus recueillis peuvent obstruer les filtres.
- Página 46 Informations pratiques Informations pratiques AVERTISSEMENT • Ne serrez pas trop les filtres. Replacez les filtres correctement et dans l'ordre, sinon de gros résidus pourraient entrer dans le système et provoquer un blocage. • N'utilisez jamais le lave-vaisselle sans avoir remis les filtres en place.
-
Página 47: Entretien Du Lave-Vaisselle
Informations pratiques Informations pratiques 2. Pour sortir le bras de lavage inférieur, tirez-le vers le haut. Entretien du lave-vaisselle Précautions contre le gel • L'hiver, vous devez prendre des mesures de protection contre le gel pour votre lave-vaisselle. Après chaque cycle de lavage, veuillez suivre la procédure suivante : 1. - Página 48 Informations pratiques Informations pratiques 5. Retirez le filtre au fond de la cuve et utilisez une éponge Lorsque vous n'allez pas l'utiliser pendant longtemps pour absorber l'eau dans la cuve de décantation. • Nous vous recommandons d'effectuer un cycle de lavage à...
-
Página 49: Informations Utiles
Informations pratiques Informations pratiques Informations utiles Conseils de dépannage Problème Causes possibles Que faire Avant d'appeler un technicien • Utilisez uniquement un La consultation des tableaux des pages suivantes peut vous éviter d'avoir à appeler un détergent spécifique pour technicien lave-vaisselle pour éviter la formation de mousse. - Página 50 Informations pratiques Informations utiles Informations pratiques Problème Causes possibles Que faire Problème Causes possibles Que faire • Évitez de passer au lave- • Utilisez moins de Les objets concernés ne Combinaison d'une eau détergent si votre eau est vaisselle des objets qui ne Les verres sont ne sont pas résistent pas à...
-
Página 51: Disponibilité Des Pièces Détachées
Informations pratiques Informations pratiques Codes d'erreur AVERTISSEMENT En cas de dysfonctionnement, le lave-vaisselle affichera un code d'erreur. Le tableau suivant Réparer votre appareil vous-même ou le faire réparer par montre les codes d'erreur possibles et leur cause. un non-professionnel peut provoquer des risques graves pour la sécurité... -
Página 52: Aperçu De L'aPpareil
Aperçu de l’appareil Inhoudsopgave Overzicht van het product Overzicht van het Bedankt! toestel B e d a n k t o m d i t VA L B E R G - p ro d u c t t e k i e z e n . Uw vaatwasser gebruiken Het toestel gebruiken E L E CT R O D E P OT k i e st , te st , e n b eve e l t d e p ro d u c te n... - Página 53 Overzicht van het toestel Gebruik van het toestel Overzicht van het product Uw vaatwasser gebruiken • Voor u uw vaatwasser gebruikt: BELANGRIJK Lees de gebruiksaanwijzing voor u de vaatwasser voor het eerst gebruikt voor optimale prestaties. Binnenslang Binnenkant Buitenkant Zoutreservoir 1.
-
Página 54: Gebruik Van Het Toestel
Gebruik van het toestel Gebruik van het toestel WAARSCHUWING OPMERKING Vul enkel met zout voor u een cyclus uitvoert. • Het zoutreservoir moet enkel bijgevuld worden wanneer het Op die manier vermijdt u dat korrels zout of zout water dat waarschuwingslichtje op het bedieningspaneel aangaat. - Página 55 Gebruik van het toestel Gebruik van het toestel Gebruikstips voor de mand 4. Duw de bovenste mand erin. Afstellen van de bovenste mand • Type 1: De hoogte van de bovenste mand kan gemakkelijk worden aangepast om grotere borden in de bovenste of onderste mand te kunnen plaatsen.
-
Página 56: Installatie-Instructies
Gebruik van het toestel Gebruik van het toestel Installatie-instructies Inklappen van het kopjesrekje Om in de bovenste mand plaats te maken voor grotere voorwerpen, klapt u het kopjesrekje naar boven. U kunt nu grotere glazen tegen het rekje plaatsen. U kunt het rekje ook WAARSCHUWING verwijderen wanneer u het niet gebruikt. - Página 57 Gebruik van het toestel Gebruik van het toestel Watertoevoer en -afvoer Hoe de veiligheidstoevoerslang aansluiten 1. Trek de veiligheidstoevoerslangen uit de opslagruimte achteraan de vaatwasser. Aansluiting koud water • Sluit de toevoerslang voor koud water aan op een connector met schroefdraad (3/4 inch 2.
- Página 58 Gebruik van het toestel Gebruik van het toestel Hoe overtollig water uit de slang verwijderen Vrijstaande installatie Wanneer de aansluiting op de afvoerleiding hoger geplaatst is dan 1.000 mm kan er overtollig Plaatsing tussen bestaande kasten water achterblijven in de afvoerslang. Overtollig water moet dan uit de slang verwijderd De hoogte van de vaatwasser, 845 mm, is speciaal ontworpen om het toestel tussen worden in een kom of geschikte bak die buiten en lager dan de wasbak geplaatst is.
-
Página 59: De Manden Vullen
Gebruik van het toestel Gebruik van het toestel De manden vullen NOTE Volgens EN60436: Max. plaatdiameter : 30cm De vaatwasser volledig vullen bespaart water en energie. Bovenste mand: Bestekrek: Aantal Categorie Kopjes Schoteltjes Glazen Mokken Dessertkommen Glazen kommen OPMERKING Plaats lichte couverts op het rekje. Deze mogen in totaal Onderste mand: niet zwaarder zijn dan 1,5 kg. - Página 60 Gebruik van het toestel Gebruik van het toestel Gebruikershandleiding Aantal Categorie Lees de inhoud van de handleiding voor 4 . D o e v a a t w a s p r o d u c t i n h e t Soeplepels meer details.
- Página 61 Gebruik van het toestel Gebruik van het toestel Uw vaatwasser gebruiken Display Bedieningspaneel Bovenste Wanneer u Bovenste selecteert, zullen enkel de borden in de bovenste mand worden gewassen. Het sproeisysteem van de onderste mand zal niet werken. Alt-lampje Onderste Wanneer u Onderste selecteert, zullen enkel de borden in de onderste mand worden gewassen.
- Página 62 Gebruik van het toestel Gebruik van het toestel Het zoutverbruik aanpassen Strwash • De hoeveelheid zout die de vaatwasser verbruikt kan aangepast worden in functie van Om zeer vuile, moeilijk te reinigen borden te wassen. de hardheid van het gebruikte water. Hierdoor wordt de verbruikte hoeveelheid zout (Kan enkel gebruikt worden bij Intensief, Universeel, geoptimaliseerd en correct ingesteld.
- Página 63 Gebruik van het toestel Gebruik van het toestel Aanbevelingen voor het inladen van de vaatwasser OPMERKING • Verwijder grote voedingsresten. Maak restjes aangebrand eten in pannen zacht. Het is Indien uw model geen waterverzachter heeft, kan u deze niet nodig om de vaat onder stromend water te spoelen. Volg deze richtlijnen voor de beste prestaties van de vaatwasser.
- Página 64 Gebruik van het toestel Gebruik van het toestel De borden verwijderen WAARSCHUWING Om te vermijden dat er water uit de bovenste mand in de onderste mand druppelt, raden we aan dat u eerst de onderste mand leeg maakt gevolgd door de bovenste mand. Zorg ervoor dat er onderaan geen voorwerpen uitsteken.
- Página 65 Gebruik van het toestel Gebruik van het toestel Functie van vaatwasmiddel 2. Giet het spoelmiddel in het compartiment en let er hierbij op het niet te veel te vullen. • De detergentia, met hun chemische bestanddelen, zijn noodzakelijk om vuil te verwijderen, te vermalen en af te voeren uit de vaatwasser.
- Página 66 Gebruik van het toestel Gebruik van het toestel 4. Wacht 5 seconden of druk op de Aan/Uit-toets om de instelling te bevestigen en de 2. Voeg vaatwasmiddel toe aan het grootste vakje voor het hoofdprogramma. Voor een instelmodus te verlaten. optimaal wasresultaat, vooral wanneer de vaat erg vuil is, giet u een klein beetje detergens op de deur.
- Página 67 Gebruik van het toestel Gebruik van het toestel Tabel met wascycli Wasmid- Omschrijving del voor-/ Energiever- Waterver- Spoel- • De tabel hieronder geeft aan welke programma's het beste zijn voor het niveau van Programma Duur (min) van de cyclus hoofdpro- bruik (kWh) bruik (L) middel...
- Página 68 Gebruik van het toestel Gebruik van het toestel Programma veranderen in het midden van de cyclus WAARSCHUWING • Het is enkel mogelijk om een programma te veranderen wanneer het net begonnen is. Anders is het vaatwasproduct misschien reeds toegevoegd of het afwaswater met Het is gevaarlijk om de deur in het midden van de cyclus te vaatwasmiddel reeds afgevoerd.
- Página 69 Praktische informatie Praktische informatie Onderhoud en reiniging De binnenkant schoonmaken De buitenkant schoonmaken Filtersysteem Deur en deurafdichting • Het filtersysteem onderaan de waskast houdt vuil van de wascyclus tegen, inclusief vreemde voorwerpen zoals • Maak de deurafdichting regelmatig schoon met een zachte vochtige doek om voedingsresten te verwijderen.
-
Página 70: Praktische Informatie
Praktische informatie Praktische informatie 2. De fijne filter kan uit de bodem van de filtergroep worden 4. Zet de filters in de omgekeerde volgorde terug in elkaar, getrokken. De grove filter kan van de hoofdfilter worden plaats ze terug en draai in wijzerzin in de richting van de pijl. losgemaakt door zachtjes op de lipjes te duwen bovenaan de filter en eraan te trekken. - Página 71 Praktische informatie Praktische informatie Sproeiarm 3. Was de sproeiarm met lauw zeepsop en gebruik een • De sproeiarm moet regelmatig schoongemaakt worden zachte borstel om de jets te reinigen. Plaats ze opnieuw na omdat de sproeiers en lagers verstopt kunnen raken door de ze grondig te hebben afgespoeld.
- Página 72 Praktische informatie Praktische informatie 4. Maak de watertoevoerslang opnieuw vast aan de Wanneer de vaatwasser lange tijd niet gebruikt wordt waterklep. • Wij raden u aan een wascyclus met een lege machine uit te voeren en vervolgens de stekker uit het stopcontact 5.
-
Página 73: Probleemoplossing
Praktische informatie Praktische informatie Probleemoplossing Probleem Mogelijke oorzaken Wat u moet doen Voor u de hersteldienst belt • Gebruik enkel speciale Wanneer u de tabellen op de volgende pagina's bekijkt, kan u zich allicht de moeite besparen producten voor vaatwassers om de hersteldienst te bellen. - Página 74 Praktische informatie Praktische informatie Probleem Mogelijke oorzaken Wat u moet doen Probleem Mogelijke oorzaken Wat u moet doen • Was geen voorwerpen De vaat werd niet juist in de • Zie "de vaat voorbereiden Het keukengerei in kwestie in de vaatwasser die niet vaatwasser geplaatst.
- Página 75 Praktische informatie Praktische informatie Beschikbaarheid van reserveonderdelen Probleem Mogelijke oorzaken Wat u moet doen Zeven jaar nadat het laatste toestel van het model op de markt gebracht is: • Draag handschoenen indien er restanten van Motor, circulatiepomp en afvoerpomp, verwarmingstoestellen en verwarmingselementen, met Niet goed ingeladen het vaatwasmiddel op de inbegrip van warmtepompen (afzonderlijk of in combinatie), leidingen en aanverwante uitrusting...
-
Página 76: Foutcodes
Praktische informatie Notities Foutcodes De vaatwasser toont een foutcode bij defecten. De volgende tabel geeft mogelijke foutcodes en hun oorzaken aan. Codes Betekenis Mogelijke oorzaken De kraan is niet open, watertoevoer Langere toevoertijd. is beperkt of de waterdruk te laag. Bereikt de vereiste temperatuur Defect van het verwarmingselement. - Página 77 Aperçu de l’appareil Índice Descripción del aparato Descripción general ¡Gracias! del aparato G r a c i a s p o r e le g i r e s t e p ro d u c t o VA L B E R G . Cómo utilizar el aparato Uso del aparato S e l e c c i o n a d o s , p r o b a d o s y r e c o m e n d a d o s p o r...
-
Página 78: Descripción Del Aparato
Descripción del aparato Utilización del aparato Descripción del producto Cómo utilizar su aparato • Antes de utilizar el lavavajillas: IMPORTANTE Para obtener el mejor rendimiento de su lavavajillas, lea todas las instrucciones de funcionamiento antes de usarlo por primera vez. Interior Exterior Tubo interior... -
Página 79: El Depósito De Sal Solo Debe Rellenarse Cuando Se Enciende El Indicador De Sal
Utilización del aparato Utilización del aparato ADVERTENCIA NOTA Rellene el compartimento de sal antes de ejecutar un ciclo. • El depósito de sal solo debe rellenarse cuando se enciende Esto evitará que los granos de sal o el agua salada, que el indicador de sal en el panel de control. - Página 80 Utilización del aparato Utilización del aparato Consejos para cargar las cestas 4. Empuje la cesta superior hacia dentro. Ajustar la cesta superior • Tipo 1: La altura de la cesta superior se puede ajustar fácilmente para poder colocar vajilla de más altura en la cesta superior o en la inferior.
-
Página 81: Para Garantizar La Seguridad Personal
Utilización del aparato Utilización del aparato Instrucciones de instalación Plegar la rejilla para tazas Para dejar espacio para los artículos de más altura en la cesta superior, suba la rejilla para tazas. Luego podrá apoyar los vasos altos contra la cesta. También puede quitarla cuando ADVERTENCIA no la necesite. -
Página 82: Fije El Tubo De Evacuación De Forma Segura En La Posición A O En La Posición B
Utilización del aparato Utilización del aparato ADVERTENCIA ADVERTENCIA Asegúrese de que exista una conexión a tierra adecuada Un tubo conectado al grifo puede explotar si se instala en antes de su uso. la misma línea de agua que el lavavajillas. Si su fregadero tiene uno, se recomienda desconectar el tubo y tapar el Suministro y evacuación de agua orificio. - Página 83 Utilización del aparato Utilización del aparato Colocación del aparato • Coloque el aparato en la ubicación deseada. La parte posterior debe apoyarse contra la Tubo de Contador pared que hay detrás y los lados a lo largo de los muebles o paredes adyacentes. evacuación •...
-
Página 84: Cargar Las Cestas
Utilización del aparato Utilización del aparato Cargar las cestas Debajo de una encimera existente (Cuando se instala debajo de una encimera) Conforme a la EN60436: En la mayoría de las cocinas modernas solamente hay una parte de la encimera debajo de la Cargar el lavavajillas a su máxima capacidad cual se pueden instalar armarios y electrodomésticos. -
Página 85: Diámetro Máximo De Plato : 30Cm
Utilización del aparato Utilización del aparato Número Objeto NOTE Diámetro máximo de plato : 30cm Cucharas soperas Tenedore Cuchillos Cesta para los cubiertos: 4 4 4 Cucharitas Cucharas de postre Información para las pruebas de comparabilidad según la EN60436 Cucharones de Capacidad: 10 cubiertos servir Posición de la cesta superior: posición inferior... -
Página 86: Uso Del Aparato
Utilización del aparato Utilización del aparato Guía de uso rápido Uso del aparato Lea el contenido correspondiente en el 4. Rellene el dispensador de detergente y Panel de control manual de instrucciones para conocer el abrillantador. método de funcionamiento detallado. 1. - Página 87 Utilización del aparato Utilización del aparato Pantalla Lavado fuerte Para lavar vajilla muy sucia y difícil de lavar. (Solo Superior puede utilizarse con los programas Intensivo, Si se selecciona Superior, solo se lavará la vajilla de Universal, ECO, Cristal y 90 min) la rejilla superior.
-
Página 88: Descalcificador De Agua
Utilización del aparato Utilización del aparato • Siga los siguientes pasos para ajustar el consumo de sal. NOTA 1. Cierre la puerta y encienda el aparato; Si su modelo no tiene descalcificador de agua, ignore esta sección. 2. En los 60 segundos posteriores al encendido del aparato, presione el botón Programa Descalcificador de agua durante más de 5 segundos para iniciar el modo de ajuste del descalcificador de agua;... - Página 89 Utilización del aparato Utilización del aparato Recomendaciones para cargar el lavavajillas Retirar la vajilla • Retire la comida sobrante. Ablande los restos de comida quemada en las cacerolas. No Para evitar que caiga agua de la cesta superior a la inferior, le recomendamos que vacíe es necesario enjuagar los platos con agua corriente.
-
Página 90: Uso Correcto Del Detergente
Utilización del aparato Utilización del aparato Función del detergente • Los ingredientes químicos que componen el detergente son necesarios para eliminar y NOTA triturar toda la suciedad del lavavajillas y deshacerse de ella. Para garantizar una mejor limpieza, cargue las cestas •... - Página 91 Utilización del aparato Utilización del aparato 2. Vierta abrillantador en el dosificador y asegúrese de no llenarlo demasiado. 4. Si no se realiza ninguna operación durante 5 segundos ni se pulsa el botón de encendido para salir del modo de ajuste, la configuración se guarda correctamente. Rellenar el dispensador de detergente 1.
-
Página 92: Tabla De Ciclos De Lavado
Utilización del aparato Utilización del aparato Tabla de ciclos de lavado 2. Añada detergente en la cavidad más grande para el lavado principal. Para conseguir un resultado de limpieza mejor, sobre todo si los objetos están muy sucios, vierta un poco de •... - Página 93 Utilización del aparato Utilización del aparato 5. Elija un programa, la luz correspondiente se encenderá. Luego presione el botón Inicio/ Detergente Tiempo de Pausa, el lavavajillas comenzará su ciclo. para Descripción del funcio- Energía Abril- Programa prelavado/ Agua (L) ciclo namiento (kWh) lantador...
-
Página 94: Información Práctica
Utilización del aparato Información práctica Mantenimiento y limpieza ADVERTENCIA Limpieza de la parte exterior Es peligroso abrir la puerta a mitad del ciclo, ya que el vapor caliente podría quemarlo. La puerta y la junta de la puerta • Limpie las juntas de la puerta con regularidad con un paño suave húmedo para eliminar los restos de comida. - Página 95 Información práctica Información práctica Limpieza de la parte interior 2. El filtro fino se puede extraer tirando de la parte inferior del conjunto del filtro. El filtro de partículas gruesas se Sistema de filtrado puede separar del filtro principal apretando con suavidad •...
-
Página 96: Para Limpiar El Brazo Aspersor, Siga Las Siguientes Instrucciones
Información práctica Información práctica 4. Vuelva a ensamblar los filtros en el orden inverso, vuelva Brazo aspersor a colocar el cartucho del filtro y gírelo en el sentido de las • Es necesario limpiar el brazo aspersor con regularidad, agujas del reloj hasta llegar a la flecha. ya que el agua dura obstruirá... -
Página 97: Cuidado Del Lavavajillas
Información práctica Información práctica 2. Para extraer el brazo aspersor inferior, tire de él hacia 1. Corte la energía eléctrica del lavavajillas en la fuente de arriba. suministro. 2. Cierre el suministro de agua y desconecte la tubería de entrada de agua de la válvula de agua. 3. -
Página 98: Mover El Aparato
Información práctica Información práctica Resolución de problemas • Para quitar las manchas de la superficie del interior, utilice un paño humedecido con agua y un poco de vinagre, Antes de llamar al servicio de posventa Las tablas de las páginas siguientes pueden evitar que tenga que llamar al servicio técnico. o un producto de limpieza elaborado específicamente para lavavajillas. - Página 99 Información práctica Información práctica Información práctica Información práctica Problemas Posibles causas ¿Qué hay que hacer? Problemas Posibles causas ¿Qué hay que hacer? • Utilice únicamente el Los cubiertos afectados • Evite lavar artículos que detergente especial para no son resistentes a la no sean resistentes a la lavavajillas para evitar corrosión.
-
Página 100: Disponibilidad De Las Piezas De Recambio
Información práctica Información práctica Disponibilidad de las piezas de recambio Problemas Posibles causas ¿Qué hay que hacer? Siete años después de la puesta en el mercado de la última unidad del modelo: • Compruebe los ajustes del En las zonas de agua Hay manchas blancas en los descalcificador o el nivel de dura, se pueden producir... -
Página 101: Códigos De Error
Información práctica Códigos de error Si hay algún fallo, el lavavajillas mostrará un código de error. La siguiente tabla muestra los posibles códigos de error y sus causas. Códigos Significado Posibles causas Los grifos no están abiertos, la Tiempo de entrada de agua muy entrada de agua es limitada o la elevado.