Tabla de contenido
Publicidad
Enlaces rápidos
MOTO GUZZI DESEA AGRADECERLE
por haber elegido uno de sus productos. Hemos preparado este manual para permitirle apreciar todas sus cualidades. Le aconsejamos que lea todo
su contenido antes de conducir por primera vez. Contiene información, consejos y advertencias para el uso de su vehículo; asimismo, descubrirá
características, detalles y soluciones que lo convencerán de lo acertado de su elección. Estamos seguros de que teniendo todo esto en cuenta, le
resultará fácil conocer su nuevo vehículo, el cual podrá disfrutar por mucho tiempo con total satisfacción. La presente publicación es parte integrante
del vehículo y en caso de venderlo debe ser entregada al nuevo propietario.
MOTO GUZZI WOULD LIKE TO THANK YOU
for choosing one of its products. We have drawn up this booklet to provide a comprehensive overview of your vehicle's quality features. Please read it
carefully before riding the vehicle for the first time. It contains information, tips and precautions for using your vehicle. It also describes features, details
and devices to assure you that you have made the right choice. We believe that if you follow our suggestions, you will soon get to know your new vehicle
well and will use it for a long time at full satisfaction. This booklet is an integral part of the vehicle, and should the vehicle be sold, it must be transferred
to the new owner.
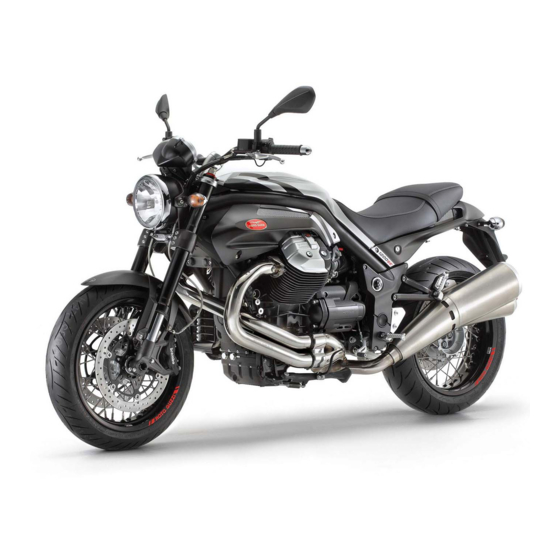
Griso 8V-1200
Ed. 04 2008
Publicidad
Tabla de contenido

Manuales relacionados para MOTO GUZZI Griso 8V-1200


Resumen de contenidos para MOTO GUZZI Griso 8V-1200
- Página 1 MOTO GUZZI WOULD LIKE TO THANK YOU for choosing one of its products. We have drawn up this booklet to provide a comprehensive overview of your vehicle's quality features. Please read it carefully before riding the vehicle for the first time.
- Página 2 The instructions in this manual have been prepared to offer mainly a simple and clear guide to its use; it also describes routine maintenance procedures and regular checks that should be carried out on the vehicle at an authorised Moto Guzzi Dealer or Workshop, The booklet also contains instructions for simple repairs.
- Página 3 Seguridad de las personas Personal safety El no-cumplimiento total o parcial de estas prescrip- Failure to completely observe these instructions will ciones puede comportar peligro grave para la incolu- result in serious risk of personal injury. midad de las personas. Salvaguardia del ambiente Safeguarding the environment Indica el comportamiento correcto para que el uso del...
-
Página 5: Tabla De Contenido
INDICE INDEX NORMAS GENERALES..............GENERAL RULES................Introducción................10 Foreword..................10 Monóxido de carbono............... 10 Carbon monoxide............... 10 Combustible................11 Fuel.................... 11 Componentes calientes............12 Hot components................. 12 Puesta en marcha y Conducción..........12 Start off and Riding..............12 Testigos..................13 Warning lights................ - Página 6 Compartimiento porta-doc./kit herramientas......46 Identification................... 47 La identificación................47 Luggage anchor point..............48 Fijación maletero................. 48 USE....................49 EL USO................... 49 Checks................... 50 Controles..................50 Refuelling..................53 Abastecimiento................53 Rear shock absorbers adjustment..........55 Regulación amortiguadores traseros........... 55 Front fork adjustment..............58 Regulación horquilla delantera............
- Página 7 Grupo óptico trasero..............110 Rear turn indicators................ 111 Indicadores de dirección traseros..........111 Number plate light................111 Luz placa..................111 Rear-view mirrors................112 Espejos retrovisores..............112 Front and rear disc brake............... 113 Freno de disco delantero y trasero..........113 Periods of inactivity................ 115 Inactividad del vehiculo..............
-
Página 9: Normas Generales
Griso 8V-1200 Cap. 01 Normas generales Chap. 01 General rules... -
Página 10: Introducción
Introducción Foreword NOTA NOTE EL TIEMPO PREVISTO PARA REALI- CARRY OUT THE MAINTENANCE OP- ZAR LAS OPERACIONES DE MANTE- ERATIONS AT HALF THE INTERVALS NIMIENTO, DEBE SER REDUCIDO A SHOWN IF THE VEHICLE IS USED IN LA MITAD SI EL VEHÍCULO SE UTILI- WET OR DUSTY AREAS, OFF ROAD ZA EN ZONAS LLUVIOSAS, POLVO- OR FOR SPORTS APPLICATIONS. -
Página 11: Combustible
Combustible Fuel ATENCIÓN CAUTION EL COMBUSTIBLE UTILIZADO PARA FUEL USED TO POWER INTERNAL LA PROPULSIÓN DE LOS MOTORES COMBUSTION ENGINES IS HIGHLY DE EXPLOSIÓN ES EXTREMADA- FLAMMABLE AND CAN BECOME EX- MENTE INFLAMABLE Y PUEDE RE- PLOSIVE UNDER SPECIFIC CONDI- SULTAR EXPLOSIVO EN DETERMI- TIONS. -
Página 12: Componentes Calientes
LA CAÍDA O LA EXCESIVA INCLINA- VEHICLE FALL OR EXCESSIVE INCLI- CIÓN DEL VEHÍCULO PUEDEN PRO- NATION CAN CAUSE FUEL TO SPILL DUCIR DERRAMES DE COMBUSTI- OUT. BLE. Componentes calientes Hot components El motor y los componentes de la insta- The engine and the exhaust system com- lación de escape alcanzan altas tempe- ponents get very hot and remain in this... -
Página 13: Testigos
TINUES TO WORK WITH LIMITED TINÚA FUNCIONANDO CON RENDI- PERFORMANCE; TAKE YOUR VEHI- MIENTO LIMITADO; DIRIGIRSE INME- CLE TO AN Official Moto Guzzi Deal- DIATAMENTE A UN CONCESIONARIO er TO CARRY OUT THE MAINTE- OFICIAL Moto Guzzi PARA REALIZAR NANCE OPERATIONS SPECIFIED IN... -
Página 14: Aceite Motor Y Aceite Cambio Usados
CONTACT AN OFFICIAL Moto Guzzi INMEDIATAMENTE Y RESTABLECER Dealer TO CHECK THE CIRCUIT. EL NIVEL. DIRIGIRSE A UN CONCESIONARIO OFICIAL Moto Guzzi PARA QUE CON- TROLE LA INSTALACIÓN. Aceite motor y aceite cambio Used engine oil and gearbox usados ATENCIÓN... -
Página 15: Líquido Frenos Y Embrague
MANTENER FUERA DEL ALCANCE KEEP OUT OF THE REACH OF CHIL- DE LOS NIÑOS. DREN Líquido frenos y embrague Brake and clutch fluid Líquido frenos y embrague Brake and clutch fluid LOS LÍQUIDOS DE FRENOS Y DEL BRAKE AND CLUTCH FLUIDS CAN EMBRAGUE PUEDEN DAÑAR LAS DAMAGE THE PLASTIC OR RUBBER SUPERFICIES PINTADAS, DE PLÁS-... -
Página 16: Electrolito Y Gas Hidrógeno De La Batería
Electrolito y gas hidrógeno de Battery hydrogen gas and la batería electrolyte ATENCIÓN CAUTION EL ELECTROLITO DE LA BATERÍA ES BATTERY ELECTROLYTE IS TOXIC, TÓXICO, CÁUSTICO Y EN CONTACTO CORROSIVE AND AS IT CONTAINS CON LA EPIDERMIS PUEDE CAUSAR SULPHURIC ACID, IT CAN CAUSE QUEMADURAS, YA QUE CONTIENE BURNS WHEN IN CONTACT WITH ÁCIDO SULFÚRICO. -
Página 17: Soporte
UNA AIREACIÓN ADECUADA AL WHEN SERVICING OR RECHARGING REALIZAR EL MANTENIMIENTO O LA THE BATTERY. RECARGA DE LA BATERÍA. KEEP OUT OF THE REACH OF CHIL- MANTENER FUERA DEL ALCANCE DREN DE LOS NIÑOS. BATTERY LIQUID IS CORROSIVE. DO EL LÍQUIDO DE LA BATERÍA ES CO- NOT POUR OR SPILL IT, PARTICU- RROSIVO. -
Página 18: Comunicación De Los Defectos Que Influyen En La Seguridad
Comunicación de los defectos Reporting of defects that que influyen en la seguridad affect safety Salvo que se lo especifique en este Ma- Unless otherwise specified in this Use nual de Uso y Mantenimiento, no des- and Maintenance Booklet, do not remove montar ningún componente mecánico o any mechanical or electrical component. -
Página 19: Vehìculo
Griso 8V-1200 Cap. 02 Vehìculo Chap. 02 Vehicle... - Página 20 02_01...
-
Página 21: Ubicación Componentes Principales
02_02 Ubicación componentes Arrangement of the main principales (02_02) components (02_02) Leyenda: key: 1. Faro delantero 1. Front headlamp 2. Tablero de instrumentos 2. Instrument panel 3. Espejo retrovisor izquierdo 3. Left rear-view mirror 4. Tapón del depósito de combus- 4. - Página 22 10. Correa de agarre pasajero 11. Tool compartment 11. Compartimiento portaherra- 12. Passenger left footrest mientas 13. Seat lock 12. Estribo izquierdo pasajero 14. Rider left footrest 13. Cerradura del asiento 15. Gear shift lever 14. Estribo izquierdo del conductor 16.
-
Página 23: Tablero De Instrumentos
02_03 Tablero de instrumentos Dashboard (02_03) (02_03) key: 1. Clutch control lever Leyenda: 2. Steering lock ignition switch 1. Palanca de mando embrague 3. Instruments and gauges 2. Conmutador de arranque blo- 4. Front brake lever queo del manillar 5. Throttle grip 3. -
Página 24: Conjunto De Instrumentos
Official Moto Guzzi extraviada dirigirse a un concesionario Dealer to enable these keys or to disable oficial Moto Guzzi. En el momento de la a key that has been lost. When the vehi- entrega del vehículo, luego de girar la lla- cle is delivered and approximately ten ve a la posición ON y durante diez se-... -
Página 25: Dificación Del Código
mente. Para conocer el procedimiento de cedure, see the CODE MODIFICATION ingreso del código ver el apartado MO- section DIFICACIÓN DEL CÓDIGO It is important to remember the personal Es importante recordar el código perso- code because: nal ya que permite: •... -
Página 26: Representacion Visual Digital Por Cristales Liquidos
4. Testigo caballete lateral (color 5. Turn indicator warning light amarillo) (green) 5. Testigo intermitentes (color ver- 6. High-beam warning light (blue) 7. Alarm summary warning light / 6. Testigo luz de carretera (color immobilizer activation - alarms azul) (red) 7. -
Página 27: Teclas De Mando
- RELOJ (zona B) - Trip computer and additional functions (zone E) - ODÓMETRO (zona C) - TEMPERATURA AMBIENTE (zona D) - Ordenador de viaje y funciones com- plementarias (zona E) Teclas de mando (02_08, Control buttons (02_08, 02_09, 02_09, 02_10) 02_10) 1. - Página 28 - ODÓMETRO PARCIAL - TRIP ODOMETER - TIEMPO DE RECORRIDO - TRAVELLING TIME - CONSUMO DURANTE EL RECORRI- - TRIP CONSUMPTION - MAXIMUM SPEED - VELOCIDAD MÁXIMA - MEAN SPEED - VELOCIDAD MEDIA To shift from one value to the next, press El cambio entre una magnitud y la suce- the SET button (2) briefly.
- Página 29 Las funciones TENSIÓN DE BATERÍA y CONSUMO INSTANTÁNEO no permiten la interacción con el usuario. CRONÓMETRO CHRONOMETER Para utilizar el cronómetro, desde la con- In order to use the chronometer, from figuración MODE, presionando breve- MODE setting, press the SET button (2) mente il pulsador SET (2), seleccionar la briefly and select the CHRONOMETER función CRONÓMETRO.
-
Página 30: Funciones Avanzadas
cleta y entrar en la función VISUALIZAR MEDIDAS del menú CRONÓMETRO. Funciones avanzadas (02_11, Advanced functions (02_11, 02_12, 02_13, 02_14, 02_15, 02_12, 02_13, 02_14, 02_15, 02_16, 02_17) 02_16, 02_17) MENÚ MENU Si el vehículo está parado y el selector If the vehicle is stopped and the selector está... -
Página 31: Ajuste Hora
- AJUSTE HORA - GEAR SHIFT - CAMBIO MARCHA - BACKLIGHTING - RETROILUMINACIÓN - °C / °F - °C/°F - 12H / 24H - 12H/24H - CODE CHANGE - MODIFICACIÓN CÓDIGO - CODE RESET - RESTABLECIMIENTO CÓDIGO - AJUSTE HORA TIME ADJUSTMENT En esta modalidad se programa el valor The clock can be programmed with this... - Página 32 CAMBIO MARCHA GEAR SHIFT En esta modalidad se programa el valor The gear shift threshold can be set in this del umbral de cambio de marcha. Una mode. Once within this option, the display vez que se entra en la función, en la pan- shows "GEAR SHIFT THRESHOLD", in talla se visualiza el mensaje "UMBRAL the set language, and the rpm indicator...
-
Página 33: Retroiluminación
RETROILUMINACIÓN BACKLIGHTING Esta función permite regular la intensi- This function adjusts backlighting to three dad de la retroiluminación en tres niveles. brightness levels. Dentro de la función, presionando breve- Once within this function, each time the mente el pulsador SET, aparecen cícli- SET button is pressed, the following camente los siguientes iconos: icons are cyclically displayed:... - Página 34 Esta función selecciona la modalidad de This function selects the time display visualización de la hora. Dentro de la fun- mode. Once within this function, each ción, presionando brevemente el pulsa- time the SET button is pressed, the two dor SET, aparecen cíclicamente los dos formats are cyclically displayed: formatos: - 12H...
- Página 35 RESTABLECER CÓDIGO CODE RESET Esta función se utiliza cuando no se dis- This function is used to set a new code pone del viejo código y se desea modifi- when the old one is not available; in this carlo; en este caso se solicita la introduc- case, at least two keys will have to be in- ción, en el bloque de encendido, de por serted in the ignition lock.
-
Página 36: Diagnóstico
- VISUALIZAR MEDIDAS - DELETE TIMES - BORRAR MEDICIONES Visualizar mediciones View times Esta función visualiza las mediciones This function displays the stored chro- cronométricas adquiridas. nometer times. Presionando brevemente el pulsador Press the SET button for a couple of sec- SET se deslizan las páginas de medicio- onds scroll... - Página 37 Moto tros de asistencia Moto Guzzi. Guzzi service centres. IDIOMAS LANGUAGES dentro de esta función se puede selec- The display language can be selected cionar el idioma de la pantalla. Las op- with this function.
-
Página 38: Visualización Alarmas
VISUALIZACIÓN ALARMAS VIEW ALARMS En el caso de que se detecte una ano- In case of a serious failure which jeop- malía grave, que pueda comprometer la ardises the integrity of the vehicle or rider, integridad del vehículo o de la persona, an icon indicating the cause is displayed en la zona inferior de la pantalla se vi- on the bottom area. -
Página 39: Conmutador De Encendido
02_18 Conmutador de encendido Ignition switch (02_18) (02_18) The ignition switch is located on the headstock upper plate. El interruptor de arranque se encuentra en la placa superior del manguito de di- The vehicle is supplied with two keys rección. (one is the spare key). -
Página 40: Bloqueo Del Volante
LOCK: La dirección está bloqueada. No LOCK: The steering is locked. It is not es posible poner en marcha el motor y possible to start the engine or switch on accionar las luces. Se puede sacar la lla- the lights. The key can be extracted OFF: The engine and lights cannot be set OFF: El motor y las luces no se pueden to work. -
Página 41: Luces De Aparcamiento
02_20 Luces de aparcamiento Parking lights (02_20) (02_20) The vehicle has front and rear parking lights. Considering that it is preferable to El vehículo está equipado con luces de park the vehicle in adequate and well-lit aparcamiento delanteras y traseras. areas, parking lights are very useful when Aunque es preferible aparcar el vehículo parking the vehicle in a dark or poorly lit... -
Página 42: Pulsante Claxon
• Quitar la llave. Pulsante claxon (02_21) Horn button (02_21) Presionado, pone en funcionamiento el Press it to activate the horn. avisador sonoro. 02_21 Conmutador intermitentes Switch direction indicators (02_22) (02_22) Para girar hacia la izquierda, desplazar el Move the switch to the left, to indicate a interruptor hacia la izquierda;... -
Página 43: Commutador Luces
Commutador luces (02_23) High/low beam selector (02_23) Presionando el conmutador de luces se enciende la luz de carretera; al presio- Press the light switch to turn on the high- narlo nuevamente se enciende la luz de beam light; press it again to turn on the cruce. -
Página 44: Pulsante Arranque
02_25 Pulsante arranque (02_25) Start-up button (02_25) Presionando el pulsador, el arrancador Press the button and the starter motor pone en funcionamiento el motor. spins the engine. 02_26 Interruptor parada motor Engine stop switch (02_26) (02_26) It acts as an engine cut-off or emergency stop switch. -
Página 45: Abertura Sillín
Presionar el interruptor para parar el mo- tor. Abertura sillín (02_27, 02_28) Opening the saddle (02_27, 02_28) • Colocar el vehículo sobre el ca- ballete. • Rest the vehicle on its stand. • Introducir la llave en la cerradu- • Insert the key in the saddle lock. -
Página 46: Glove/Tool Kit Compartment
Para bloquear el asiento: To lock the saddle: • • Colocar la parte delantera del Place the saddle front part in its asiento en su alojamiento. position. • • Bajar la parte trasera y colocar Lower the rear part and position el asiento de manera que los the saddle so that the retaining dos enganches de fijación que-... -
Página 47: La Identificación
La identificación (02_30, Identification (02_30, 02_31) 02_31) Write down the chassis and engine num- ber in the specific space of this manual. Es conveniente tomar nota de los núme- The chassis number is handy when pur- ros del chasis y del motor, en el espacio chasing spare parts. -
Página 48: Fijación Maletero
El número de motor está estampillado en The engine number is printed on the base la bancada del cárter motor lado izquier- of the left side engine crankcase. Engine No..... Motor Nº....Fijación maletero (02_32) Luggage anchor point (02_32) Sobre la parte trasera del asiento se pue- A small piece of luggage can be fastened de fijar un pequeño equipaje, ajustándolo... -
Página 49: El Uso
Griso 8V-1200 Cap. 03 El uso Chap. 03... -
Página 50: Controles
JURY OR VEHICLE DAMAGE. DO NOT SAR GRAVES LESIONES PERSONA- HESITATE TO CONTACT AN Official LES O DAÑOS GRAVES AL VEHÍCU- Moto Guzzi Dealer IF YOU DO NOT UN- LO. SI NO SE COMPRENDE EL DERSTAND HOW SOME CONTROLS FUNCIONAMIENTO DE ALGÚN MAN-... -
Página 51: Controles Preliminares
ONTROLES PRELIMINARES RIDE CHECKS Freno de disco delantero y trasero Controlar el funcionamiento, la Front and rear disc brake Check for proper operation. Check carrera en vacío de las palancas brake lever empty travel and brake de mando, el nivel del líquido y fluid level. - Página 52 Embrague Controlar el funcionamiento, la Steering Check that rotation carrera en vacío de la palanca de homogeneous, smooth and there mando, el nivel del líquido y are no signs of clearance or eventuales pérdidas. slackness. necesario, efectuar el llenado del líquido: embrague debe...
-
Página 53: Abastecimiento
Controlar tapón authorised Moto Guzzi repair combustible esté correctamente shop. cerrado. Interruptor de parada del motor Controlar funcionamiento (ON - OFF) correcto. Luces, testigos, avisador sonoro, Controlar funcionamiento interruptores luz de stop trasera y correcto dispositivos dispositivos eléctricos sonoros y visuales. Sustituir las bombillas o intervenir en caso de avería. -
Página 54: Características Técnicas
ATENCIÓN DO NOT FILL THE TANK UP TO THE NO AGREGAR ADITIVOS U OTRAS RIM; FUEL MAXIMUM LEVEL MUST SUSTANCIAS AL COMBUSTIBLE. ALWAYS BE BELOW THE LOWER EDGE OF THE FILLER NECK (SEE SI SE USA UN EMBUDO U OTRO OB- FIGURE). -
Página 55: Regulación Amortiguadores Traseros
ASEGURARSE DE QUE LA TAPA ES- MAKE SURE THE CAP IS TIGHTLY TÉ CORRECTAMENTE CERRADA. CLOSED. Regulación amortiguadores Rear shock absorbers traseros (03_03, 03_04, 03_05) adjustment (03_03, 03_04, 03_05) La suspensión trasera esta compuesta por el grupo muelle-amortiguador, que se The rear suspension consists of a spring- conecta mediante silent-block, al chasis shock absorber unit linked to the frame... - Página 56 conducción a velocidad moderada o ele- riding conditions, to transport the rider vada, para el transporte del conductor plus luggage. con equipaje. However, this set can be modified for Sin embargo es posible personalizar la specific needs according to vehicle use. regulación en función del uso del vehícu- ALLOW ENGINE AND EXHAUST SI- LENCER TO COOL OFF BEFORE OP-...
- Página 57 • • Utilizando la llave apropiada dis- Using the specific spanner avail- ponible en los Concesionarios able at any Moto Guzzi Official oficiales Moto Guzzi, desenros- Dealer, unscrew the locking ring car la tuerca de bloqueo (4). nut (4). •...
-
Página 58: Regulación Del Amortiguador
REGULACIÓN DEL AMORTIGUADOR SHOCK ABSORBER ADJUSTMENT Longitud muelle (precargado) (A) 161 mm. (6.34 in) Length of (preloaded) spring (A) 161 mm (6.34 in) Regulación en extensión, virola (1) de todo cerrado (*) abrir (**) 17 Rebound adjustment, ring nut (1) open (**) 17 clicks from fully closed pasos Regulación en compresión, tornillo... - Página 59 La configuración estándar de la horquilla The standard front fork setting is adjusted delantera está regulada para satisfacer to suit most low and high speed riding la mayoría de las condiciones de con- conditions, whether the vehicle is partial- ducción a baja y a alta velocidad, con el ly or fully loaded.
-
Página 60: Regulación Horquilla Delantera
Stems (A) protrusion from top plate 4 protrusion notches superior (excluido el tapón) (excluding cover) (standard Para este tipo de regulación, (regulación estándar) Take your vehicle only to a Moto adjustment) dirigirse únicamente Guzzi Official Dealer for this type Concesionario Oficial Moto Guzzi of adjustment. -
Página 61: Regulación Leva Freno Delantero
Take your vehicle only to a Moto (regulación para uso deportivo) adjustment) dirigirse únicamente Guzzi Official Dealer for this type Concesionario Oficial Moto Guzzi of adjustment. (*) = en sentido horario (*) = clockwise (**) = sentido antihorario (**) = anticlockwise Regulación leva freno... -
Página 62: Regulación Leva Embrague
Regulación leva embrague Clutch lever adjustment (03_10) (03_10) Se puede regular la distancia entre los Adjust the distance between the lever extremos de la palanca y el puño, girando end and the hand grip by turning the set el dispositivo. screw. - Página 63 ATENCIÓN THIS OCCURRENCE IS PERFECTLY ES POSIBLE QUE DEL EMBRAGUE NORMAL AND IT WILL DISAPPEAR SE DESPRENDA UN LEVE OLOR DE ONCE THE CLUTCH DISC HAS BEEN QUEMADO, DURANTE EL PRIMER BROKEN IN. PERIODO DE USO. ESTE FENÓMENO IT IS IMPORTANT TO STRAIN ENGINE ES PERFECTAMENTE NORMAL Y DE- COMPONENTS DURING...
-
Página 64: Arranque Dificultoso
Moto Guzzi DEALER PREVISTO, DIRIGIRSE A UN CONCE- CHECKS INDICATED IN THE "AFTER SIONARIO OFICIAL Moto Guzzi PARA RUN-IN" TABLE IN THE SCHEDULED QUE EJECUTE LOS CONTROLES MAINTENANCE SECTION TO AVOID CONTEMPLADOS EN LA TABLA "FIN INJURING YOURSELF, OTHERS AND / DEL RODAJE"... -
Página 65: Aparcamiento
Aparcamiento Parking La elección de la zona de aparcamiento It is very important to select an adequate es muy importante y se deben respetar la parking spot, in compliance with road sig- señalización vial y las indicaciones que nals and the guidelines described below. se presentan a continuación. -
Página 66: Escape Catalítico
NO CARGAR SOBRE EL CABALLETE LATERAL EL PESO DEL CONDUC- TOR NI EL DEL PASAJERO. Escape catalítico Catalytic silencer El vehículo cuenta con un silenciador con The vehicle has a silencer with a "plati- catalizador metálico del tipo "trivalente al num - palladium - rhodium three-way"... - Página 67 If the noise produced by the exhaust sys- cios y que el sistema de escape funcione tem increases, get immediately in touch correctamente. with the Dealer or with a Moto Guzzi au- Si el ruido producido por el sistema de thorised repair shop. escape aumenta, contactar inmediata-...
-
Página 68: Soporte
NOTA ESTÁ PROHIBIDO ALTERAR EL SIS- TEMA DE ESCAPE. Soporte (03_11, 03_12) Stand (03_11, 03_12) EL CABALLETE LATERAL Y EL CEN- THE SIDE AND CENTRE STANDS TRAL DEBEN GIRAR LIBREMENTE, SHOULD TURN SMOOTHLY, GREASE EN CASO DE SER NECESARIO EN- THE JOINT IF NECESSARY. -
Página 69: Sugerencias Contra Los Robos
• CAUTION ATENCIÓN MAKE SURE THE VEHICLE IS STA- BLE. ASEGURARSE DE LA ESTABILIDAD DEL VEHÍCULO. En el caballete lateral se encuentra un A safety switch is installed on the side interruptor de seguridad que tiene la fun- stand to inhibit ignition or to stop the en- ción de impedir o interrumpir el funciona- gine when a gear is engaged and the side miento del motor con la marcha acoplada... - Página 70 NUNCA dejar la llave de arranque colo- NEVER leave the ignition key in the lock cada y siempre bloquear el manillar. and always use the steering lock. Park Aparcar el vehículo en un lugar seguro, the vehicle in a safe place such as a ga- en lo posible en un garaje o en un lugar rage or a place with guards.
-
Página 71: Normas Basicás De Seguridad
03_13 03_14 Normas basicás de seguridad Basic safety rules (03_14) (03_14) Follow the instructions given below atten- tively to avoid injuring persons, damaging Prestar la máxima atención a las indica- property or the vehicle in the event of the ciones siguientes porque fueron redacta- rider or the passenger falling off the ve- das para evitar daños a las personas, a hicle and/or the vehicle falling or over-... - Página 72 nos libres (de objetos, casco, guantes o your hands (helmet, gloves or goggles antiparras, aún no utilizados). not put on). Ascender y descender sólo por el lado Always get on and off the vehicle on the izquierdo del vehículo y sólo con el ca- left side and with the side stand lowered.
- Página 73 Por otra parte, el pasajero debe ascender When getting on and off the vehicle, the y descender del vehículo con cautela, passenger must move carefully so as not para no desbalancear el vehículo y el to cause a loss of stability for vehicle and conductor.
- Página 74 PERAR LA PARTE TRASERA DEL VEHÍCULO (COLA O EQUIPAJE) SIN DESBALANCEAR EL MISMO. ASCENSO GETTING ON THE VEHICLE • • Tomar correctamente el mani- Grip the handlebar correctly and llar y ascender al vehículo sin get on the vehicle without rest- cargar el propio peso en el ca- ing your weight on the side ballete lateral.
- Página 75 EQUILIBRIO Y LA ESTABILIDAD DEL VEHÍCULO. • • Hacer que el pasajero extraiga Ask passenger to fold out both los dos estribos reposapiés pa- passenger footrests. • sajero. Instruct passenger on how to • Instruirlo acerca del ascenso al get on the vehicle safely. •...
- Página 76 LATERAL) Y MANTENER EL IZQUIER- AND BE READY TO PUT YOUR LEFT DO LISTO PARA APOYARSE. FOOT ON THE GROUND. • • Apoyar ambos pies en el piso y Place both feet on the ground mantener en equilibrio el vehí- and balance the vehicle keeping culo en posición de marcha.
- Página 77 ATENCIÓN ASEGURARSE DE LA ESTABILIDAD DEL VEHÍCULO.
-
Página 79: El Mantenimiento
Griso 8V-1200 Cap. 04 El mantenimiento Chap. 04 Maintenance... -
Página 80: Premisa
Guzzi Dealer for prompt and accurate dirigirse a un CONCESIONARIO OFI- service. CIAL Moto Guzzi, en donde se le garan- WARNING tiza un servicio esmerado y rápido. THIS VEHICLE HAS BEEN PROGRAM- ADVERTENCIA MED TO INDICATE IN REAL TIME ANY ESTE VEHÍCULO ESTA PREPARADO... -
Página 81: Control Del Nivel De Aceite Motor
Control del nivel de aceite Engine oil level check (04_01, motor (04_01, 04_02) 04_02) Controlar periódicamente el nivel del Check engine oil level regularly, change aceite del motor y sustituirlo cada 10.000 it every 10000 km (6250 miles). km (6,250 millas). To check: Para el control: THE ENGINE MUST BE WARM TO... -
Página 82: Llenado De Aceite Motor
DE HABER RECORRIDO APROXIMA- DAMENTE 15 Km (10 mi) FUERA DE LA CIUDAD (SUFICIENTES PARA ELEVAR LA TEMPERATURA DEL ACEITE DEL MOTOR). • • Parar el motor. Shut off the engine. • • Mantener el vehículo en posi- Keep the vehicle upright with ción vertical con las dos ruedas both wheels on the ground. - Página 83 Si es necesario, restablecer el nivel de Fill with engine oil as required: aceite del motor: • Unscrew and remove the filler • Desenroscar y quitar el tapón de plug. llenado. DO NOT ADD ADDITIVES OR OTHER NO AGREGAR ADITIVOS U OTRAS SUBSTANCES TO THE OIL.
-
Página 84: Sustitución Aceite Motor
DEL FILTRO DE ACEITE DEL MOTOR YOUR ARE INEXPERIENCED. PODRÍAN RESULTAR DIFICULTOSAS TAKE YOUR VEHICLE TO AN Official Y COMPLEJAS PARA PERSONAS Moto Guzzi Dealer IF NECESSARY. INEXPERTAS. IF YOU WISH TO PERFORM THESE EN CASO DE NECESIDAD, DIRIGIRSE OPERATIONS YOURSELF, FOLLOW A UN CONCESIONARIO OFICIAL Moto THESE INSTRUCTIONS. - Página 85 TO GET BURNED WHEN CARRYING OUT THE OPERATIONS DESCRIBED BELOW. EL MOTOR CALIENTE TIENE ACEITE CON ALTA TEMPERATURA, EXTRE- MAR LOS CUIDADOS PARA NO QUE- MARSE DURANTE LAS SIGUIENTES OPERACIONES. • • Colocar un recipiente, con ca- Place a container with a 4000 pacidad superior a 4000 cm³...
-
Página 86: Sustitución Del Filtro De Acei- Te Motor
SE RECOMIENDA LLEVARLO AL TA- TO YOUR SUPPLIER OR TO THE LLER DE SERVICIO DONDE HABI- NEAREST USED OIL RECLAMATION TUALMENTE SE LO COMPRA O A UN FIRM. CENTRO DE RECOLECCIÓN DE ACEI- TES, EN UN RECIPIENTE CERRADO HERMÉTICAMENTE. SUSTITUCIÓN DEL FILTRO DE ACEI- ENGINE OIL FILTER REPLACEMENT TE MOTOR Sustituir el filtro de aceite en cada... -
Página 87: Nivel Aceite Cardán
To top-up or change the oil in the car- ceder al llenado. dan shaft transmission unit, contact Para llenar y eventualmente sustituir an Official Moto Guzzi Dealer. el aceite del grupo transmisión cardá- nica, dirigirse a un Concesionario Ofi- cial Moto Guzzi. -
Página 88: Neumáticos
Neumáticos (04_08, 04_09) Tyres (04_08, 04_09) Este vehículo posee neumáticos sin cá- This vehicle is fitted with tyres without in- mara de aire (Tubeless). ner tubes (Tubeless). ATENCIÓN CAUTION CONTROLAR PERIÓDICAMENTE LA CHECK TYRE INFLATION PRESSURE PRESIÓN DE INFLADO DE LOS NEU- REGULARLY AT AMBIENT TEMPER- MÁTICOS A TEMPERATURA AMBIEN- ATURE. - Página 89 CONTROLAR EL ESTADO SUPERFI- SOME TYRE TYPES HOMOLOGATED CIAL Y EL DESGASTE, YA QUE UN FOR THIS VEHICLE FEATURE WEAR ESTADO DEFICIENTE DE LOS NEU- INDICATORS. MÁTICOS COMPROMETERÍA LA AD- THERE ARE SEVERAL TYPES OF HERENCIA EN LA CARRETERA Y LA WEAR INDICATORS.
- Página 90 USAR EXCLUSIVAMENTE NEUMÁTI- USING THE SPECIFIC TOOLS AND COS CON LAS DIMENSIONES INDICA- WITH THE ADEQUATE KNOWLEDGE. DAS POR LA EMPRESA. NO INSTA- HAVE YOUR TYRES AND WHEELS LAR NEUMÁTICOS DEL TIPO CON SERVICED AT AN OFFICIAL DEALER CÁMARA DE AIRE EN LLANTAS PA- OR A SPECIALISED TYRE WORK- RA NEUMÁTICOS TUBELESS Y VICE- SHOP.
-
Página 91: Desmontaje Bujía
EN ESTE CASO, SUSTITUIR LOS NEU- MÁTICOS. Limite mínimo de profundidad de la Minimum tread depth: banda de rodadura: front and rear 2 mm (0.079 in) (USA 3 delantera y trasera 2 mm (0.079 in) (USA mm) (USA 0.118 in), and not less than 3 mm) (USA 0.118 in) y en ningún caso required by regulations in force in the inferior a lo prescrito por la legislación vi-... - Página 92 u otras sustancias dentro del ci- lindro. Para el control y la limpieza: DO NOT USE METAL BRUSHES AND/ OR ABRASIVE PRODUCTS TO CLEAN THE SPARK PLUGS; USE ONLY A BLAST OF COMPRESSED AIR. PARA LA LIMPIEZA NO UTILIZAR CE- PILLOS METÁLICOS Y/O PRODUC- TOS ABRASIVOS, SINO EXCLUSIVA- MENTE UN CHORRO DE AGUA A...
- Página 93 ATENCIÓN CAUTION NO INTENTAR DE NINGUNA MANERA DO NOT ATTEMPT TO READJUST RESTABLECER LA DISTANCIA EN- THE ELECTRODE GAP. TRE LOS ELECTRODOS. La distancia entre los electrodos debe The electrode gap should be between 0.6 ser de 0,6 - 0,7 mm. (0.023 - 0.027 pul- - 0.7 mm (0.023 - 0.027 in).
-
Página 94: Desmontaje Filtro Aire
TROL Y LA SUSTITUCIÓN DEL FIL- PLACE THE AIR FILTER REFER TO TRO DE AIRE, DIRIGIRSE A UN CON- AN Official Moto Guzzi Agent. IF YOU CESIONARIO OFICIAL Moto Guzzi O, ARE ADEQUATELY TRAINED AND EN CASO DE SER PERSONAS EX-... -
Página 95: Control Nivel Aceite Frenos
Llenado liquido circuito de Braking system fluid top up frenos CAUTION ATENCIÓN FOR TOP-UP OF THE BRAKE FLUID REFER TO AN Official Moto Guzzi PARA LLENAR CON LÍQUIDO LOS Agent OR, IF YOU ARE EXPERIENCED SISTEMAS DE FRENO, DIRIGIRSE A... -
Página 96: Control Líquido Embrague
THE INSTRUCTION IN THE SHOP NAS EXPERTAS Y CALIFICADAS, OB- MANUAL THAT MAY BE PURCHASED SERVAR LAS INDICACIONES DEL FROM THE SAME Official Moto Guzzi MANUAL DE TALLER, QUE SE PUEDE Agent. ADQUIRIR EN EL MISMO CONCESIO- NARIO OFICIAL Moto Guzzi. -
Página 97: Reposición Líquido Embrague
FOR TOP-UP OF THE CLUTCH FLUID BRAGUE, DIRIGIRSE A UN Concesio- REFER TO AN Official Moto Guzzi nario Oficial Moto Guzzi O, EN CASO Agent OR, IF YOU ARE EXPERIENCED DE SER PERSONAS EXPERTAS Y CA- AND QUALIFIED, YOU MAY REFER TO... -
Página 98: Comprobacion Del Nivel Del Electrolito
• Colocar la batería sobre una su- To install a new battery follow the op- perficie plana, en un lugar fres- erations described above but in re- co y seco. verse order. • Volver a colocar el asiento. CAUTION Para instalar una nueva batería ejecu- tar las operaciones descritas en sen- UPON REFITTING, CONNECT THE LEAD TO THE POSITIVE TERMINAL... -
Página 99: Recarga Batería
SINO UN ESPORÁDICO CONTROL Y UNA EVENTUAL RECARGA. Recarga batería Charging the battery • • Sacar la batería. Remove the battery. • • Preparar un cargador de batería Get an adequate battery charg- adecuado. • • Predisponer el cargador de ba- Set the battery charger for the tería para el tipo de recarga in- recharge type indicated. -
Página 100: Larga Inactividad
Larga inactividad Long periods of inactivity SI EL VEHÍCULO PERMANECE INAC- IF THE VEHICLE IS OUT OF USE FOR TIVO DURANTE MÁS DE VEINTE MORE THAN TWENTY DAYS, DIS- DÍAS, DESCONECTAR LOS FUSI- CONNECT THE 30 A FUSE TO PRE- BLES DE 30 A PARA EVITAR LA DE- VENT BATTERY... -
Página 101: Fusibles
MAY INDICATE A SHORT CIRCUIT OR CUANDO UN FUSIBLE SE DAÑA FRE- OVERLOAD. IF THIS OCCURS, CON- CUENTEMENTE, ES PROBABLE QUE TACT AN Official Guzzi Dealer. EXISTA UN CORTOCIRCUITO O UNA SOBRECARGA. EN ESTE CASO CON- SULTAR UN CONCESIONARIO OFI- CIAL Moto Guzzi. - Página 102 Si se detecta que un componente eléc- Checking the fuses is necessary when- trico no funciona o funciona en forma ever an electrical component fails to op- anormal, o no se produce el arranque del erate or is malfunctioning or when the motor, es necesario controlar los fusi- engine does not start.
- Página 103 • • Extraer un fusible por vez y con- Extract a fuse at a time and trolar si el filamento está inte- check if the linked is divided. • rrumpido. Before replacing the fuse, iden- • Antes de sustituir el fusible bus- tify the cause of the failure if pos- car, si es posible, la causa que sible.
-
Página 104: Fusibles Secundarios
FUSIBLES SECUNDARIOS AUXILIARY FUSES A - Stop, claxon, luces, bobina, relé de A - Stop, horn, lights, coil, light relay (15 luces (15 A). B - Luces de posición, luz de matrícula, B - Tail lights, license plate light, passing, passing, relé... -
Página 105: Disposición Bombillas
Bombillas (04_24, 04_25, Lamps (04_24, 04_25, 04_26) 04_26) CAUTION ATENCIÓN BEFORE REPLACING A BULB, TURN THE IGNITION SWITCH TO "KEY OFF" ANTES DE SUSTITUIR UNA BOMBI- AND WAIT A FEW MINUTES FOR THE LLA, COLOCAR EL INTERRUPTOR DE BULB TO COOL OFF. ARRANQUE EN LA POSICIÓN «OFF»... -
Página 106: Sustitución Bombillas Faro De- Lantero
- una bombilla (2) de luz de posición (in- Front headlamp bulb replacement ferior); • Rest the vehicle on its stand. • SUSTITUCIÓN BOMBILLAS FARO DE- Remove the complete parabole LANTERO from the headlight body by un- doing the screw (3). •... -
Página 107: Bombilla Luz De Posición
BOMBILLA LUZ DE POSICIÓN TAIL LIGHT BULB • • Sujetar el portalámparas de luz Pull out the tail light bulb holder de posición (7), tirar de él y ex- (7) from its seat. • traerlo de su alojamiento. Remove the bulb (2) and re- •... -
Página 108: Regulación Proyector
Regulación proyector (04_27, Headlight adjustment (04_27, 04_28) 04_28) NOTA NOTE EN FUNCIÓN DE LO PREVISTO POR IN COMPLIANCE WITH LOCAL LEGAL LA LEGISLACIÓN EN VIGENCIA EN REQUIREMENTS, SPECIFIC PROCE- EL PAÍS DONDE SE UTILICE EL VEHÍ- DURES MUST BE FOLLOWED WHEN CULO, PARA EL CONTROL DE LA CHECKING LIGHT BEAM ADJUST- ORIENTACIÓN DEL HAZ LUMINOSO... - Página 109 locar manualmente el haz lumi- light beam manually to the de- noso en la posición deseada. sired position. • • Efectuada la regulación, apretar Once the adjustment is finished los tornillos (1). tighten the screws (1). Al finalizar la regulación: After adjusting: NOTA NOTE...
-
Página 110: Indicadores De Dirección Delanteros
REFER TO AN Official Moto Guzzi BOMBILLA, DIRIGIRSE A UN Conce- Agent OR, IF YOU ARE EXPERIENCED sionario Oficial Moto Guzzi O, EN CA- AND QUALIFIED, YOU MAY REFER TO SO DE SER PERSONAS EXPERTAS Y THE INSTRUCTIONS IN THE WORK-... -
Página 111: Indicadores De Dirección Traseros
Luz placa Number plate light Dada la complejidad de la operación se Have this bulb replaced at an Official Mo- aconseja dirigirse a un Concesionario to Guzzi Dealer since it is very complex. Oficial Moto Guzzi. 04_30... -
Página 112: Espejos Retrovisores
Espejos retrovisores (04_30) Rear-view mirrors (04_30) NUNCA CONDUZCA CON LOS ESPE- DO NOT RIDE WITH REAR-VIEW MIR- JOS RETROVISORES GIRADOS IN- RORS INCORRECTLY SET. CORRECTAMENTE. BEFORE RIDING OFF, ALWAYS ASEGURARSE SIEMPRE, ANTES DE MAKE SURE THEY ARE CORRECTLY PARTIR, DE QUE SE ENCUENTREN ADJUSTED TO RIDE. -
Página 113: Freno De Disco Delantero Y Trasero
LAS PASTILLAS SUCIAS SE DEBEN QUALITY DEGREASING PRODUCT. SUSTITUIR, MIENTRAS QUE EL DIS- CAUTION CO SUCIO SE DEBE LIMPIAR CON UN PRODUCTO DESENGRASANTE DE TAKE YOUR VEHICLE TO AN Official ALTA CALIDAD. Moto Guzzi Dealer TO HAVE THE REAR WHEEL REMOVED. - Página 114 ATENCIÓN PARA EXTRAER LA RUEDA TRASE- RA DIRIGIRSE A UN CONCESIONA- RIO OFICIAL Moto Guzzi. ATENCIÓN CAUTION CONTROLAR EL DESGASTE DE LAS CHECK BRAKE PADS FOR WEAR PASTILLAS DE FRENOS SOBRE TO- MAINLY BEFORE EACH RIDE. DO ANTES DE CADA VIAJE.
-
Página 115: Inactividad Del Vehiculo
Guzzi Dealer to replace all the calliper pastillas de las pinzas del freno, dirigién- pads. dose a un CONCESIONARIO OFICIAL Moto Guzzi. Inactividad del vehiculo Periods of inactivity (04_35) (04_35) Take some measures to avoid the side effects of not using the vehicle. -
Página 116: Después Del Período De Apar- Camiento
• Pasar cera sobre las superficies ture variations and not exposed pintadas. to sun rays. • • Inflar los neumáticos. Wrap and tie a plastic bag • Situar el vehículo en un local no around the muffler exhaust end calefaccionado, libre de hume- to keep moisture out. -
Página 117: Limpieza Del Vehiculo
NOTA NOTE SACAR LAS BOLSAS PLÁSTICAS DE TAKE THE PLASTIC BAGS OFF THE LOS EXTREMOS DEL SILENCIADOR. EXHAUST PIPE OPENING. • • Descubrir y limpiar el vehículo. Uncover and clean the scooter. • • Controlar el estado de carga de Check battery charge and in- la batería e instalarla. - Página 118 sal, productos químicos anti- icing chemical products on the congelantes en carreteras du- roads in winter). • rante el período invernal). Always clean off any smog and • Se debe dedicar especial aten- pollution residue, tar stains, in- ción para evitar que en la carro- sects, bird droppings, etc.
- Página 119 RIO PREVER DISTANCIAS MAYORES DE FRENADO PARA EVITAR ACCI- DENTES. ACCIONAR REPETIDAMEN- TE LOS FRENOS PARA RESTABLE- CER LAS CONDICIONES NORMALES. EFECTUAR LOS CONTROLES PRELI- MINARES. Para eliminar la suciedad y el fango de- To clean off dirt and mud deposited from positados en las superficies pintadas, es painted surfaces, soften caked dirt with a necesario utilizar un chorro de agua a...
- Página 120 CUENTEMENTE CON ABUNDANTE WITH POLISHING PASTE. THE VEHI- AGUA. SE RECUERDA QUE EL LUS- CLE SHOULD NEVER BE WASHED IN TRADO CON CERA SILICONADA SE DIRECT SUNLIGHT, ESPECIALLY DEBE REALIZAR DESPUÉS DE UN DURING SUMMER, OR WITH THE CUIDADOSO LAVADO DEL VEHÍCU- BODYWORK STILL HOT AS THE CAR LO.
- Página 121 NI PARA EL ASIENTO. UTILIZAR, EN GENTS WITH SURFACE ACTIVE CAMBIO, AGUA Y JABÓN NEUTRO. AGENTS NOT EXCEEDING 5% (NEU- TRAL SOAP, DEGREASING DETER- ATENCIÓN GENTS OR ALCOHOL). PARA LIMPIAR EL ASIENTO NO UTI- DRY THE SADDLE WELL AFTER LIZAR SOLVENTES O DERIVADOS DE CLEANING.
-
Página 122: Transporte
Transporte (04_39) Transport (04_39) Antes de transportar el vehículo es ne- Before transporting the vehicle, empty cesario vaciar cuidadosamente el depó- the fuel tank well and make sure it is per- sito de combustible, controlando que fectly dry. quede completamente seco. During transport, the vehicle must be well Durante el desplazamiento el vehículo anchored and upright, and first gear must... -
Página 123: Datos Técnicos
Griso 8V-1200 Cap. 05 Datos técnicos Chap. 05 Technical data... -
Página 124: Dimensiones Y Masa
DIMENSIONES Y MASA WEIGHT AND DIMENSIONS Longitud 2260 mm (89.0") Length 2260 mm (89.0 in) Anchura máx. 830 mm (32.68 in) Max. width 830 mm (32.68 in) Altura máxima 1070 mm (42.1 in) Maximum height 1070 mm (42.1 in) Altura asiento 800 mm.(31.5 in) Saddle height 800 mm (31.5 in) -
Página 125: Alimentación
N° revoluciones del motor en 1.100 ± 100 rpm Engine revs at idle speed 1100 ± 100 rpm ralentí Clutch dry single disc with integrated Embrague monodisco en seco con mando hydraulic drive and anti-vibration hidráulico dispositivo buffer antivibración integrado Lubrication system Pressure system regulated by Sistema de lubricación... -
Página 126: Instalación Eléctrica
combustible Gasolina súper plomo, Fuel premium unleaded petrol, octanaje mínimo 95 (N.O.R.M.) y minimum octane rating of 95 85 (N.O.M.M.) (NORM) and 85 (NOMM) CAPACITÀ CAPACITÀ Aceite motor Cambio de aceite y filtro de aceite Engine oil change filter 3.500 cm³ (214 cu in) replacement: 3,500 cm³... - Página 127 Generador (con magneto 12 V - 550 W (Permanent magnet) Generator 12V - 550W permanente) Main fuses 30 A Fusibles principales 30 A Auxiliary fuses 3 A - 15 A Fusibles secundarios 3 - 15 A Tail light 12V - 5 W Luz de posición 12V - 5W Low-/ high-beam light (halogen)
- Página 128 CHASIS CHASSIS Tipo tubular de doble cuna de acero con Type double cradle, high strength steel alto límite de deformación elástica tube chassis Avance 108 mm (4.25 ") Trail 108 mm (4.25 in) Inclinación manguito de dirección 26° 30' Headstock angle 26°...
-
Página 129: Ruedas Y Neumáticos
Trasero Disco de acero inoxidable, Ø 282 Rear Single stainless steel disc; Ø 282 mm (11.1 in). mm (11.1 in) RUEDAS Y NEUMÁTICOS WHEELS AND TYRES Tipo de 3 rayos en aleación de aluminio Type hollow 3-spoke rim in chilled cast fundidas en coquilla aluminium alloy Llanta delantera... - Página 130 Cambio Mecánico de 6 relaciones con Gearbox Mechanical, 6 speeds with foot mando por pedal en el lado lever on the left hand side of the izquierdo del motor engine Relaciones cambio 1° marcha 17/38 = 1: 2,2353 1st gear ratios 17/38 = 1 :2.2353 Relaciones cambio 2°...
-
Página 131: Herramientas En Dotación
Herramientas en dotación Kit equipment (05_01) (05_01) The tools supplied are: La dotación de herramientas com- - 3-4-5 mm (0.12-0.15-0.20 in) L-shaped prende: hex Allen keys (1); - llaves macho hexagonales dobladas 3 - - 10 - 13 mm (0.39 - 0.51 in) double open 4 - 5 mm (0.12 0.15 - 0.20 in) (1);... -
Página 133: El Mantenimiento Programado
Griso 8V-1200 Cap. 06 El mantenimiento programado Chap. 06 Programmed maintenance... -
Página 134: Tabla Manutención Programada
óp- To this end, Moto Guzzi offers a set of timas de funcionamiento y rendimiento. checks and maintenance services (at the owner's expense) that are listed in the... -
Página 135: En Cada Arranque
LA MITAD SI EL VEHÍCULO SE UTILI- WET OR DUSTY AREAS, OFF ROAD ZA EN ZONAS LLUVIOSAS, POLVO- OR FOR SPORTS APPLICATIONS. RIENTAS, EN RECORRIDOS ACCI- DENTADOS CONDUCCIÓN DEPORTIVA. EN CADA ARRANQUE AT EVERY START-UP Testigo presión aceite motor - controlar y limpiar, regular, lubricar o Engine oil pressure warning light - check and clean, adjust, grease or sustituir si es necesario replace if necessary... - Página 136 Cojinetes de dirección y juego dirección - Controlar y limpiar, regular, Steering bearings and steering clearance - Check and clean, adjust, lubricar o sustituir si es necesario grease or replace if necessary. Discos de frenos - Controlar y limpiar, regular o sustituir si es necesario Disc brakes - Check and clean, adjust or replace if necessary Filtro de aceite motor - sustitución Engine oil filter - Replace...
- Página 137 Sincronización cilindros - Controlar y limpiar, regular, lubricar o sustituir Suspensions and setting - Check and clean, adjust, grease or replace si es necesario if necessary Suspensiones y ajuste - Controlar y limpiar, regular, lubricar o sustituir Brake pad wear - Check and clean, adjust or replace if necessary si es necesario Desgaste pastillas de frenos - Controlar y limpiar, regular o sustituir si es necesario...
- Página 138 CADA 10.000 K (6250 12 MESES EVERY 10,000 (6250 12 MONTHS MILLAS Bujías - Sustituir Spark plugs - Replace Carburación en ralentí (CO) - Controlar y limpiar, regular, lubricar o Idle mixture (CO) - Check and clean, adjust, grease or replace if sustituir si es necesario necessary Cables transmisión y mandos - controlar y limpiar, regular, lubricar o...
- Página 139 Sincronización cilindros - Controlar y limpiar, regular, lubricar o sustituir Cylinder synchronisation - Check and clean, adjust, grease or replace si es necesario if necessary Vaciado del tubo de drenaje aceite de la caja del filtro - Limpiar Purge fluid present in oil drainage pipe from the filter housing - Clean Tubos del combustible - Controlar y limpiar, regular, lubricar o sustituir Fuel pipes - Check and clean, adjust, grease or replace if necessary si es necesario...
-
Página 140: Productos Aconsejados
Desgaste pastillas de frenos - Controlar y limpiar, regular o sustituir si Brake pad wear - Check and clean, adjust or replace if necessary es necesario RODUCTOS ACONSEJADOS Producto Denominación Características AGIP RACING 4T 10W-60 Aceite motor SAE 10W - 60. Como alternativa, se pueden utilizar aceites de marca o con prestaciones iguales o superiores a las especificaciones CCMC G-4 A.P.I. - Página 141 Producto Denominación Características especificaciones Fluido sintético SAE J1703, NHTSA 116 DOT 4, ISO 4925. ECOMMENDED PRODUCTS Product Description Specifications AGIP RACING 4T 10W-60 Engine oil SAE 10W - 60. As an alternative for recommended oils, use top branded oils that meet or exceed the requirements of CCMC G-4 API SG specifications.
-
Página 143: Preparaciones Especiales
Griso 8V-1200 Cap. 07 Preparaciones especiales Chap. 07 Special fittings... -
Página 144: Índice Accesorios
Índice accesorios Accessories index Para este vehículo, se dispone de acce- For this vehicle, dedicated accessories sorios e indumentaria especial. Para ma- and clothing are available For additional yor información, consultar con un pro- info please refer to your dealer or visit our veedor o visitar el sitio: site: www.motoguzzi.it... - Página 145 TABLA DE MATERIAS Accesorios: 144 Embrague: 15, 62, 96, 97 Maletero: 48 Aceite cardán: 87 Espejos: 112 Mantenimiento: 79, 133 Aceite motor: 14, 81, 82, 84 Mantenimiento programado: Amortiguadores: 55 Arranque: 44, 64 Freno: 61, 113 Freno de disco: 113 Funciones avanzadas: 30 Neumáticos: 88 Batería: 16, 97, 99...
- Página 147 TABLE OF CONTENTS Accessories: 144 Engine oil: 14, 81, 82, 84 Maintenance: 79, 133, 134 Advanced functions: 30 Engine stop: 44 Mirrors: 112 Air filter: 94 Fork: 58 Saddle: 45 Battery: 16, 97, 99 Fuel: 11 Scheduled maintenance: Brake: 15, 95, 113 Fuses: 101 Shock absorbers: 55 Spark plug: 91...
- Página 148 Only by purchasing Moto Guzzi Original Spare Parts will you get a product designed and tested during the bike designing phase. Moto Guzzi Original Spare Parts are subject to systematic quality control procedures so that their reliability and performance over time is guaranteed.
- Página 149 © Copyright 2007- Moto Guzzi. All rights reserved. Reproduction of this publication in whole or in part is prohibited. Moto Guzzi - After sales service.