Tabla de contenido
Publicidad
Idiomas disponibles
Idiomas disponibles
Enlaces rápidos
Meridium 1B1
Gebrauchsanweisung (Benutzer) .....................................................................................
Instructions for use (user) ...............................................................................................
Instructions d'utilisation (Utilisateur) .................................................................................
Istruzioni per l'uso (Utilizzatore) ....................................................................................... 109
Instrucciones de uso (Usuario) ........................................................................................ 144
Manual de utilização (Usuário) ......................................................................................... 180
Gebruiksaanwijzing (Gebruiker) ....................................................................................... 215
Kullanma talimatı (Kullanıcı) ............................................................................................. 251
2
36
71
Publicidad
Tabla de contenido

Manuales relacionados para Ottobock Meridium 1B1


Resumen de contenidos para Ottobock Meridium 1B1
- Página 1 Meridium 1B1 Gebrauchsanweisung (Benutzer) ..................Instructions for use (user) ....................Instructions d'utilisation (Utilisateur) ................. Istruzioni per l’uso (Utilizzatore) ..................109 Instrucciones de uso (Usuario) ..................144 Manual de utilização (Usuário) ..................180 Gebruiksaanwijzing (Gebruiker) ..................215 Kullanma talimatı (Kullanıcı) ..................... 251...
- Página 2 Die Sensordaten werden 100-mal pro Sekunde aktualisiert und ausgewertet. Dadurch wird das Verhalten des Produkts dynamisch und in Echtzeit der aktuellen Bewegungssituation (Gangpha se) angepasst. Durch die mikroprozessorgesteuerte Dämpfung der Plantarflexion und Dorsalflexion, kann das Produkt individuell an die Bedürfnisse angepasst werden. 2 | Ottobock...
- Página 3 3.5 Indikationen • Für Anwender mit unilateraler Knieexartikulation und unilateraler Oberschenkelamputation • Für Anwender mit unilateraler oder bilateraler Unterschenkelamputation • Der Anwender muss die physischen und mentalen Voraussetzungen zur Wahrnehmung von optischen/akustischen Signalen und/oder mechanischen Vibrationen erfüllen Ottobock | 3...
-
Página 4: Bedeutung Der Warnsymbolik
Verwendung von beschädigtem Netzteil, Adapterstecker oder Ladegerät Stromschlag durch Berührung freiliegender, spannungsführender Teile. ► Öffnen Sie Netzteil, Adapterstecker oder Ladegerät nicht. Setzen Sie Netzteil, Adapterstecker oder Ladegerät keinen extremen Belastungen aus. ► ► Ersetzen Sie sofort beschädigte Netzteile, Adapterstecker oder Ladegeräte. 4 | Ottobock... - Página 5 Prothese muss zur Überprüfung zum autorisierten Ottobock Service gebracht werden. ► Sollte Salzwasser eingedrungen sein, muss die Fußhülle sofort vom Orthopädie-Techni ker entfernt werden. Die Prothese muss durch eine autorisierte Ottobock Servicestelle überprüft werden. ► Verwenden Sie das Produkt nicht für Badeprothesen.
- Página 6 Sollten auf das Produkt und seinen Komponenten extreme Belastungen aufgebracht worden sein, (z.B. durch Sturz, o.ä.), muss das Produkt umgehend von einem Orthopä die-Techniker auf Schäden überprüft werden. Dieser leitet das Produkt ggf. an eine au torisierte Ottobock Servicestelle weiter. VORSICHT Mechanische Belastung während des Transports >...
- Página 7 HINWEIS Verwendung von falschem Netzteil/Ladegerät Beschädigung des Produkts durch falsche Spannung, Strom, Polarität. ► Verwenden Sie nur von Ottobock für dieses Produkt freigegebene Netzteile/Ladegeräte (siehe Gebrauchsanweisungen und Kataloge). 4.5 Hinweise zum Ladegerät HINWEIS Eindringen von Schmutz und Feuchtigkeit in das Produkt Keine einwandfreie Ladefunktion infolge Fehlfunktion.
- Página 8 • Mobiltelefon GSM 1800 / GSM 1900 / UMTS: 0,35 m • DECT Schnurlostelefone inkl. Basisstation: 0,18 m • WLAN (Router, Access Points,…): 0,11 m • Bluetooth Geräte (Fremdprodukte, die nicht von Ottobock freigegeben sind): 0,11 m VORSICHT Aufenthalt im Bereich starker magnetischer und elektrischer Störquellen (z.B. Dieb...
- Página 9 ► Wird die Aktivität trotz einsetzender, pulsierender Vibrationssignale nicht reduziert, kann es zu einer Überhitzung des Hydraulikelements und im Extremfall zu einer Beschädigung des Produkts kommen. Das Produkt sollte durch eine autorisierte Ottobock Servicestelle überprüft werden. VORSICHT Nicht korrekt durchgeführte Modus Umschaltung Sturz durch unerwartetes Verhalten des Produkts infolge veränderten Dämpfungsverhaltens.
- Página 10 Fehler. ► Verwenden Sie das defekte Produkt nicht weiter. ► Das Produkt muss durch eine autorisierte Ottobock Servicestelle überprüft werden. An sprechpartner ist der Orthopädie-Techniker. VORSICHT Auftreten der Sicherheitsmeldung (andauerndes Vibrieren) Sturz durch unerwartetes Verhalten des Produkts infolge veränderten Dämpfungsverhaltens.
-
Página 11: Lieferumfang Und Zubehör
Installieren Sie die Cockpit App nur auf jenen Betriebssystemen, die im Kapitel „Sys temanforderungen“ angeführt sind (siehe Seite 14). Die getesteten Endgeräte sind eben falls in diesem Kapitel angeführt. 5 Lieferumfang und Zubehör Lieferumfang • 1 St. Meridium 1B1 • 1 St. Netzteil 757L16* • 1 St. Ladegerät für C-Leg 4E50* Ottobock | 11... -
Página 12: Akku Laden
→ Die grüne Leuchtdiode (LED) an der Rückseite des Netzteils und die grüne Leuchtdiode (LED) am Ladegerät leuchten. → Sollte die grüne Leuchtdiode (LED) am Netzteil und die grüne Leuchtdiode (LED) am Lade gerät nicht leuchten, liegt ein Fehler vor (siehe Seite 32). 12 | Ottobock... -
Página 13: Akku Der Prothese Laden
Bei gestarteter Cockpit App wird der aktuelle Ladezustand in der unteren Bildschirmzeile ange zeigt: 38% – Ladezustand des Akkus der aktuell verbundenen Prothese Anzeige des aktuellen Ladezustands über die Fernbedienung: Bei eingeschalteter und verbundener Fernbedienung wird der aktuelle Ladezustand in der Status zeile angezeigt: Ottobock | 13... -
Página 14: Systemanforderungen
Änderungen mitverfolgen. INFORMATION Die Cockpit App kann kostenlos aus dem jeweiligen Online Store heruntergeladen werden. Nä here Informationen folgender Internetseite entnehmen: http://www.ottobock-group.com/cockpi tapp. Es kann auch der QR-Code der mitgelieferten Bluetooth PIN Card eingelesen werden. 7.1 Systemanforderungen Die Funktion der Cockpit App ist auf Endgeräten, die das Betriebssystem Android ab der Version 4.0.3 unterstützen, gewährleistet. -
Página 15: Bedienungselemente Der Cockpit App
Zusätzlich wird der aktuelle Ladezustand in % angezeigt. 100% 1. Basismodus 7. Anzeige und Benennung des aktuell gewählten Modus (z.B. 1. Basismodus) Verbindung zum Passteil ist hergestellt Verbindung zum Passteil ist unterbrochen. Es wird ver sucht die Verbindung automatisch wieder herzustellen. Ottobock | 15... -
Página 16: Navigationsmenü Der Cockpit App
→ Das Navigationsmenü wird geöffnet. 2) Im Navigationsmenü auf den Eintrag „Passteile verwalten“ tippen. 3) Anschließend auf den Eintrag „Passteile verwalten“ tippen. 4) Bei dem zu löschenden Passteil auf das Symbol tippen. → Das Passteil wird gelöscht. 16 | Ottobock... -
Página 17: Absatzhöhe Über Bewegungsmuster Einstellen
4) Füße auf gleiche Höhe stellen und darauf achten, dass Ferse und Fußspitze den Boden be rühren. 5) Füße gleichmäßig belasten. → Ein Bestätigungssignal ertönt, um die erfolgreiche Speicherung der neuen Absatzhöhe anzu zeigen. INFORMATION: Gibt es kein Feedback (z.B. Piepsignal), konnte die neue Absatzhöhe nicht gespeichert werden. Messung der Absatzhöhe wiederholen. Ottobock | 17... -
Página 18: Absatzhöhe Mit Der Cockpit App Einstellen
4) Messung der Absatzhöhe mit dem Drücken der Taste starten. → Ein Bestätigungssignal ertönt, um die erfolgreiche Speicherung der neuen Absatzhöhe anzu zeigen. INFORMATION: Gibt es kein Feedback (z.B. Piepsignal), konnte die neue Absatzhöhe nicht gespeichert werden. Messung der Absatzhöhe wiederholen. 18 | Ottobock... - Página 19 1) Beide Füße nebeneinander auf gleiche Höhe stellen. 2) Die Beine beim Hinsetzen gleichmäßig belasten und die Armstützen ver wenden, soweit sie vorhanden sind. 3) Gesäß in Richtung der Rückenlehne bewegen und den Oberkörper nach vorne beugen. Ottobock | 19...
-
Página 20: Treppe Hinauf Gehen
4) Das Bein mit dem Prothesenfuß auf die übernächste Stufe setzen. 5) Am Ende der Treppe beim Übergang in die Ebene einen größeren Schritt machen, um den Prothesenfuß korrekt vom Treppe hinab gehen in die nor male Gangphase umzuschalten. 20 | Ottobock... -
Página 21: Rampe Hinab Gehen
Den ersten Schritt mit der Prothesenseite beginnen. • Mit der Prothesenseite gezielt eine Überrollbewegung auslösen. Der Prothesenfuß gibt dann in der Dorsalflexion nach, um ein Absenken des Körperschwerpunkts vor dem Fersenauftritt des anderen Beins zu er möglichen. Ottobock | 21... -
Página 22: Umschaltung Der Mymodes Mit Der Cockpit App
Anstecken/Abstecken des Ladegeräts Bluetooth eingeschaltet werden. Anschließend ist Bluetooth für die Dauer von ca. 2 Minuten eingeschaltet. Während dieser Zeit muss die App ge startet und dadurch die Verbindung hergestellt werden. Falls gewünscht, kann anschließend Bluetooth der Prothese dauerhaft eingeschaltet werden (siehe Seite 27). 22 | Ottobock... -
Página 23: Umschaltung Der Mymodes Mit Bewegungsmuster
Die Knöchelsperre muss als MyMode "" konfiguriert sein. Die Anzahl der Bewegungsmuster mit der sie eingeschaltet wird, muss zusätzlich in der Einstellsoftware aktiviert sein. • Vor weiteren Aktivitäten immer prüfen, ob der gewählte Modus der gewünschten Bewegungs art entspricht. Ottobock | 23... -
Página 24: Umschaltung Von Einem Mymode Auf Den Basismodus Zurück
Vor dem ersten Schritt immer prüfen, ob der gewählte Modus der gewünschten Bewegungs art entspricht. 8.4 Änderung der Protheseneinstellungen Ist eine Verbindung zu einer Prothese aktiv, können die Einstellungen des jeweils aktiven Modus mit der Cockpit App oder der Fernbedienung (optionales Zubehör) geändert werden. 24 | Ottobock... -
Página 25: Änderung Der Protheseneinstellung Über Die Cockpit App
Funktionen pen auf die Symbole „<“, „>“ einstellen. Einstellungen INFORMATION: Die Einstellung des Orthopädietechni kers ist markiert und kann bei einer veränderten Ein Status stellung durch das Antippen der Schaltfläche "Stan Allgemein dard" wiederhergestellt werden. Passteile verwalten Impressum/Info Ottobock | 25... - Página 26 ‚Stopwinkel’ erreicht werden kann, bzw. wie stark der Widerstand zum Erreichen des Werts des Parameters ‚Stopwinkel’ ist. Stopwinkel -200 — 200 ± 10 Knöchelwinkel ab dem die Bewegung in 0,1° ange in Überrollrichtung (in Dorsalflexions zeigt richtung) gesperrt wird. 26 | Ottobock...
-
Página 27: Bluetooth Der Prothese Aus-/Einschalten
8.6.3 Statusanzeige im Display der Fernbedienung (optionales Zubehör) Menüeintrag Beschreibung mögliche Aktionen Tag:1747 Tagesschrittzähler Zähler zurücksetzen durch Be stätigen des Menüpunkts mit der Taste Gesamt:1747 Gesamtschrittzähler Nur Information Akku:68 Aktueller Ladezustand der Pro Nur Information these in Prozent Ottobock | 27... -
Página 28: Zusätzliche Betriebszustände (Modi)
Übertemperaturmodus zurückgeschaltet. Der Übertemperaturmodus wird durch kurzes Vibrieren alle 5 Sekunden angezeigt. 10 Reinigung 1) Bei Verschmutzungen die Produkte mit einem feuchten Tuch und milder Seife (z.B. Ottobock Derma Clean 453H10=1) reinigen. Darauf achten, dass keine Flüssigkeit in die Systemkomponente/Systemkomponenten ein... -
Página 29: Ce-Konformität
12.4 Lokale Rechtliche Hinweise Rechtliche Hinweise, die ausschließlich in einzelnen Ländern zur Anwendung kommen, befin den sich unter diesem Kapitel in der Amtssprache des jeweiligen Verwenderlandes. 13 Anhänge 13.1 Angewandte Symbole 13.1.1 Symbole auf dem Produkt Rechtlicher Hersteller Ottobock | 29... -
Página 30: Symbole Auf Der Fernbedienung
Bestimmungen Ihres Landes entsprechende Entsorgung kann sich schädlich auf die Umwelt und die Gesundheit auswirken. Bitte beachten Sie die Hinweise der für Ihr Land zuständigen Behörde zu Rückgabe- und Sammelverfah ren. Konformitätserklärung gemäß der anwendbaren europäischen Richtlinien Nicht ionisierende Strahlung 30 | Ottobock... -
Página 31: Symbole Auf Dem Ladegerät
3-mal zur Seite schwingen zur Einstellung der Absatz höhe 1 x kurz 1 x kurz Prothesenbein belastet und Umschaltung auf den Basismo 1 Sekunde ruhig gehalten dus (Modus 1) durchgeführt. zur Modusumschaltung oder Füße auf gleiche Höhe ge Ottobock | 31... - Página 32 Möglicherweise keine Ladegeräts versuchen, Umschaltung in den diesen Fehler zurückzu Sicherheitsmodus. setzen. Bleibt dieser Fehler be stehen, ist die Verwen dung des Produkts nicht mehr zulässig. Das Pro dukt muss umgehend durch einen Orthopädie- Techniker überprüft wer den. 32 | Ottobock...
-
Página 33: Fehlermeldungen Beim Verbindungsaufbau Mit Der Cockpit App
Netzteil eingerastet ist. Steckdose ohne Funktion Steckdose mit einem anderen Elektrogerät prüfen. Netzteil defekt Das Ladegerät und Netzteil muss von einer autorisierten Ottobock Servicestelle überprüft werden. Verbindung vom Ladegerät zum Überprüfen, ob der Stecker des Netzteil unterbrochen Ladekabels am Ladegerät voll... -
Página 34: Technische Daten
Ist dieses Piepsignal zu hören, ist der Akku vollständig aufgeladen. Ist kein Piepsignal zu hören, ist die Verbindung zum Produkt unterbrochen. 13.3 Technische Daten Umgebungsbedingungen Lagerung und Transport in der Originalverpa -20 °C/-4 °F bis +40 °C/+104 °F ckung (≤3 Monate) 34 | Ottobock... - Página 35 Ladezeit bis der Akku vollständig geladen ist 6 Stunden Verhalten des Prothesenfußes während dem Das Knöchelgelenk des Prothesenfußes ist ge Ladevorgang sperrt Betriebsdauer der Prothese mit vollständig ge 1 Tag bei durchschnittlicher Benutzung ladenem Akku Fernbedienung Kennzeichen 4X350 Ottobock | 35...
-
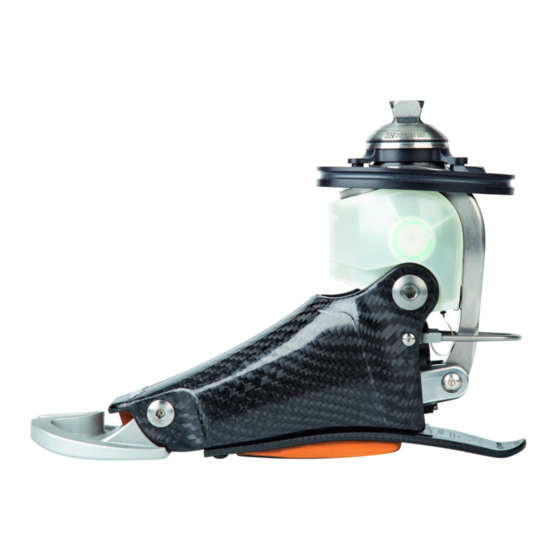
Página 36: Product Description
From this point, the product "1B1 Meridium" shall be referred to simply as the product/compon ent/prosthesis/prosthetic foot. These instructions for use provide you with important information on the use, adaptation and handling of the product. 2 Product Description 2.1 Design The product consists of the following components: 36 | Ottobock... - Página 37 Adaptation of product characteristics to various surfaces, inclines, gait situations, walking speeds and heel heights 3 Application 3.1 Indications for use The product is to be used solely for lower limb exoprosthetic fittings. 3.2 Area of Application Area of application according to the MOBIS mobility system: Ottobock | 37...
-
Página 38: Conditions Of Use
The user must fulfil the physical and mental requirements for perceiving optical/acoustic sig nals and/or mechanical vibrations 3.6 Qualification The product may be fitted only by qualified personnel authorised by Ottobock after completing the corresponding training. 4 Safety 4.1 Explanation of Warning Symbols Warning regarding possible serious risks of accident or injury. -
Página 39: General Safety Instructions
Manipulations to the product other than the tasks described in these instructions for use are not permitted. ► The battery may only be handled by Ottobock authorised, qualified personnel (no replacement by the user). ► The product and any damaged components may only be opened and repaired by author... - Página 40 If the product and its components have been subjected to extreme loads (e.g. due to a fall, etc.), then the product must be inspected for damage immediately by a prosthetist. If necessary, the prosthetist will forward the product to an authorised Ottobock Service Centre.
-
Página 41: Information On The Power Supply/Battery Charging
NOTICE Improper product care Damage to the product due to the use of incorrect cleaning agents. ► Only clean the product with a damp cloth and mild soap (e.g. 453H10=1 Ottobock Der maClean). NOTICE Mechanical damage to the product Change in or loss of functionality due to damage. -
Página 42: Battery Charger Information
Independent changes or modifications carried out to the battery charger Lack of proper charging functionality due to malfunction. ► Have any changes or modifications carried out only by Ottobock authorised, qualified personnel. 4.6 Information on Proximity to Certain Areas CAUTION Distance to HF communication devices is too small (e.g. -
Página 43: Information On Use
If the activity level is not reduced in spite of the pulsating vibration signals, this could lead to the hydraulic element overheating and, in extreme cases, cause damage to the product. The product should be inspected by an authorised Ottobock Service Centre. Ottobock | 43... - Página 44 Do not continue using the defective product. ► ► The product must be inspected by an authorised Ottobock Service Centre. The prosthet ist is your contact person. CAUTION Safety signal occurs (ongoing vibration) Falling due to unexpected behaviour of the product because of changed damping behaviour.
-
Página 45: Information On The Use Of A Mobile Device With The Cockpit App
Do not continue using the product after the safety signal has been emitted. ► The product must be inspected by an authorised Ottobock Service Centre. In this case, the contact person is your prosthetist. 4.9 Information on the use of a mobile device with the cockpit app... -
Página 46: Charging The Battery
→ The green LED on the back of the power supply and the green LED on the battery charger light up. → If the green LED on the power supply and the green LED on the battery charger do not light up, there is an error (see Page 67). 46 | Ottobock... -
Página 47: Charging The Prosthesis Battery
38% – battery charge level of currently connected pros thesis Display of current charge level using remote control: The current charge level is displayed in the status bar of the remote control when it is connected and switched on: Ottobock | 47... -
Página 48: System Requirements
INFORMATION The cockpit app can be downloaded free of charge from the respective online store. For more information, please visit the website: http://www.ottobock-group.com/cockpitapp. You can also read the QR code on the supplied Bluetooth PIN card. 7.1 System Requirements The functioning of the cockpit app is assured on devices with the Android operating system ver... -
Página 49: Starting The Cockpit App For The First Time
The current charge level is also displayed in %. 100% 1. Basic Mode Display and name of the currently selected mode (e.g. 1. Basic Mode) Connection to component has been established Connection to component has been interrupted. The app is attempting to re-establish the connection automatically. Ottobock | 49... -
Página 50: Cockpit App Navigation Menu
3) Then tap the option "Manage components". 4) Tap the symbol under the component you want to delete. → The component is deleted. Connecting component with multiple devices A component can be connected to multiple devices (Managing prostheses). 50 | Ottobock... -
Página 51: Setting The Heel Height
→ A confirmation signal will sound to indicate that the new heel height was successfully stored. INFORMATION: If there is no feedback (e.g. beep signal), this indicates that the new heel height could not be stored. Repeat the heel height measurement. Ottobock | 51... -
Página 52: Setting The Heel Height With The Cockpit App
→ A confirmation signal will sound to indicate that the new heel height was successfully stored. INFORMATION: If there is no feedback (e.g. beep signal), this indicates that the new heel height could not be stored. Repeat the heel height measurement. 52 | Ottobock... -
Página 53: Sitting Down
Possible applications include sitting with the heel in front of the knee axis, standing while leaning against something, and standing on a downward slop ing surface. Ottobock | 53... -
Página 54: Walking Down Stairs
The stair function increases the rollover angle when walking down stairs. This function should be switched on when walking down stairs step-over-step. If walking down stairs step-over-step is not required, this function can be switched off. Further information on switching on/off see Page 59. 54 | Ottobock... -
Página 55: Walking Down A Ramp
The relief function can be used when standing on an inclined surface (see Page 56). Wearing shoes with heels limits the range of incline, so it may not be possible to achieve a perpendicular lower leg. Ottobock | 55... -
Página 56: Relief Function
During this time, the app must be started and used to establish a connection. If required, Bluetooth on the prosthesis can be switched on permanently afterwards (see Page 60). Once a connection to a prosthesis has been established, the cockpit app can be used to switch between the MyModes. 56 | Ottobock... -
Página 57: Switching Mymodes Using Motion Patterns
• Before further activities, always check whether the selected mode corresponds to the required motion type. Switching process 1) Hold the prosthetic leg under the body. Ottobock | 57... -
Página 58: Switching From A Mymode Back To Basic Mode
(optional accessory). INFORMATION Bluetooth on the prosthesis must be switched on to change the prosthesis settings. If Bluetooth is switched off, it can be turned on by turning the prosthesis upside-down or by 58 | Ottobock... -
Página 59: Changing The Prosthesis Setting Using The Cockpit App
The parameters in basic mode describe the dynamic behaviour of the prosthesis in a normal gait cycle. These parameters act as basic settings for automatically adjusting the damping behaviour to the current motion situation (e.g. ramps, slow walking speed, etc.). Ottobock | 59... -
Página 60: Turning Bluetooth On The Prosthesis On/Off
If Bluetooth is switched off, it can be turned on by turning the prosthesis upside-down or by connecting/disconnecting the battery charger. Bluetooth is then turned on for approx. 2 minutes. During this time, the app must be started and used to establish a connection. If 60 | Ottobock... -
Página 61: Switching Bluetooth Off/On Using The Cockpit App
Bluetooth: On Switch Bluetooth function of The Bluetooth function of the the prosthesis on or off prosthesis can be turned on or off (see Page 60) by confirm ing the menu item with the key. Ottobock | 61... -
Página 62: Additional Operating States (Modes)
Overheating mode is indicated by a brief vibration every 5 seconds. 10 Cleaning 1) Clean the product with a damp cloth and mild soap (e.g. Ottobock 453H10=1 Derma Clean) when needed. Ensure that no liquid penetrates into the system component(s). -
Página 63: Local Legal Information
—Increase the separation between the equipment and receiver. —Connect the equipment into an outlet on a circuit different from that to which the receiver is connected. —Consult the dealer or an experienced radio/ TV technician for help. Ottobock | 63... -
Página 64: Symbols Used
State in which he/she practices to use or order the use of the device. 13 Appendices 13.1 Symbols Used 13.1.1 Symbols on the product Legal manufacturer Compliance with the requirements according to "FCC Part 15" (USA) 64 | Ottobock... -
Página 65: Symbols On Remote Control
Please observe the instructions of your national authority pertaining to return and collec tion. Declaration of conformity according to the applicable European directives Non-ionising radiation Compliance with the requirements according to "FCC Part 15" (USA) Ottobock | 65... -
Página 66: Symbols On The Battery Charger
Weight placed on prosthetic Switching to basic mode (mode leg and leg kept still for 1 1) carried out. second to switch mode or feet placed on same level and weight distributed evenly on both feet to set heel height 66 | Ottobock... -
Página 67: Warnings/Error Signals
Attempt to reset this error Possibly no switching by connecting/discon into safety mode. necting the battery char ger. If the error persists, it is no longer permissible to use the product. The product must be inspec ted immediately by a prosthetist. Ottobock | 67... - Página 68 If no beep signal is heard, the connection to the product is interrupted. If the connection to the product is interrupted, an authorised Ottobock Service Centre must inspect the product, battery char ger and power supply. Error after disconnecting the battery charger (error on self-test) Beep...
-
Página 69: Error Messages While Establishing A Connection With The Cockpit App
When the battery charger is connected or disconnected, a self-test is conduc ted and confirmed by a single beep and vibration signal. The battery is fully charged if this beep signal is heard. If no beep signal is heard, the connection to the product is interrupted. Ottobock | 69... -
Página 70: Technical Data
Charging time until battery is fully charged 6 hours Behaviour of prosthetic foot while being The ankle joint of the prosthetic foot is locked charged Operating time of prosthesis with fully charged 1 day with average use battery Remote control Reference number 4X350 70 | Ottobock... -
Página 71: Avant-Propos
Dans la suite du texte, le produit « 1B1 Meridium » sera désigné par les termes suivants : produit, composant, prothèse, pied prothétique. Ces instructions d’utilisation vous fournissent des informations importantes relatives à l’utilisation, au réglage et à la manipulation du produit. 2 Description du produit 2.1 Construction Le produit est constitué des composants suivants : Ottobock | 71... - Página 72 Rapprochement de la démarche à la démarche physiologique • Sécurité en position debout et pendant la marche • Adaptation des caractéristiques du produit aux différents terrains, différentes inclinaisons des terrains, situations de marche, vitesses de marche et hauteurs de talon 72 | Ottobock...
- Página 73 L’utilisateur doit présenter les aptitudes physiques et mentales nécessaires à la perception des signaux optiques/acoustiques et/ou des vibrations mécaniques 3.6 Qualification Seul le personnel spécialisé formé à cet effet par Ottobock est autorisé à effectuer des appa reillages avec le produit. 4 Sécurité...
-
Página 74: Structure Des Consignes De Sécurité
(consulter la page 104) ainsi que du réglage d’amortissement modifié en conséquence. PRUDENCE Manipulations des composants du système effectuées de manière autonome Chute occasionnée par une rupture des pièces porteuses ou un dysfonctionnement du produit. 74 | Ottobock... - Página 75 L’accumulateur doit être exclusivement manipulé par le personnel spécialisé agréé par Ottobock (n’effectuez pas de remplacement de votre propre chef). ► Seul le personnel spécialisé agréé par Ottobock est autorisé à ouvrir et à réparer le pro duit ou à remettre en état des composants endommagés. PRUDENCE Sollicitation mécanique du produit...
- Página 76 être immédiatement contrôlé par un or thoprothésiste afin d’évaluer les dégâts subis. Celui-ci enverra, le cas échéant, le pro duit à un SAV Ottobock agréé. PRUDENCE Sollicitation mécanique pendant le transport >...
-
Página 77: Remarques Relatives À L'aLimentation Électrique / À La Charge De L'aCcumulateur
Ottobock dans les plus brefs délais si l’émission de ces bruits augmente de manière frap pante au cours du cycle de vie du composant. Signes de modification ou de perte de fonctionnalité détectés lors de l’utilisation Une réduction de l’amortissement ou de la résistance de l’avant-pied sont des signes percep... -
Página 78: Remarques Relatives Au Séjour Dans Des Endroits Particuliers
• Téléphones sans fil DECT avec station de base : 0,18 m • WLAN (routeurs, points d’accès…) : 0,11 m • Appareils Bluetooth (produits d’autres marques non autorisés par Ottobock) : 0,11 m PRUDENCE Séjour à proximité de fortes sources d’interférences magnétiques et électriques (par ex. -
Página 79: Consignes Relatives À L'uTilisation
Ne pas réduire l’activité en cours malgré l’émission de signaux vibratoires à pulsations peut entraîner une surchauffe de l’élément hydraulique et, dans un cas extrême, endom mager le produit. Le produit doit si possible être vérifié par un SAV Ottobock agréé. PRUDENCE Commutation de mode effectuée de manière incorrecte... -
Página 80: Remarques Relatives Aux Modes De Sécurité
êtes en présence d’un défaut permanent. ► Cessez d’utiliser le produit défectueux. ► Le produit doit être vérifié par un SAV Ottobock agréé. Votre interlocuteur est votre or thoprothésiste. PRUDENCE Apparition du message de sécurité (vibration permanente) Chute occasionnée par un comportement inattendu du produit à la suite d’un comportement d’amortissement modifié. -
Página 81: Consignes Lors De L'uTilisation D'uN Terminal Mobile Avec L'aPplication Cockpit
Installez l’application Cockpit uniquement avec les systèmes d’exploitation mentionnés dans le chapitre « Configuration requise » (consulter la page 84). Les terminaux testés sont également indiqués dans ce chapitre. 5 Fournitures et accessoires Contenu de la livraison • 1x Meridium 1B1 • 1x bloc d’alimentation 757L16* Ottobock | 81... -
Página 82: Charger L'aCcumulateur
4) Brancher le bloc d’alimentation à la prise de courant. → La diode électroluminescente (DEL) verte située au dos du bloc d’alimentation et la diode électroluminescente (DEL) verte du chargeur s’allument. 82 | Ottobock... -
Página 83: Charger L'aCcumulateur De La Prothèse
De 20 % à 35 % 1x court 5x long Inférieur à 20 % Affichage de l’état de charge actuel via l’application Cockpit : Si l’application Cockpit est lancée, l’état de charge actuel est affiché dans la ligne inférieure de l’écran : Ottobock | 83... -
Página 84: Application Cockpit
INFORMATION L’application Cockpit peut être téléchargée gratuitement dans la boutique en ligne correspon dante. Vous trouverez plus d’informations sur la page Internet suivante : http://www.ottobock- group.com/cockpitapp. Il est également possible de lire le code QR de la Bluetooth PIN Card fournie. -
Página 85: Première Connexion Entre L'aPplication Cockpit Et Le Composant
Le menu principal apparaît ensuite avec le nom de la prothèse connectée. INFORMATION Une fois que la première connexion avec la prothèse a été établie, l’application se connecte tou jours automatiquement après son démarrage. Il n’y a pas d’autres étapes à effectuer. Ottobock | 85... -
Página 86: Éléments De Commande De L'aPplication Cockpit
Afficher les informations/mentions légales sur l’application Cockpit 7.4 Gestion des prothèses Cette application permet d’enregistrer au maximum des connexions avec quatre composants dif férents. Un composant ne peut toutefois être connecté qu’à un seul terminal ou à un seul boîtier de programmation. 86 | Ottobock... -
Página 87: Régler La Hauteur De Talon À L'aIde D'uN Modèle De Mouvement
8.1.1 Régler la hauteur de talon à l’aide d’un modèle de mouvement 1) Mettre les chaussures avec la nouvelle hauteur de talon. 2) Tendre le pied avec le pied prothétique sur le côté. 3) Balancer le pied 3 fois sur le côté. Ottobock | 87... -
Página 88: Régler La Hauteur De Talon Avec L'aPplication Cockpit
« État ». 1) Dans le menu principal, sélectionner l’entrée de menu « État » à l’aide des touches , valider avec la touche . 2) Sélectionner l’entrée de menu « Hauteur de talon » à l’aide des touches , 88 | Ottobock... -
Página 89: Être Debout
être réalisé de manière agréable et le levier du talon est adapté à la longueur de pas. À la fin de la phase pendulaire, lors de la pose du talon, l’amortissement de la flexion plantaire diminue pour assurer un contact en douceur. Ottobock | 89... -
Página 90: Être Assis
à la verticale. En fonction du type d’appareillage, monter des escaliers à pas alternés est possible. Pour monter un escalier, il faut toujours se tenir à la rampe avec une main. 90 | Ottobock... -
Página 91: Descendre Un Escalier
Cela permet une compensation du mouvement de déroulement précédent et une position debout stable. La flexion dorsale peut entraîner une flexion au niveau de l’articulation de ge nou. Ottobock | 91... -
Página 92: Monter Une Pente
Ils peuvent être appelés au moyen du boîtier de programmation ou d’un modèle de mouvement. Pour cela, il faut que la commutation par modèles de mouvement soit activée par l’orthoprothésiste avec le logiciel de réglage. 92 | Ottobock... -
Página 93: Changement De Mymode Avec L'aPplication Cockpit
La commutation et le nombre de modèles de mouvement doivent être activés avec le logiciel de réglage. • Avant toute autre activité, toujours vérifier si le mode sélectionné correspond au type de mou vement souhaité. Effectuer une commutation 1) Maintenir la jambe appareillée sous le corps. Ottobock | 93... -
Página 94: Activation Du Verrou De La Cheville
8.3.4 Retour au mode de base à partir d’un MyMode Informations relatives à la commutation • Indépendamment de la configuration des MyModes dans le logiciel de réglage, il est toujours possible de revenir au mode de base (mode 1) à l’aide d’un modèle de mouvement. 94 | Ottobock... -
Página 95: Modification Des Réglages De La Prothèse
(par exemple lors de l’accoutumance à la prothèse). L’orthoprothésiste peut suivre ces modifica tions à l’occasion de la prochaine visite à l’aide du logiciel de réglage. Ottobock | 95... -
Página 96: Modification Du Réglage De La Prothèse Via L'aPplication Cockpit
110 — 170 ± 10 Ce paramètre définit la facilité du dé roulement. Fonction escaliers MARCHE - MARCHE - L’activation de cette fonction a pour ARRÊT ARRÊT effet l’augmentation de l’angle de dé roulement lors de la descente 96 | Ottobock... -
Página 97: Désactiver/Activer La Fonction Bluetooth De La Prothèse
Désactiver la fonction Bluetooth 1) Le composant étant connecté, appuyez sur le symbole dans le menu principal. → Le menu de navigation s’ouvre. 2) Appuyez sur l’entrée « Fonctions » dans le menu de navigation. 3) Appuyez sur l’entrée « Désactiver le Bluetooth ». Ottobock | 97... -
Página 98: Interrogation De L'éTat De La Prothèse
(mode 1) à partir du mode d’accumulateur déchargé. 9.2 Mode pendant la charge de la prothèse L’articulation de la cheville du pied prothétique est bloquée pendant la charge. 98 | Ottobock... -
Página 99: Mode De Sécurité
Il est possible de désactiver le mode de sécurité en branchant et débranchant le chargeur. Si le produit active à nouveau le mode de sécurité, cela indique la présence d’un défaut permanent. Le produit doit être vérifié par un SAV Ottobock agréé. 9.4 Mode de température trop élevée En cas de surchauffe de l’unité... -
Página 100: Informations Légales Locales
Any changes or modifications not expressly approved by the party responsible for compliance could void the user’s authority to operate the equipment. Caution: Exposure to Radio Frequency Radiation. This device must not be co-located or operating in conjunction with any other antenna or transmit ter. Responsible party: 100 | Ottobock... -
Página 101: Symboles Utilisés
State in which he/she practices to use or order the use of the device. 13 Annexes 13.1 Symboles utilisés 13.1.1 Symboles inscrits sur le produit Fabricant légal Conforme aux exigences selon « FCC Part 15 » (États-Unis) Conforme aux exigences du « Radiocommunications Act » (Australie) Rayonnement non ionisant Ottobock | 101... -
Página 102: Symboles Figurant Sur Le Boîtier De Programmation
Déclaration de conformité conforme aux directives européennes applicables Rayonnement non ionisant Conforme aux exigences selon « FCC Part 15 » (États-Unis) Conforme aux exigences du « Radiocommunications Act » (Australie) 13.1.3 Symboles inscrits sur le chargeur Déclaration de conformité conforme aux directives européennes applicables 102 | Ottobock... -
Página 103: États De Fonctionnement / Signaux De Défaut
2 x court 2 x court Jambe appareillée chargée Passage au MyMode 1 (mode 2) et maintenue immobile pen effectué. dant 1 seconde 3 x court 3 x court Jambe appareillée chargée Passage au MyMode 2 (mode 3) et maintenue immobile pen effectué. dant 1 seconde Ottobock | 103... -
Página 104: Signaux D'aVertissement/De Défaut
La prise de courant ne fonctionne Vérifiez la prise de courant à l’aide d’un autre appareil élec trique. 104 | Ottobock... - Página 105 Bloc d’alimentation défectueux Le chargeur et le bloc d’alimentation doivent être véri fiés par un SAV Ottobock agréé. Connexion entre le chargeur et le Vérifier si la fiche du câble de bloc d’alimentation interrompue charge est enclenchée complète...
-
Página 106: Messages D'eRreur Apparaissant À L'éTablissement De La Connexion Avec L'aPplication Cockpit
Observer les signaux sonores afin de pouvoir distinguer les deux situations. Un test automatique confirmé par un seul signal sonore et un seul signal vibra toire est effectué lors du branchement ou du débranchement du chargeur. 106 | Ottobock... -
Página 107: Caractéristiques Techniques
Portée de la connexion Bluetooth par rapport max. 10 m/32 ft au boîtier de programmation Taille de pied [cm] 100 kg / 100 kg / 100 kg / 220 lbs 220 lbs 220 lbs Env. 1250 g / Env. 1500 g / Env. 1550 g / 44 oz 53 oz 55 oz Accumulateur de la prothèse Type d’accumulateur Li-Ion Ottobock | 107... - Página 108 -25 °C/-13 °F à +70 °C/+158 °F d’origine Stockage et transport sans emballage -25 °C/-13 °F à +70 °C/+158 °F Humidité relative de l’air de 93 % max., sans condensation Fonctionnement 0 °C/+32 °F à +40 °C/+104 °F Humidité relative de l’air de 93 % max., sans condensation Tension d’entrée 12 V 108 | Ottobock...
-
Página 109: Descrizione Del Prodotto
I dati di contatto sono disponibili sul retro della copertina. ► Conservare il presente documento. Di seguito il prodotto "Meridium 1B1" viene denominato prodotto/componente/protesi/piede pro tesico. Queste istruzioni per l'uso forniscono importanti informazioni sull'utilizzo, la regolazione e il tratta... -
Página 110: Condizioni D'iMpiego
ISO 22675. Ciò corrisponde, a seconda del livello di attività del paziente, ad un periodo di utilizzo di 2 - 3 anni. 3.5 Indicazioni • Per utenti con disarticolazione di ginocchio e amputazione transfemorale monolaterale • Per utenti con amputazione transtibiale monolaterale o bilaterale 110 | Ottobock... -
Página 111: Significato Dei Simboli Utilizzati
3.6 Qualifica Il trattamento con il prodotto può essere effettuato esclusivamente da personale specializzato, au torizzato dalla Ottobock dopo la partecipazione al relativo corso di formazione. 4 Sicurezza 4.1 Significato dei simboli utilizzati Avvertenza relativa a possibili gravi pericoli di incidente e lesioni. - Página 112 La gestione della batteria è affidata esclusivamente al personale tecnico autorizzato da Ottobock (non eseguire sostituzioni di propria iniziativa). ► L'apertura e la riparazione del prodotto o la riparazione di componenti danneggiati pos sono essere effettuate solamente da personale tecnico autorizzato da Ottobock. CAUTELA Sollecitazione meccanica del prodotto >...
- Página 113 è necessario far controllare immediatamente il prodotto da un tecnico ortopedico per verificare la presenza di eventuali danni. Se necessario, il tec nico invierà il prodotto a un centro assistenza autorizzato Ottobock. CAUTELA Sollecitazione meccanica durante il trasporto >...
-
Página 114: Indicazioni Sull'aLimentazione Elettrica / Carica Della Batteria
è normale e inevitabile. Solitamente non comporta alcun problema. Se tutta via si riscontrasse un evidente aumento dei rumori durante il ciclo operativo del componente, lo si dovrebbe far controllare tempestivamente da personale specializzato autorizzato da Ottobock. Segni di cambiamento o perdita di funzionalità durante l'utilizzo Un'azione elastica ridotta o una minore resistenza dell'avampiede è... -
Página 115: Indicazioni Per La Permanenza In Determinate Aree
• telefono cellulare GSM 1800 / GSM 1900 / UMTS: 0,35 m • telefoni DECT cordless incl. stazione base: 0,18 m • WLAN (router, access point,…): 0,11 m • dispositivi Bluetooth (prodotti di altri produttori non approvati da Ottobock): 0,11 m CAUTELA Permanenza in prossimità di fonti di interferenza elettromagnetica intense (ad es. siste... -
Página 116: Indicazioni Per L'uTilizzo
Se, nonostante i segnali a vibrazione intermittenti, non si riduce l'attività, si può causare un grave surriscaldamento dell'unità idraulica e, in casi estremi, un danno al prodotto. Il prodotto deve essere controllato da un centro assistenza Ottobock autorizzato. 116 | Ottobock... -
Página 117: Indicazioni Sulle Modalità Di Sicurezza
Caduta per comportamento inatteso del prodotto a seguito del cambiamento dell'azione ammor tizzante. ► Nel caso in cui non sia possibile disattivare la modalità di sicurezza dopo aver caricato la batteria, si è in presenza di un guasto permanente. Ottobock | 117... -
Página 118: Indicazioni Sull'uTilizzo Di Un Terminale Mobile Con L'aPplicazione Cockpit
► Non continuare a utilizzare il prodotto difettoso. ► Il prodotto deve essere controllato da un centro assistenza Ottobock autorizzato. Rivol gersi al proprio tecnico ortopedico. CAUTELA Segnalazione di sicurezza (vibrazione costante) Caduta per comportamento inatteso del prodotto a seguito del cambiamento dell'azione ammor... -
Página 119: Fornitura E Accessori
Installare l'applicazione Cockpit solo sui sistemi operativi riportati al capitolo "Requisiti di sistema" (v. pagina 121). Anche i terminali testati sono elencati al capitolo indicato. 5 Fornitura e accessori Fornitura • 1 Meridium 1B1 • 1 alimentatore 757L16* • 1 caricabatteria per C-Leg 4E50* •... -
Página 120: Carica Della Batteria Della Protesi
Il segnale acustico per il piede protesico viene emesso dopo cir ca 2 secondi. Segnale acustico Segnale a vibrazione Stato di carica della batteria 5 segnali brevi superiore all'80% 4 segnali brevi dal 66% all'80% 3 segnali brevi dal 51% al 65% 120 | Ottobock... -
Página 121: Applicazione Cockpit
INFORMAZIONE L'applicazione Cockpit può essere scaricata gratuitamente dal proprio store online. Per ulteriori informazioni consultare il seguente sito internet: http://www.ottobock-group.com/cockpitapp. È anche possibile scannerizzare il codice QR della Bluetooth PIN Card fornita in dotazione. 7.1 Requisiti di sistema Il funzionamento dell'applicazione Cockpit è... -
Página 122: Primo Collegamento Tra L'aPplicazione Cockpit E Il Componente
A questo punto viene visualizzato il menu principale con il nome della protesi collegata. INFORMAZIONE Dopo che il primo collegamento con la protesi è stato stabilito correttamente, l'applicazione si collegherà sempre in automatico dopo l'avvio. Non sono necessarie ulteriori operazioni. 122 | Ottobock... -
Página 123: Comandi Dell'aPplicazione Cockpit
Impostazioni Gestisci componenti Modifica delle impostazioni della modalità selezionata (v. pagina 132) Informazioni legali/Info Stato Verifica dello stato del componente collegato (v. pagina 135) Gestisci componenti Aggiunta, eliminazione di componenti (v. pagina 124) Informazioni legali/Info Visualizzazione di informazioni/note legali sull'applicazione Coc kpit Ottobock | 123... -
Página 124: Gestione Delle Protesi
Rispettare quindi l'altezza massima consentita del tac co indicata nel capitolo "Dati tecnici" (v. pagina 142). 124 | Ottobock... -
Página 125: Impostazione Dell'aLtezza Del Tacco Mediante Schemi Di Movimento
Impostazioni Stato Informazioni generali Gestisci componenti Informazioni legali/Info 8.1.3 Impostazione dell'altezza del tacco con il telecomando INFORMAZIONE Durante il caricamento della batteria della protesi, questa funzione non è disponibile. Prima del la voce del menu "Stato" compare il simbolo . Ottobock | 125... -
Página 126: Stare In Piedi
A conclusione della fase dinamica, al contatto del tallone con il suolo, l'am mortizzazione della flessione plantare diminuisce per consentire un morbido appoggio. 126 | Ottobock... -
Página 127: Stare Seduto
La posizione è assicurata da un'ammortizzazione elevata della flessione dorsa le con la gamba in posizione verticale. A seconda del tipo di protesizzazione è possibile salire le scale con passo alternato. Tenersi sempre con una mano al corrimano quando si salgono le scale. Ottobock | 127... -
Página 128: Scendere Le Scale
In questo modo il precedente movimento di rollover viene bilanciato consentendo una posizione eretta sicura. La flessione dorsale può portare a una flessione nell'articolazione di ginoc chio. 128 | Ottobock... -
Página 129: Salire Una Rampa
8.3 MyMode Il tecnico ortopedico può attivare e configurare tramite il software di regolazione, oltre alla modali tà di base, anche le modalità MyMode. Queste modalità possono essere selezionate tramite il te Ottobock | 129... -
Página 130: Commutazione Nelle Modalità Mymode Tramite L'aPplicazione Cockpit
La commutazione e il numero di schemi di movimento devono essere attivati nel software di regolazione. • Prima di eseguire altre attività verificare sempre che la modalità selezionata corrisponda al ti po di movimento desiderato. Esecuzione della commutazione 1) Mantenere l'arto protesico in linea con il corpo. 130 | Ottobock... -
Página 131: Attivazione Del Blocco Della Caviglia
A prescindere dalla configurazione delle modalità MyMode nel software di regolazione, è sempre possibile tornare alla modalità di base (modalità 1) tramite uno schema di movimento. • Collegando/scollegando il caricabatteria è sempre possibile tornare alla modalità di base (modalità 1). Ottobock | 131... -
Página 132: Modifica Delle Impostazioni Della Protesi
Il tecnico ortopedico, in occasione della successiva visita, potrà rin tracciare le modifiche effettuate grazie al software di regolazione. • Qualora si debbano modificare le impostazioni di una modalità MyMode, è necessario dappri ma passare a tale modalità MyMode. 132 | Ottobock... -
Página 133: Modifica Dell'iMpostazione Della Protesi Tramite L'aPplicazione Cockpit
Questo parametro definisce l'intensità della resistenza durante il rollover. Funzione scale ON — OFF ON — OFF Attivando questa funzione si amplia l'angolo di rollover scendendo le sca le. Questa funzione deve essere atti vata nel software di regolazione. Ottobock | 133... -
Página 134: Accensione/Spegnimento Del Bluetooth Della Protesi
1) Girare il componente o collegare/scollegare il caricabatteria. → La funzione Bluetooth rimane attiva per circa 2 minuti. Durante questo lasso di tempo l'ap plicazione deve essere avviata per instaurare un collegamento con il componente. 2) Seguire le istruzioni visualizzate sullo schermo. 134 | Ottobock... -
Página 135: Richiesta Dello Stato Della Protesi
Nella modalità di sicurezza vengono adottati i valori di ammortizzazione preimpostati. Questo con sente al paziente di camminare, nonostante il sistema non sia attivo, con determinate limitazioni. La commutazione alla modalità di sicurezza viene segnalata subito prima da segnali acustici e a vibrazione (v. pagina 139). Ottobock | 135... -
Página 136: Modalità Sovratemperatura
La modalità sovratemperatura viene segnalata ogni 5 secondi da una breve vibrazione. 10 Pulizia 1) Pulire il prodotto con un panno umido e sapone delicato (p. es. Ottobock Derma Clean 453H10=1) in caso di sporcizia. Accertarsi che nessun liquido penetri nel componente/nei componenti di sistema. -
Página 137: Simboli Utilizzati
Attenersi alle disposizioni delle autorità locali compe tenti relative alla restituzione e alla raccolta. Dichiarazione di conformità ai sensi delle direttive europee applicabili Numero di serie Protetto dalla polvere, protezione dagli spruzzi d'acqua Ottobock | 137... -
Página 138: Simboli Sul Telecomando
La protesi segnala stati operativi e messaggi di errore mediante segnali acustici e a vibrazione. 13.2.1 Segnalazione degli stati operativi Caricabatteria collegato/scollegato Segnale acustico Segnale a vibrazio Evento 1 segnale breve Caricabatteria attaccato o caricabatteria ancora staccato prima dell'avvio della modalità di carica 138 | Ottobock... -
Página 139: Segnali Di Avvertimento E Di Errore
Segnale a vibrazio Evento Intervento necessario 1 segnale breve ad Surriscaldamento Ridurre le attività intervalli di circa 5 se unità idraulica condi 10 segnali brevi 10 segnali lunghi Stato di carica infe Caricare la batteria riore al 5% Ottobock | 139... - Página 140 Verificare la funzionalità della presa con un altro elettrodomesti Alimentatore difettoso Il caricabatteria e l'alimentatore devono essere esaminati da un centro assistenza Ottobock auto rizzato. Collegamento tra caricabatteria e Verificare che il connettore del alimentatore interrotto cavo di carica sia ben inserito nel caricabatteria.
- Página 141 è interrotto. In caso di collegamento interrotto con il prodotto, il caricabatteria, l'alimentatore e il prodotto devo no essere esaminati da un centro assistenza Ottobock autorizzato. Guasto dopo aver staccato il caricabatteria (guasto riconosciuto durante l'autodiagnosi) Segnale Segnale Guasto...
-
Página 142: Segnali Di Stato
Immagazzinaggio e trasporto senza imballag -25 °C/-13 °F ... +70 °C/+122 °F gio (<48 ore) max. 93% di umidità relativa dell'aria, senza condensa Conservazione per lungo tempo (>3 mesi) -20 °C/-4 °F ... +20 °C/+68 °F max. 93% di umidità relativa dell'aria, senza condensa 142 | Ottobock... - Página 143 Codice 4X350 Cicli di carica (cicli di caricamento e scarica mento) dopo i quali si dispone di almeno l'80% della capacità originale della batteria Tipo batteria Ioni di litio Tempo di carica totale della batteria 4 ore Ottobock | 143...
-
Página 144: Introducción
El producto "1B1 Meridium" se denominará en lo sucesivo producto/componente/prótesis/pie protésico. Estas instrucciones de uso le proporcionan información importante relacionada con el empleo, el ajuste y el manejo del producto. 2 Descripción del producto 2.1 Construcción El producto consta de los siguientes componentes: 144 | Ottobock... -
Página 145: Uso Previsto
Adaptación de las propiedades del producto a distintos tipos de suelo, inclinaciones, situa ciones de marcha, velocidades y alturas de tacón 3 Uso 3.1 Uso previsto El producto está exclusivamente indicado para exoprotetizaciones de la extremidad inferior. Ottobock | 145... - Página 146 3.6 Cualificación La protetización con el producto podrá realizarla únicamente el personal técnico que haya obteni do la autorización de Ottobock tras superar la correspondiente formación. 4 Seguridad 4.1 Significado de los símbolos de advertencia Advertencias sobre posibles riesgos de accidentes y lesiones graves.
-
Página 147: Indicaciones Generales De Seguridad
El personal técnico autorizado por Ottobock se reserva el derecho exclusivo de manipu lación de la batería (no está permitido que la cambie por su cuenta). ► Solo el personal técnico autorizado por Ottobock puede abrir y reparar el producto y arreglar los componentes dañados. Ottobock | 147... - Página 148 Lleve la pró tesis a un servicio técnico de Ottobock autorizado para que la examine. En caso de que penetre agua salada, el técnico ortopédico tendrá que retirar la funda ►...
- Página 149 AVISO Cuidado incorrecto del producto Daños en el producto debidos al uso de limpiadores inadecuados. ► Limpie el producto únicamente con un paño húmedo y jabón suave (p. ej., Ottobock DermaClean 453H10=1). AVISO Daño mecánico del producto Alteraciones o fallos en el funcionamiento debidos a daños.
-
Página 150: Indicaciones Sobre El Suministro De Corriente / Para Cargar La Batería
Deterioro del producto debido a una tensión, corriente o polaridad incorrectas. ► Utilice este producto únicamente con fuentes de alimentación y cargadores autorizados por Ottobock (véanse las instrucciones de uso y los catálogos). 4.5 Indicaciones sobre el cargador AVISO Entrada de suciedad y humedad en el producto Función de carga defectuosa debida a fallos en el funcionamiento. -
Página 151: Indicaciones Sobre Las Estancias En Ciertas Zonas
• Teléfono inalámbrico DECT, incluida la base: 0,18 m • Wi-Fi (router, puntos de acceso,…): 0,11 m • Aparatos con Bluetooth (productos de terceros no autorizados por Ottobock): 0,11 m PRECAUCIÓN Estancia en las proximidades de fuentes de interferencias magnéticas o eléctricas in... - Página 152 Si no se reduce la actividad aunque las señales vibratorias intermitentes hayan comenza do, podría producirse un sobrecalentamiento del elemento hidráulico y, en caso extre mo, dañarse el producto. El producto debería ser revisado por un servicio técnico auto rizado de Ottobock. PRECAUCIÓN Cambio de modo realizado de forma incorrecta Caídas debidas a un comportamiento inesperado del producto a causa de un comportamiento...
-
Página 153: Indicaciones Sobre Los Modos De Seguridad
No siga utilizando el producto defectuoso. ► ► El producto debe ser revisado por un servicio técnico autorizado de Ottobock. Su per sona de contacto es el técnico ortopédico. PRECAUCIÓN Aparición del mensaje de seguridad (vibración permanente) Caídas debidas a un comportamiento inesperado del producto a causa de un comportamiento... -
Página 154: Indicaciones Sobre El Uso De Un Terminal Móvil Con La Aplicación Cockpit
"Requisitos del sistema" (véase la página 157). Los terminales que se han pro bado también están indicados en este capítulo. 5 Componentes incluidos en el suministro y accesorios Componentes incluidos en el suministro • 1 Meridium 1B1 • 1 fuente de alimentación 757L16* • 1 cargador para C-Leg 4E50*... -
Página 155: Cargar La Batería
(LED) verde del cargador. → Si ni el diodo luminoso (LED) verde de la fuente de alimentación ni el diodo luminoso (LED) verde del cargador se encienden, esto indica que se ha producido un fallo (véase la página 175). Ottobock | 155... -
Página 156: Cargar La Batería De La Prótesis
Visualización del nivel actual de carga mediante la aplicación Cockpit: Cuando la aplicación se ha iniciado, el nivel de carga actual se muestra en la línea inferior de la pantalla: 38 % – Nivel de carga de la batería de la prótesis co nectada en ese momento 156 | Ottobock... -
Página 157: Requisitos Del Sistema
INFORMACIÓN La aplicación Cockpit puede descargarse gratuitamente en la tienda online correspondiente. Puede consultar más información en la siguiente página web: http://www.ottobock- group.com/cockpitapp. También se puede leer el código QR de la tarjeta PIN de Bluetooth su ministrada. -
Página 158: Iniciar La Aplicación Cockpit Por Primera Vez
7. Visualización y denominación del modo seleccionado actual mente (p. ej., 1. Modo básico) Se ha establecido la conexión con el componente Se ha interrumpido la conexión con el componente. Se intentará restablecer la conexión automáticamente. 158 | Ottobock... -
Página 159: Menú De Navegación De La Aplicación Cockpit
→ Se abrirá el menú de navegación. 2) Pulse la opción "Gestionar componentes" en el menú de navegación. 3) A continuación, pulse la opción "Gestionar componentes". 4) Pulse el símbolo en el componente que desee eliminar. → El componente se eliminará. Ottobock | 159... -
Página 160: Ajustar La Altura De Tacón Mediante Un Patrón De Movimiento
→ Una señal de confirmación sonará para indicar que se ha memorizado correctamente la altura nueva del tacón. INFORMACIÓN: Si no se produjese respuesta alguna (p. ej., señal acústica), esto indi caría que no se ha podido memorizar la altura nueva de tacón. Repita la medición de la altura de tacón. 160 | Ottobock... -
Página 161: Ajustar La Altura De Tacón Con La Aplicación Cockpit
→ Una señal de confirmación sonará para indicar que se ha memorizado correctamente la altura nueva del tacón. INFORMACIÓN: Si no se produjese respuesta alguna (p. ej., señal acústica), esto indi caría que no se ha podido memorizar la altura nueva de tacón. Repita la medición de la altura de tacón. Ottobock | 161... -
Página 162: Estar De Pie
1) Sitúe ambos pies uno al lado del otro a la misma altura. 2) Cuando se vaya a sentar, ejerza carga sobre ambas piernas por igual y, de haberlos, ayúdese de los reposabrazos. 3) Mueva las nalgas en dirección al respaldo e incline el torso hacia delante. 162 | Ottobock... -
Página 163: Estar Sentado
3) Coloque el lado contralateral en el escalón siguiente. Al hacerlo compruebe si la articulación de rodilla y el pie protésico permi ten realizar este movimiento. 4) Coloque la pierna con el pie protésico en el escalón después del siguien Ottobock | 163... -
Página 164: Función De Escaleras
él. Si se pisase con el antepié teniendo la parte inferior de la pierna inclinada (p. ej., en pendientes muy pronunciadas), el pie afianzará la flexión dorsal, permi tiendo así levantar el cuerpo de forma estable. 164 | Ottobock... -
Página 165: Estar De Pie Sobre Un Suelo Inclinado
Estos se pueden activar con el mando a distancia o mediante un patrón de movimiento concreto. El técnico ortopédico debe activar para ello en el software de configura ción la función de cambiar de modo mediante patrones de movimiento. Ottobock | 165... -
Página 166: Cambiar De Mymode Con La Aplicación Cockpit
3) Incline el pie protésico ligeramente hacia atrás y ejerza carga sobre el antepié. INFORMACIÓN: Si el pie protésico presenta una flexión dorsal pronunciada, se puede ejercer carga sobre el talón. 4) Mantenga quieta la pierna protésica. 166 | Ottobock... -
Página 167: Activar El Bloqueo Del Tobillo
→ Una señal acústica y vibratoria sonará para confirmar que se ha detectado el patrón de movimiento. 3) Incline el pie protésico ligeramente hacia atrás y ejerza carga sobre el antepié. INFORMACIÓN: Si el pie protésico presenta una flexión dorsal pronunciada, se puede ejercer carga sobre el talón. Ottobock | 167... -
Página 168: Modificar Los Ajustes De La Prótesis
El técnico ortopédico puede ver las modifi caciones mediante el software de configuración en la siguiente visita. • Para modificar los ajustes de un MyMode se ha de pasar primero a ese MyMode en concreto. 168 | Ottobock... -
Página 169: Modificar Los Ajustes De La Prótesis Con La Aplicación Cockpit
Func. escaleras ACTIVADA — ACTIVADA — Activando esta función se amplía el DESACTIVA DESACTIVA ángulo de balanceo al bajar escale ras. Para ello, esta función debe estar activada en el software de configura ción. Ottobock | 169... -
Página 170: Activar/Desactivar La Función De Bluetooth De La Prótesis
→ La función de Bluetooth está activada durante aprox. 2 minutos. En este tiempo hay que iniciar la aplicación para establecer una conexión con el componente. 2) Siga las instrucciones que aparecen en la pantalla. → Si la función de Bluetooth está activada, aparecerá el símbolo en la pantalla. 170 | Ottobock... -
Página 171: Consultar El Estado De La Prótesis
Se puede salir del modo de seguridad conectando y desconectando el cargador. Si el producto vuelve a cambiar al modo de seguridad, es porque existe un fallo permanente. El producto debe ser revisado por un servicio técnico autorizado de Ottobock. Ottobock | 171... -
Página 172: Modo De Sobrecalentamiento
Para la inspección de mantenimiento hay que enviar el producto con su cargador y su fuente de alimentación a un servicio técnico autorizado de Ottobock. INFORMACIÓN Si con el producto se hubiese entregado un mando a distancia a modo de accesorio opcional, este también deberá... -
Página 173: Avisos Legales Locales
Declaración de conformidad conforme a las directivas europeas aplicables Número de serie Protegido contra el polvo y las salpicaduras Ottobock | 173... -
Página 174: Símbolos En El Mando A Distancia
Número de lote 13.2 Estados de funcionamiento / señales de error La prótesis indica los estados de funcionamiento y los mensajes de error mediante señales acús ticas y vibratorias. 174 | Ottobock... -
Página 175: Indicación De Los Estados De Funcionamiento
Nivel de carga inferior al 5 % Señal acústica Señal vibratoria Suceso ¿Qué hacer? 1 señal corta aprox. Sistema hidráulico Reducir la actividad cada 5 segundos sobrecalentado 10 señales cortas 10 señales largas Nivel de carga infe Cargar la batería rior al 5 % Ottobock | 175... - Página 176 La fuente de alimentación está Un servicio técnico autorizado de defectuosa Ottobock debe revisar el carga dor y la fuente de alimentación. Se ha interrumpido la conexión Comprobar si la clavija del cable del cargador con la fuente de ali...
-
Página 177: Mensajes De Error Al Establecer La Conexión Con La Aplicación Cockpit
En caso de que se interrumpa la conexión con el producto, un ser vicio técnico autorizado de Ottobock deberá revisar el pro ducto, el cargador y la fuente de alimentación. Fallo después de desconectar el cargador (fallo detectado durante la autocomprobación) Señal... -
Página 178: Señales De Estado
Almacenamiento prolongado (>3 meses) de -20 °C/-4 °F a +20 °C/+68 °F máx. 93 % de humedad relativa, sin condensa ción Funcionamiento De -10 °C/+14 °F a +40 °C/+104 °F máx. 93 % de humedad relativa, sin condensa ción Carga de la batería De 0 °C/+32 °F a +45 °C/+113 °F Producto Referencia 178 | Ottobock... - Página 179 • Si el mando a distancia está encendido, en lugar de la pantalla de inicio se muestra también el nivel de carga actual de la bate ría. Ottobock | 179...
-
Página 180: Descrição Do Produto
O produto "1B1 Meridium" será denominado, a seguir, de produto/módulo/prótese/pé protético. Este manual de utilização fornece informações importantes sobre a utilização, ajuste e manuseio do produto. 2 Descrição do produto 2.1 Estrutura O produto é constituído pelos seguintes componentes: 180 | Ottobock... - Página 181 Segurança na bipedestação e na marcha • Adaptação das propriedades do produto aos diferentes pisos, inclinações de piso, situações e velocidades de marcha, e alturas do salto 3 Uso 3.1 Finalidade Este produto destina-se exclusivamente à protetização exoesquelética das extremidades inferio res. Ottobock | 181...
- Página 182 3.6 Qualificação A protetização com o produto deve ser realizada somente por pessoal técnico, autorizado pela Ottobock através de um treinamento correspondente. 4 Segurança 4.1 Significado dos símbolos de advertência Aviso sobre potenciais riscos de acidentes e lesões graves.
-
Página 183: Indicações Gerais De Segurança
Com exceção dos trabalhos descritos neste manual de utilização, não efetue nenhuma manipulação no produto. ► O manuseio da bateria está reservado exclusivamente ao pessoal técnico da Ottobock (não efetuar a substituição sem autorização). ► A abertura e o reparo do produto, assim como o reparo de componentes danificados, só... - Página 184 Caso haja a penetração de água nos componentes do sistema, deixe que o técnico orto pédico retire a capa de pé para que possam secar. A prótese tem que ser encaminhada à assistência técnica autorizada da Ottobock para vistoria. ►...
-
Página 185: Indicações Sobre A Alimentação De Corrente / Carregamento Da Bateria
INDICAÇÃO Cuidados inadequados do produto Danificação do produto devido à utilização de detergentes inadequados. ► Limpe o produto somente com um pano úmido e sabão suave (p. ex., Ottobock Derma Clean 453H10=1). INDICAÇÃO Danificação mecânica do produto Alteração ou perda do funcionamento devido a uma danificação. -
Página 186: Indicações Relativas Ao Carregador
INDICAÇÃO Utilização do transformador/carregador incorreto Danos ao produto causados por tensão, corrente ou polaridade incorretas. ► Use somente os transformadores/carregadores autorizados pela Ottobock para este produto (consulte manuais de utilização e catálogos). 4.5 Indicações relativas ao carregador INDICAÇÃO Penetração de sujeira e umidade no produto Nenhuma função de carregamento adequada devido a uma falha do funcionamento. -
Página 187: Indicações Sobre A Permanência Em Determinadas Áreas
Se você colocar somente a parte da frente do pé sobre a borda do degrau, a placa dos dedos do pé pode ceder. ► É necessário proceder com especial cuidado na subida de escadas com crianças ao co Ottobock | 187... - Página 188 ► Não utilize o pé protético sem a capa de pé prevista. CUIDADO Utilização do pé protético com uma capa de pé danificada > Queda decorrente do comportamento inesperado do produto causado por falha do fun cionamento. 188 | Ottobock...
-
Página 189: Indicações Relativas Aos Modos De Segurança
Não continue a usar o produto defeituoso. ► ► O produto deve ser verificado pela assistência técnica autorizada Ottobock. A pessoa de contato é o técnico ortopédico. CUIDADO Ocorrência do sinal de segurança (vibração contínua) Queda devido a comportamento inesperado do produto causado por alteração do comporta... -
Página 190: Material Fornecido E Acessórios
Instale o app Cockpit somente nos sistemas operacionais especificados no capítulo "Requisitos de sistema" (consulte a página 193). Os terminais testados também estão relacionados neste capítulo. 5 Material fornecido e acessórios Material fornecido • 1 Meridium 1B1 • 1 transformador 757L16* • 1 carregador para C-Leg 4E50* •... -
Página 191: Carregar A Bateria
→ Os diodos luminosos (LED) verdes, um no lado posterior do transformador e o outro no carregador, acendem-se. → Se os diodos luminosos (LED) verdes, no lado posterior do transformador e no carregador, não se acenderem, existe um erro (consulte a página 211). Ottobock | 191... -
Página 192: Carregar A Bateria Da Prótese
38% – Estado da carga da bateria da prótese conecta da atualmente Indicação do estado de carga atual através do controle remoto: Com o controle remoto conectado e ligado, o estado de carga atual é indicado na linha de esta 192 | Ottobock... -
Página 193: Requisitos Do Sistema
INFORMAÇÃO O app Cockpit pode ser baixado gratuitamente da respectiva loja online. Para mais informa ções, visite as seguintes páginas na internet: http://www.ottobock-group.com/cockpitapp. Tam bém é possível fazer a leitura do código QR do cartão PIN Bluetooth fornecido. 7.1 Requisitos do sistema A função do app Cockpit está... -
Página 194: Elementos De Comando Do App Cockpit
Também é indicado o estado de carga atual em %. 7. Indicação e denominação do modo atualmente escolhido (p. ex., 1. Basic Mode) Conexão foi estabelecida com o módulo Conexão com o módulo foi interrompida. O sistema está tentando restabelecer a conexão automaticamente. 194 | Ottobock... -
Página 195: Menu De Navegação Do App Cockpit
3) Em seguida, tocar na entrada "Manage components". 4) Tocar no símbolo no módulo a ser excluído. → O módulo é excluído. Conectar um módulo com vários terminais É possível conectar um módulo com vários terminais (Gestão de próteses). Ottobock | 195... -
Página 196: Ajustar A Altura Do Salto Através De Padrão De Movimento
→ Um sinal de confirmação soa, para indicar que a nova altura do salto foi salva com êxito. INFORMAÇÃO: Se não houver uma resposta (p. ex., sinal de bip), não foi possível sal var a nova altura do salto. Repetir a medição da altura do salto. 196 | Ottobock... -
Página 197: Ajustar A Altura Do Salto Com O App Cockpit
→ Um sinal de confirmação soa, para indicar que a nova altura do salto foi salva com êxito. INFORMAÇÃO: Se não houver uma resposta (p. ex., sinal de bip), não foi possível sal var a nova altura do salto. Repetir a medição da altura do salto. Ottobock | 197... - Página 198 1) Colocar ambos os pés lado a lado e à mesma altura. 2) Ao sentar, aplicar carga homogênea sobre os membros inferiores e usar os apoios de braço, se houver. 3) Mover as nádegas em direção ao encosto e dobrar o tronco para a frente. 198 | Ottobock...
-
Página 199: Subir Escadas
4) Colocar o membro inferior com o pé protético sobre o degrau de cima. 5) Ao chegar ao fim da escada, dar um passo maior na transição para o pla no, para comutar corretamente o pé protético da fase de descer escadas para a fase de marcha normal. Ottobock | 199... -
Página 200: Função De Escadas
O pé estabiliza na flexão dorsal com a perna na posição vertical. Aplicar carga sobre o calcanhar para abaixar o antepé (p. ex., na bi pedestação em declive). Para continuar a andar sobre um declive a partir da bipedestação, efetuar um dos movimentos seguintes: 200 | Ottobock... -
Página 201: Função De Alívio De Carga
8.3.1 Comutação dos MyModes com o app Cockpit INFORMAÇÃO Para a utilização do app Cockpit, o Bluetooth da prótese deve estar ligado. Se estiver desligado, Bluetooth pode ser ligado com uma rotação da prótese ou com a cone Ottobock | 201... -
Página 202: Comutação Dos Mymodes Com Padrões De Movimentos
8.3.3 Ligação do bloqueio do tornozelo Informações relativas à comutação • O bloqueio do tornozelo deve estar configurado como MyMode "". O número de padrões de movimento, com o qual ele é ligado, também deve estar ativado no software de configuração. 202 | Ottobock... -
Página 203: Comutação De Um Mymode De Volta Ao Modo Básico
Antes do primeiro passo, sempre verificar se o modo selecionado corresponde ao tipo de mo vimento desejado. 8.4 Alteração das configurações da prótese Se a conexão à prótese estiver ativa, é possível alterar as configurações do respectivo modo ativo com o app Cockpit ou o controle remoto (acessório opcional). Ottobock | 203... -
Página 204: Alteração Da Configuração Da Prótese Através Do App Cockpit
Imprint/Info 8.4.2 Visão geral dos parâmetros de configuração no modo básico Os parâmetros do modo básico descrevem o comportamento dinâmico da prótese no ciclo de marcha normal. Estes parâmetros servem como configuração básica para a adaptação automáti 204 | Ottobock... - Página 205 "Stop angle". Stop angle -200 — 200 ± 10 Ângulo do tornozelo, a partir do qual é indicado em bloqueado o movimento no sentido do 0,1° rolamento (no sentido da flexão dor sal). Ottobock | 205...
-
Página 206: Desligar/Ligar O Bluetooth Da Prótese
Contador de passos diários Repor o contador, confirman do o item de menu com a te cla Step:1747 Contador total de passos Só informação Batt.:68 Estado atual da carga da bate Só informação ria da prótese em porcenta 206 | Ottobock... -
Página 207: Estados Operacionais Adicionais (Modos)
O modo de segurança pode ser reposto através da conexão e desconexão do carregador. Se o produto comutar novamente para o modo de segurança, há a presença de um erro permanente. O produto deve ser verificado pela assistência técnica autorizada Ottobock. 9.4 Modo de temperatura excessiva Em caso de superaquecimento da unidade hidráulica devido a uma atividade intensa e contínua... -
Página 208: Marcas Registradas
Para a inspeção de assistência, o produto, bem como o carregador e o transformador, devem ser enviados à assistência técnica autorizada Ottobock. INFORMAÇÃO Se um controle remoto foi fornecido juntamente com o produto, como acessório opcional, ele também deve ser enviado junto com o produto para a inspeção de assistência. -
Página 209: Símbolos Presentes No Controle Remoto
à saúde. Favor observar as indica ções dos órgãos nacionais responsáveis pelos processos de devolução e coleta. Declaração de Conformidade de acordo com as diretivas europeias aplicáveis Radiação não ionizante Cumprimento dos requisitos de acordo com a "FCC Part 15" (EUA) Ottobock | 209... -
Página 210: Símbolos Presentes No Carregador
Aplicação de carga sobre o Comutação para o modo básico membro inferior com prótese (Modo 1) executada. e imobilização por um se gundo para a comutação do modo ou Pés colocados à mesma al tura e recebendo carga ho 210 | Ottobock... -
Página 211: Sinais De Aviso/Erro
Se o erro persistir, não é para o modo de se gurança. permitido continuar a uti lização do produto. O produto tem que ser veri ficado imediatamente por um técnico ortopédico. Ottobock | 211... - Página 212 Em caso de interrupção da cone xão com o produto, o produto, o carregador e o transformador de vem ser verificados pela assistên cia técnica autorizada Ottobock. Erro após a desconexão do carregador (erro detectado no autoteste) Sinal vi Erro Passos para solução...
-
Página 213: Mensagens De Erro No Estabelecimento Da Conexão Com O App Cockpit
Na conexão ou desconexão do carregador, é realizado um autoteste, que é con firmado com um único sinal de bip e um único sinal vibratório. Quando este bip soar, a bateria estará completamente carregada. Se o bip não soar, a conexão com o produto foi interrompida. Ottobock | 213... -
Página 214: Dados Técnicos
80 % da capacidade original da bateria estão disponíveis Tempo de carregamento total da bateria 6 horas Comportamento do pé protético durante o pro A articulação de tornozelo do pé protético está cesso de carregamento bloqueada. 214 | Ottobock... - Página 215 (bijv. over de ingebruikneming, het gebruik, het onderhoud, onverwacht gedrag of onverwachte gebeurtenissen). De contactgegevens kunt u vinden op de achterzijde. ► Bewaar dit document. Het product "Meridium 1B1" wordt hierna product, prothesecomponent, prothese of prothese voet genoemd. Ottobock | 215...
-
Página 216: Productbeschrijving
De accu-leeg-modus maakt het mogelijk veilig te lopen, wanneer de accu leeg is. Hiervoor wor den er door het product vooraf gedefinieerde weerstandsparameters ingesteld (zie pagina 242). De microprocessorgestuurde hydraulische eenheid biedt de volgende voordelen: • benadering van het fysiologische gangbeeld; • zekerheid bij het staan en lopen; 216 | Ottobock... - Página 217 De gebruiker moet fysiek en mentaal in staat zijn optische/akoestische signalen en/of mecha nische trillingen waar te nemen. 3.6 Kwalificatie Het product mag alleen worden toegepast door vakspecialisten die bij Ottobock een speciale opleiding hebben gevolgd en daartoe op basis van die opleiding geautoriseerd zijn. 4 Veiligheid 4.1 Betekenis van de gebruikte waarschuwingssymbolen...
-
Página 218: Opbouw Van De Veiligheidsvoorschriften
Vallen door onverwacht gedrag van het product als gevolg van verandering van het dempings gedrag. ► Wees attent op de waarschuwings-/foutsignalen, de foutmeldingen op het display van de afstandsbediening (zie pagina 246) en de in overeenstemming daarmee gewijzigde instelling van de demping. 218 | Ottobock... - Página 219 ► Werkzaamheden aan de accu mogen uitsluitend worden uitgevoerd door medewerkers van Ottobock die daarvoor zijn opgeleid en daartoe zijn geautoriseerd (niet zelf vervan gen). ► Het product mag alleen worden geopend en gerepareerd resp. beschadigde componen...
- Página 220 LET OP Verkeerd onderhoud van het product Beschadiging van het product door gebruik van verkeerde reinigingsmiddelen. ► Reinig het product uitsluitend met een vochtige doek en milde zeep (bijv. Ottobock Der maClean 453H10=1). LET OP Mechanische beschadiging van het product Functieveranderingen of -verlies door beschadiging.
-
Página 221: Aanwijzingen Voor De Stroomvoorziening/Het Laden Van De Accu
Deze geluidsontwikkeling is normaal, onvermijdelijk en gewoonlijk volledig onproblematisch. Indien de prothesecomponent na verloop van tijd duidelijk meer geluid gaat maken, moet deze onmiddellijk door een geautoriseerde Ottobock vakspecialist wor den gecontroleerd. Tekenen van functieveranderingen of -verlies tijdens het gebruik Waarneembare tekenen van functieverlies zijn een verminderde veerwerking en/of een verminder... -
Página 222: Aanwijzingen Voor Het Verblijf In Bepaalde Omgevingen
Het laden gaat niet goed als gevolg van een storing in de werking. ► Laat het product uitsluitend wijzigen en modificeren door medewerkers van Ottobock die daarvoor zijn opgeleid en daartoe zijn geautoriseerd. 4.6 Aanwijzingen voor het verblijf in bepaalde omgevingen VOORZICHTIG Te kleine afstand tot HF-communicatieapparaten (bijv. -
Página 223: Aanwijzingen Voor Het Gebruik
Als de activiteit ondanks de pulserende trilsignalen niet wordt verminderd, kan het hydraulische element oververhit raken en is het in extreme gevallen zelfs mogelijk dat het product beschadigd raakt. Het product moet bij een geautoriseerde Ottobock service werkplaats worden gecontroleerd. -
Página 224: Aanwijzingen Over De Veiligheidsmodi
► Gebruik het defecte product niet langer. ► Het product moet bij een geautoriseerde Ottobock servicewerkplaats worden gecontro leerd. Aanspreekpartner is de orthopedisch instrumentmaker. VOORZICHTIG Waarschuwingssignaal (ononderbroken trillen) Vallen door onverwacht gedrag van het product als gevolg van verandering van het dempings... - Página 225 "Systeemvereisten" (zie pagina 228). De geteste eindapparaten staan even eens in dit hoofdstuk vermeld. 5 Inhoud van de levering en toebehoren Inhoud van de levering • 1 st. Meridium 1B1 • 1 st. netvoeding 757L16* • 1 st. acculader voor de C-Leg 4E50* •...
-
Página 226: Accu Laden
(led) op de acculader lichten op. → Als de groene lichtgevende diode (led) van de netvoeding en de groene lichtgevende diode (led) van de acculader niet oplichten, is er sprake van een storing (zie pagina 246). 226 | Ottobock... -
Página 227: Accu Van De Prothese Laden
Weergave van de actuele laadtoestand via de Cockpit App Wanneer de Cockpit App is gestart, wordt de actuele laadtoestand weergegeven op de onderste regel van het beeldscherm: 38% – Laadtoestand van de accu van de prothese waar mee op het moment verbinding is Ottobock | 227... -
Página 228: Cockpit App En Prothesecomponent Voor Het Eerst Met Elkaar Verbinden
De Cockpit App kan gratis worden gedownload uit de betreffende online store. Nadere informa tie hierover is te vinden op de volgende internetpagina: http://www.ottobock-group.com/cockpi tapp. Het is ook mogelijk de QR-code van de meegeleverde Bluetooth PIN card in te lezen. - Página 229 Daarna verschijnt het hoofdmenu met de naam van de prothese waarmee er verbinding is. INFORMATIE Nadat er één keer met succes verbinding is gemaakt met de prothese, maakt de app na het star ten voortaan altijd automatisch verbinding. U hoeft hier verder niets meer voor te doen. Ottobock | 229...
-
Página 230: Bedieningselementen Van De Cockpit App
Instellingen van de geselecteerde modus wijzigen (zie Colofon/info pagina 239) Status Status opvragen van de prothesecomponent waarmee er verbin ding is (zie pagina 241) Componenten beheren Prothesecomponenten toevoegen/verwijderen (zie pagina 231) Colofon/info Juridische en andere informatie over de Cockpit App weergeven 230 | Ottobock... -
Página 231: Prothesen Beheren
Bij te hoge hakken kan het gebeuren dat de prothesevoet niet goed wordt aangestuurd, doordat de beweging in het enkelscharnier te gering is. Dit geldt vooral voor kleine voeten, bij hakken die Ottobock | 231... -
Página 232: Hakhoogte Instellen Via Bewegingspatronen
5) Volg de verdere instructies op het beeldscherm op. Functies Opties Status Algemeen Componenten beheren Colofon/info 8.1.3 Hakhoogte instellen met de afstandsbediening INFORMATIE Tijdens het laden van de accu van de prothese is deze functie niet beschikbaar. Vóór de menu- optie "Status" verschijnt het symbool . 232 | Ottobock... - Página 233 Bij het hielcontact aan het einde van de zwaaifase wordt de demping van de plantaire flexie verminderd, zodat de voet zachtjes kan worden neergezet. Ottobock | 233...
-
Página 234: Gaan Zitten
1) Houd u met één hand vast aan de leuning. 2) Zet het been met de prothesevoet zo op de traptrede, dat een zo groot mogelijk deel van de voet op de trede rust. INFORMATIE: Afrollen over de rand van de traptreden is niet nodig. 234 | Ottobock... -
Página 235: Hellingbaan Op Lopen
Wanneer met een recht onderbeen eerst de voorvoet wordt neergezet (bijv. op extreem steile hellingbanen), blokkeert de voet de dorsale flexie en maakt deze het mogelijk het bovenlichaam stabiel omhoog te bewegen. Ottobock | 235... -
Página 236: Staan Op Een Hellende Ondergrond
Het omschakelen via bewegingspatronen moet door de orthopedisch instrumentmaker in de instelsoftware worden geactiveerd. Deze modi zijn bedoeld voor specifieke bewegingen of houdingen (bijv. inlineskaten, ...). Met de Cockpit App of de afstandsbediening kunnen de instellingen worden aangepast (zie pagina 241). 236 | Ottobock... -
Página 237: Omschakelen Naar De Mymodes Met De Cockpit App
→ Door middel van een piep- en trilsignaal wordt bevestigd dat het bewegingspatroon is her kend. 3) Kantel de prothesevoet licht naar achteren en belast op de voorvoet. INFORMATIE: Wanneer er voor de prothesevoet sprake is van een sterke dorsale flexie, kan de hiel worden belast. 4) Houd het prothesebeen stil. Ottobock | 237... -
Página 238: Enkelblokkering Inschakelen
2) Tik met de hiel van de prothesevoet minimaal 3 keer maar niet meer dan 5 keer naar achteren tegen een vast object. → Door middel van een piep- en trilsignaal wordt bevestigd dat het bewegingspatroon is her kend. 238 | Ottobock... -
Página 239: Prothese-Instellingen Wijzigen
De orthopedisch instrumentmaker kan bij uw volgende bezoek met behulp van de instelsoftware precies nagaan hoe de instellingen zijn aangepast. • Wanneer u de instellingen van een MyMode wilt aanpassen, moet u eerst omschakelen naar deze MyMode. Ottobock | 239... -
Página 240: Prothese-Instellingen Wijzigen Met De Cockpit App
Trapfunctie AAN — UIT AAN — UIT Door inschakeling van deze functie wordt de afrolhoek bij het trap af lopen vergroot. Hiervoor moet deze functie in de instelsoftware geacti veerd zijn. 240 | Ottobock... -
Página 241: Bluetooth Van De Prothese In-/Uitschakelen
8.6 Status van de prothese oproepen 8.6.1 Status opvragen via de Cockpit App 1) Raak terwijl er verbinding is met de prothesecomponent, in het hoofdmenu het symbool aan. 2) Raak in het navigatiemenu de optie "Status" aan. Ottobock | 241... -
Página 242: Statusweergave In Der Cockpit App
Door het aansluiten en weer loskoppelen van de acculader kunt u de veiligheidsmodus uitschake len. Wanneer het product daarna opnieuw omschakelt naar de veiligheidsmodus, is er sprake van een blijvende storing. Het product moet bij een geautoriseerde Ottobock servicewerkplaats wor den gecontroleerd. -
Página 243: Juridische Informatie
Dat de hogetemperatuurmodus actief is, wordt aangegeven door een kort trilsignaal dat eens in de 5 seconden wordt herhaald. 10 Reiniging 1) Verwijder vuil en vlekken van het product met een vochtige doek en milde zeep (bijv. Ottobock Derma Clean 453H10=1). Zorg ervoor dat er geen vocht in de systeemcomponent(en) binnendringt. -
Página 244: Lokale Juridische Informatie
Neem de aanwijzingen van de in uw land bevoegde instantie voor terugname- en inzamelprocedures in acht. Verklaring van overeenstemming overeenkomstig de toepasselijke Europese richt lijnen Serienummer Beschermd tegen stof, beschermd tegen spatwater 13.1.2 Symbolen op de afstandsbediening Wettelijke fabrikant Lotnummer 244 | Ottobock... -
Página 245: Symbolen Op De Acculader
1 x kort Acculader aangesloten of acculader nog voor het starten van de laadmodus losgekoppeld 3 x kort Laadmodus gestart (3 sec. na aansluiting van de acculader) 1 x kort 1 x voor piepsignaal Acculader na het starten van de laadmodus los gekoppeld Ottobock | 245... - Página 246 Omschakeling naar de veiligheidsmodus 5 x kort met tussen Veiligheidsmodus Lopen beperkt mogelijk. pozen van 5 minuten actief Het product moet onmid dellijk door een orthope disch instrumentmaker worden gecontroleerd. 246 | Ottobock...
- Página 247 Netvoeding defect De acculader en de netvoeding moeten bij een geautoriseerde Ottobock servicewerkplaats wor den gecontroleerd. Verbinding tussen acculader en Controleer of de stekker van de netvoeding verbroken laadkabel goed is aangesloten op de acculader.
-
Página 248: Foutmeldingen Bij De Verbindingsopbouw Met De Cockpit App
Trilsig Fout Oplossing naal naal 3 x kort Lichte storing: Neem contact op met Ottobock. bijv. servicetermijn verstreken, sto ring van een sensorsignaal 13.2.3 Foutmeldingen bij de verbindingsopbouw met de Cockpit App Foutmelding Oorzaak Oplossing Apparaat niet gevonden Er kon geen verbinding... -
Página 249: Technische Gegevens
22° Mobiliteitsgraad volgens MOBIS 2 – 4 Kleuren van de voetovertrek translucide, beige, bruin Max. systeemhoogte bij 2 cm / 0.79 inch hak 18,5 cm/7.28 inch hoogte Beschermingsklasse IP54 Reikwijdte Bluetooth-verbinding met pc max. 10 m/32 ft Reikwijdte Bluetooth-verbinding met afstands max. 10 m/32 ft bediening Ottobock | 249... - Página 250 Opslag en transport in de originele verpakking -25 °C/-13 °F tot +70 °C/+158 °F Opslag en transport zonder verpakking -25 °C/-13 °F tot +70 °C/+158 °F max. 93% relatieve luchtvochtigheid, niet con denserend Gebruik 0 °C/+32 °F tot +40 °C/+104 °F max. 93% relatieve luchtvochtigheid, niet con denserend Ingangsspanning 12 V 250 | Ottobock...
-
Página 251: Ürün Açıklaması
(yürüme fazı) uyarlanır. Mikro işlemci tarafından kontrol edilen plantar fleksiyon ve dorsal fleksiyonun sönümlemesi saye sinde, ürün kişisel olarak ihtiyaçlara göre ayarlanabilir. Bunun için ürün uzman personel tarafından bir ayar yazılımı ile ayarlanır. Ottobock | 251... -
Página 252: Kullanım Koşulları
Tek taraflı veya çift taraflı baldır ampütasyonu olan kullanıcılar için • Kullanıcı, fiziksel ve zihinsel olarak optik/akustik sinyalleri ve/veya mekanik titreşimleri algılaya bilmelidir. 3.6 Kalifikasyon Bu ürünün uygulaması sadece Ottobock tarafından ilgili eğitimi alarak yetkilendirilen uzman per sonel tarafından yürütülebilir. 252 | Ottobock... -
Página 253: Uyarı Sembollerinin Anlamı
Adaptörü, adaptör soketini veya şarj cihazını aşırı yüklemelere maruz bırakmayınız. Hasar gören adaptörü, adaptör soketini veya şarj cihazını hemen değiştiriniz. ► DİKKAT Uyarı/hata sinyallerinin dikkate alınmaması Değişen sönümleme tutumu nedeniyle üründe beklenmeyen bir etki sonucunda düşme meydana gelebilir. Ottobock | 253... - Página 254 ► Sistem bileşenlerine su sızdıysa, ayak kılıfını bir ortopedik teknisyen tarafından çıkarılma sını sağlayın ve bileşenleri kurumaya bırakın. Protez kontrol için yetkili Ottobock servisine götürülmelidir. ► Tuzlu su sızdıysa, ayak kılıfı derhal bir ortopedik teknisyen tarafından çıkartılmalıdır. Pro...
- Página 255 DUYURU Ürünün usulüne uygun olmayan şekilde bakımı Yanlış deterjanın kullanılması nedeniyle ürün hasar görebilir. ► Ürünü sadece ıslatılmış bir bez ve yumuşak sabun ile temizleyiniz (örn. Ottobock Der maClean 453H10=1). DUYURU Ürünün mekanik hasarı Hasar nedeniyle fonksiyon değişimi veya kaybı.
-
Página 256: Akım Beslemesi / Akü Şarjı Ile Ilgili Bilgiler
DUYURU Yanlış adaptör/şarj cihazı kullanımı Yanlış gerilim, akım, polariteden dolayı üründe hasar ► Bu ürün için sadece Ottobock tarafından onaylanan adaptör/şarj cihazları kullanınız (bkz. Kullanım kılavuzları ve kataloglar). 4.5 Şarj cihazı ile ilgili bilgiler DUYURU Ürüne kir ve nem girişi Yanlış... -
Página 257: Belirli Bölgelerde Kişilerin Bulunması Için Bilgiler
• Mobil telefon GSM 1800 / GSM 1900 / UMTS: 0,35 m • DECT telsiz telefonlar dhl. baz istasyonu: 0,18 m • WLAN (Router, Access Points,…): 0,11 m • Bluetooth cihazlar (Ottobock tarafından izin verilmeyen yabancı ürünler): 0,11 m DİKKAT Güçlü manyetik ve elektrikli arıza kaynakları alanında bulunma (örn. hırsızlık alarm sis... - Página 258 ► Etkinlik palsli titreşim sinyallerinin ortaya çıkmasına rağmen azaltılmazsa, hidrolik eleman ın aşırı ısınması ve aşırı durumda ürünün hasar görmesi söz konusu olabilir. Ürün yetkili bir Ottobock servisi tarafından kontrol edilmelidir. DİKKAT Usulüne uygun olmayan mod değiştirme Değişen sönümleme tutumu nedeniyle ürünün beklenmeyen bir etkisinden kaynaklanan düşme meydana gelebilir.
-
Página 259: Güvenlik Modu Ile Ilgili Bilgiler
► Akünün şarj edilmesi dolayısıyla güvenlik modunu devreden çıkaramıyorsanız, burada sürekli bir hata söz konusudur. ► Arızalı ürünü kullanmaya devam etmeyin. Ürün yetkili bir Ottobock servisi tarafından kontrol edilmelidir. Muhatap ortopedi teknis ► yenidir. DİKKAT Güvenlik mesajının belirmesi (sürekli titreşim) Değişen sönümleme tutumu nedeniyle üründe beklenmeyen bir etki sonucunda düşme meydana... -
Página 260: Teslimat Kapsamı Ve Aksesuar
Cockpit App'i "Sistem talepleri verileri" bölümünde belirtilmiş olan işletme sistemleri üzerine kurunuz (bkz. Sayfa 263). Test edilmiş son cihazlar da bu bölümde belirtilmiştir. 5 Teslimat kapsamı ve aksesuar Teslimat kapsamı • 1 adet Meridium 1B1 • 1 Ad. adaptör 757L16* • 1 Ad. C-Leg 4E50* için şarj cihazı... -
Página 261: Adaptör Ve Şarj Cihazının Bağlanması
4) Şarj işlemi tamamlandıktan sonra ürünle bağlantı ayrılmalıdır. → Elektroniğin, geri bildirimlerle onaylanan kendi kendine testi gerçekleşir (bkz. Sayfa 281). 5) Şarj kovanının kapağı kapatılmalıdır. 6.3 Güncel şarj durumu göstergesi BİLGİ Şarj işlemi esnasında şarj durumu gösterilemez. Ottobock | 261... - Página 262 üzerinden değişiklikleri takip edebilir. BİLGİ Cockpit App bedelsiz olarak ilgili Online Store'dan indirilebilir. Daha ayrıntılı bilgiler aşağıdaki internet sayfalarından alınabilir: http://www.ottobock-group.com/cockpitapp. Aynı zamanda bir likte teslim edilen Bluetooth PIN kartına ait QR kodu okunabilir. 262 | Ottobock...
-
Página 263: Sistem Talepleri
→ Başarılı bağlantı kurulumundan sonra protezden bilgiler okunur. Bu işlem bir dakika kadar sürebilir. Ardından bağlanan protezin ismini gösteren ana menü görünür. BİLGİ Protez ile başarılı ilk bağlantıdan sonra App için başlatmadan sonra otomatik bağlantı daima kurulur. Başka bir adımın yürütülmesi gerekli değildir. Ottobock | 263... -
Página 264: Cockpit App Kumanda Elemanları
7.4 Protezlerin yönetimi Bu App içinde dört adete kadar farklı uyum parçalarının bağlantıları kayıtlı olabilir. Ancak bir uyum parçası daima bir son cihazla veya bir uzaktan kumanda ile bağlanabilir. Uyum parçasının eklenmesi 1) Ana menüde sembolü üzerine tıklanmalıdır. 264 | Ottobock... -
Página 265: Topuk Yüksekliğinin Ayarlanması
3) Ayak ile yanal şekilde 3 kez yana sallanmalıdır. → Hareket numunesi tanınmasının onayı için bir bip sinyali duyulur. 4) Ayaklar aynı hizaya getirilmeli ve topuğun aynı zamanda ayak ucunun yer ile temas etmesine dikkat edilmelidir. 5) Ayaklara eşit yük bindirilmelidir. Ottobock | 265... -
Página 266: Topuk Yüksekliği Cockpit App Ile Ayarlanmalıdır
3) Düz zeminde durulmalı ve her iki ayağa eşit yük bindirilmelidir. 4) tuşuna basarak, topuk yüksekliği ölçümü başlatılmalıdır. → Yeni topuk yüksekliğinin kayıt edildiğini gösteren bir onay sinyali çıkar. BİLGİ: Geri bildirim olmazsa (örn. bip sinyali), yeni topuk yüksekliği kayıt edilmemiş tir. Topuk yüksekliğinin ölçümü tekrarlanmalıdır. 266 | Ottobock... -
Página 267: Ayakta Durma
Otomatik olarak uyarlanamayan ayak protezine kıyasen bu sayede güdük ve soket arasında daha eşit basınç dağılımı gerçekleşir. Mümkün kullanımlar şunlardır: topuk ile diz ekseni önünde oturma, yaslı şekil de ayakta durma ve aşağıya doğru eğimli zeminlerde ayakta durma. Ottobock | 267... -
Página 268: Ayağa Kalkma
8.2.7.1 Merdiven fonksiyonu Merdiven fonksiyonu merdiveni aşağıya inme sırasında aşma açısını geliştirir. Alternatifli olarak merdiven inme için bu fonksiyon kapatılmalıdır. Alternatifli olarak merdiven inme istenilmiyorsa, bu fonksiyon kapatılabilir. Açma/kapama hakkında ilave bilgiler bkz. Sayfa 273. 268 | Ottobock... -
Página 269: Rampadan Inme
Böylece protez ayak, diğer bacağın topuğuna basılmasından önce vücut ağırlık noktasını düşürmek için dorsal fleksiyonda esner. Eğilimli zeminde ayakta durma sırasında yük azaltma fonksiyonu kullanılabilir (bkz. Sayfa 270). Topuklu ayakkabıların giyilmesiyle beraber eğilim alanı kısıtlanır böylece belirli koşullar altında dikey baldıra ulaşılamaz. Ottobock | 269... -
Página 270: Yük Azaltma Fonksiyonu
Ardından Bluetooth yakl. 2 dakika sürede açık durumdadır. Bu süre esnasında App başlatılmalı ve bu sayede bağlantının oluşması sağlanmalıdır. İstenirse ardından proteze ait Blu etooth sürekli olarak açık tutulabilir (bkz. Sayfa 274). Bir protez için bir bağlantı kurulmuş ise Cockpit App ile MyMode'lar arasında geçiş yapılabilir. 270 | Ottobock... -
Página 271: Mymode'uN Hareket Numunesi Ile Değiştirilmesi
4 kez, MyMode 3 = 5 kez). Aynı zamanda kontralateral bacağın ayak ucuna da vurulabilir. → Hareket numunesi tanınmasının onayı için bir bip ve titreşim sinyali duyulur. 3) Protez bacak hafifçe arkaya doğru eğilmeli ve ayağın ön tarafına yük verilmelidir. BİLGİ: Şayet protez ayakta güçlü dorsal fleksiyon olduysa, topuğa yük verilebilir. Ottobock | 271... -
Página 272: Değiştirilmiş Bir Mymode'dAn Basic Mode'a Geri Alma
Sadece protezin durumu çağrılabilir. Cockpit App'ta alt ekran satırında sembolü yerine sembolü görünür. • Ortopedi teknisyeninin ayarı skalanın ortasında bulunur. Ayar işleminden sonra bu ayar duru mu tekrar "Standart" kumanda yüzeyine tıklayarak (Cockpit App) veya sürgülü ayarlayıcıyı orta yere getirilerek oluşturulabilir (uzaktan kumanda). 272 | Ottobock... -
Página 273: Cockpit App Üzerinden Protez Ayarlarını Değiştirme
Topuk yüklenmesi sırasında ayağın ön tarafı ne kadar hızlı alçalıyor. 110 — 170 ± 10 Bu parametre aşmanın nekadar kolay olduğunu anlatıyor. Merdiven fonksiyonu AÇIK — AÇIK — Bu fonksiyonun açılmasıyla merdiveni KAPALI KAPALI aşağıya inme sırasında aşma açısı Ottobock | 273... -
Página 274: Mymode'dA Ayar Parametrelerine Genel Bakış
1) Uyum parçası ters döndürülmeli ve şarj cihazı takılmalı ve çıkarılmalıdır. → Bluetooth yakl. 2 dakika süre ile açıktır. Bu süre esnasında uyum parçasına bağlantıyı olu şturmak için App'ın başlatılması gerekir. 2) Ekrandaki talimatlar yerine getirilmelidir. → Bluetooth açıksa, ekranda sembolü görünür. 274 | Ottobock... -
Página 275: Protez Durumunun Sorgulanması
Sayfa 279). Şarj cihazı takılarak ve çıkarılarak güvenlik modu geri alınabilir. Ürün yeniden güvenlik moduna geçerse, sürekli bir hata vardır. Ürün yetkili bir Ottobock servisi tarafından kontrol edilmelidir. 9.4 Aşırı sıcaklık modu Hidrolik ünitenin durmadan yükseltilen etkinlikler (örn. uzun süreli yokuş inmede) dolayısıyla aşırı... -
Página 276: Yasal Talimatlar
Aşırı sıcaklık modu, kısa titreşimlerle her 5 saniyede bir gösterilir. 10 Temizleme 1) Kirlenmesi halinde ürün nemli bir bez ve yumuşak sabun ile (ör. Ottobock Derma Clean 453H10=1) temizlenmelidir. Ürünün sistem bileşenine/sistem bileşenlerine sıvı madde girmemesine dikkat edilmelidir. 2) Ürün toz bırakmayan bir bezle kurulanmalı ve iyice kurumaya bırakılmalıdır. -
Página 277: Yerel Yasal Talimatlar
Bu ürün her yerde ayrıştırılmamış evsel çöplerle birlikte imha edilemez. Ülkenizin imha kurallarına uygun olmayan imha işlemleri sonucunda çevre ve sağlık açısın dan zararlı durumlar meydana gelebilir. Geri verme ve toplama yöntemleri konu sunda ülkenizin yetkili makamlarının kurallarını lütfen dikkate alınız. Ottobock | 277... -
Página 278: Şarj Cihazı Üzerindeki Semboller
İlave aksiyon yürütülmüş Olay sinyali 1 x kısa 1 x kısa Uzaktan kumanda üzerinde Uzaktan kumanda üzerinde mod mod değiştirme değiştirme yürütülmüş 1 x kısa 1 x kısa Mod değiştirme için topuk ile hareket numunesi tanındı vurulmalı veya topuk yüksekliğinin ayarlan 278 | Ottobock... -
Página 279: Uyarı/Hata Sinyalleri
Yürüme sınırlamalar ile örn. valf tahriğinin mümkün. devre dışı kalması Şarj cihazı takılarak/çıkar Muhtemelen güvenlik ılarak bu hatanın geri alın moduna geçiş yapıl ması denenmelidir. mıyor. Bu hata devam ederse, ürünün bundan sonra kul lanılmasına izin verilmez. Ottobock | 279... - Página 280 Fonksiyonsuz priz Priz başka bir elektrikli aletle kontrol edilmelidir. Adaptör hatalı Şarj cihazı ve adaptör yetkili bir Ottobock servisi tarafından kont rol edilmelidir. Şarj cihazının adaptöre bağlantıs Şarj kablosu soketinin şarj cihaz ında kesinti var ındaki yerine tam oturup oturmad...
-
Página 281: Cockpit App Ile Bağlantı Kurulmasında Hata Mesajları
Ayırt etmek için bip sinyallerine dikkat edilmelidir. Şarj cihazının takılmasında ve ayrılmasında, bir defalık bip ve titreşim sinyali ile onaylanan kendiliğinden bir test yürütülür. Bu bip sinyali duyulursa, akü tam şarj edilmiştir. Bip sinyali duyulmazsa, ürün ile bağlantıda kesinti vardır. Ottobock | 281... -
Página 282: Teknik Veriler
(şarj ve deşarj periyotları) Akünün tamamen şarj olması için gereken süre 6 saat Şarj işlemi esnasında protez ayağının davranışı Protez ayağının ayak bileği eklemi kilitli Protezin dolu akü ile kullanım süresi Ortalama kullanımda 1 gün Uzaktan kumanda Ürün kodu 4X350 282 | Ottobock... - Página 283 Orijinal ambalajında depolama ve taşıma -25 °C/-13 °F ile +70 °C/+158 °F arası Ambalaj olmadan depolama ve taşıma -25 °C/-13 °F ile +70 °C/+158 °F arası maks. % 93 rölatif hava nemliliği, yoğuşmasız İşletim 0 °C/+32 °F ile +40 °C/+104 °F arası maks. % 93 rölatif hava nemliliği, yoğuşmasız Giriş gerilimi 12 V Ottobock | 283...
- Página 284 Patents pending in Brazil, Canada, China, EPA, Germany and USA. Otto Bock Healthcare Products GmbH Brehmstraße 16 · 1110 Wien · Austria T +43-1 523 37 86 · F +43-1 523 22 64 info.austria@ottobock.com · www.ottobock.com Ottobock has a certified Quality Management System in accordance with ISO 13485.